Using GitHub for Spec Work
- Create a new GitHub repository using the W3C Repository Manager. The spec’s shortname in lowercase is usually a good choice.
-
Once the new repository is created, find it on GitHub and set up GitHub Pages to use the default branch,
main(Settings / Options / GitHub Pages).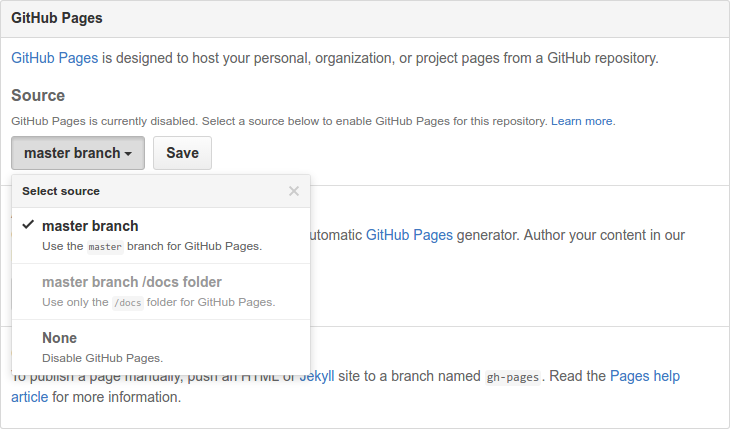
The repository’s contents will get automagically served from
https://username.github.com/reponame.⚠️ NB: be aware that GitHub Pages have some limitations.
-
Clone the repository locally.
git clone https://github.com/username/reponame.git -
Navigate to the repo.
cd reponame -
Note: this step and the following are not needed if you set up your repository using the W3C Repository Manager as it can create a basic ReSpec document for you.
Now we want to create the spec document itself. I use ReSpec, so I simply copy the content of the default template into anindex.htmlpage at the root of my repository. And then add it to the repository. See also the requirements for Group-internal Drafts.git add index.html git commit -m "Add empty doc." -
Lets now push these changes back to our GitHub account.
git push origin mainThe first time you push changes it can take a little while for the code to be published to your GitHub Pages subdomain, so be patient. But it’ll be ready soon enough.
- Set up your favorite labels
- Bask in the glory of modern spec development.
(For help and tips about Git itself, refer to the dedicated page.)