
Distributed Microblogging with RWW.IO and Tabulator

Earlier this month RWW.IO was launched, to much positive feedback. In this post I will show how RWW.IO can be used to extend your FOAF file to become a distributed microblog.
*Disclaimer* this tutorial is for advanced users that may be prepared to live on the bleeding edge, and maybe do some debugging.
Step 1 — Create a FOAF profile
If you’ve followed previous posts, you probably have a FOAF profile by now. The FOAF is used to give a nick, avatar, name and URL for the micro blog creator. For this demo I’ve uploaded a FOAF to
But you can put it anywhere in your space. If you’ve done this right, click on it and it should look something like this:
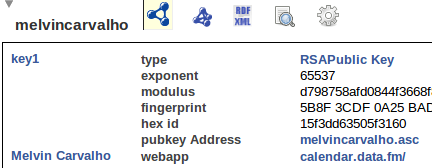
Note: that you do not need the tabulator extension running to view this FOAF, rww.io has a tabulator skin pre installed, so there is nothing to install.
Step 2 — Create a Microblog
Once you are at your FOAF, click in the entity that is of “type” FOAF : Person, in my case it’s “Melvin Carvalho”. After this click the small microblog icon which will ask you to create a microblog. The screen should look something like this:
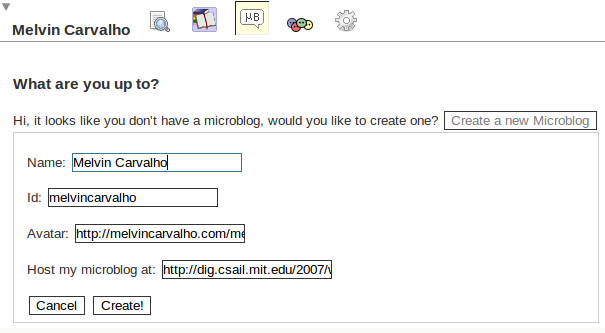
For the final input box I used:
Again, you can locate it anywhere you wish. And hit create. It will then put a new file in the directory you chose.
Note: this worked best for me in opera. In firefox and chrome it was temperamental and worked best when I stepped through with a debugger.
Step 3 — Link your microblog to your profile
Although not strictly required, for various reasons this demo works best when you have linked your microblog to your profile. This is done by adding the triple:
<#nickname> rdfs : seeAlso <../profile/nickname>
Your microblog should look something like:
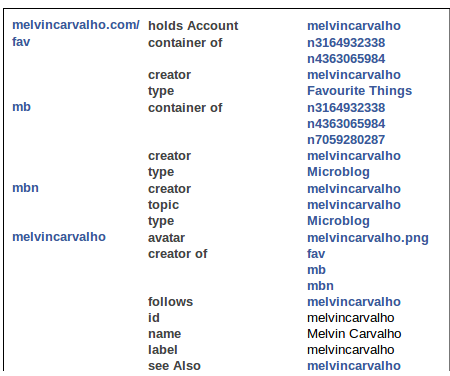
We want to click to the right of “see Also” which will take us back to our profile where we can now add micro blog posts.
Step 4 — Set Your Identity
While you’re at your profile page quickly click the foaf icon at the top, and you’ll see an image of yourself such that you can set our identity. If you’ve done it right it should look something like:
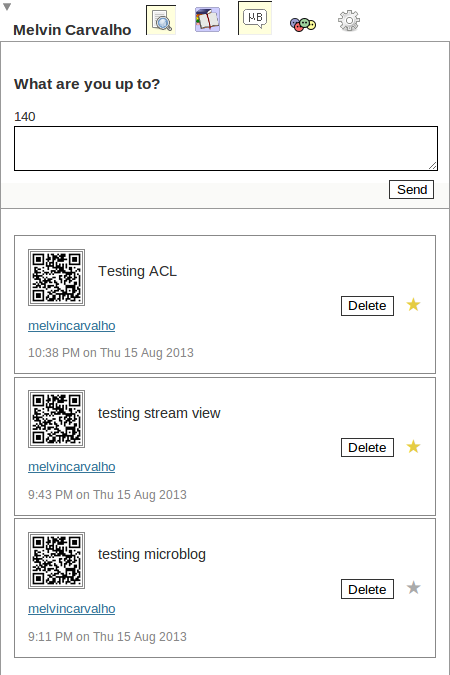
Step 5 — Start Microblogging!
You can start microblogging straight away by clicking he microblog icon. However it helps if you start following people. Strangely you need to follow yourself to see your own posts, so you can add triples to the same place you added the seeAlso, with 2 URIs of the form:
<http://rdfs.org/sioc/ns#follows>
       <#melvincarvalho>
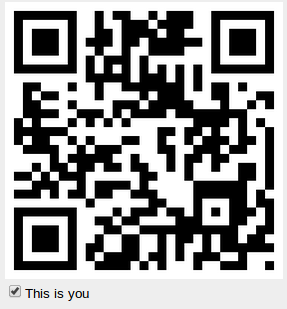
And you should start seeing the posts of the people you follow come in. You can even favourite the ones you like with the final screen looking something like:
If you’ve got this far (or even past a few steps) very well done! I’d be very happy so start growing my microblog circle!
To summarize we’ve shown how to use commodity storage such as rww.io to create a distributed microblog using tabulator’s microblog pane. No installations were required and it is possible to follow an arbitrary list of users, and, of course, control the access!