This Web page lists PDF Techniques from Techniques for WCAG 2.0: Techniques and Failures for Web Content Accessibility Guidelines 2.0. Technology-specific techniques do not replace the general techniques: content developers should consider both general techniques and technology-specific techniques as they work toward conformance.
Publication of techniques for a specific technology does not imply that the technology can be used in all situations to create content that meets WCAG 2.0 success criteria and conformance requirements. Developers need to be aware of the limitations of specific technologies and provide content in a way that is accessible to people with disabilities.
For information about the techniques, see Introduction to Techniques for WCAG 2.0. For a list of techniques for other technologies, see the Table of Contents.
The Portable Document Format (PDF) is a file format for representing documents in a manner independent of the application software, hardware, and operating system used to create them, as well as of the output device on which they are to be displayed or printed. PDF files specify the appearance of pages in a document in a reliable, device-independent manner. The PDF specification was introduced by Adobe Systems in 1993 as a publicly available standard. In July 2008, PDF 1.7 became an ISO standard (ISO 32000-1) [ISO32000].
Of note for accessibility is PDF/UA (Universal Accessibility) which became an ISO Standard in July 2012, and was updated in 2014 (ISO 14289-1:2014 (See PDF/UA (ISO 14289-1:2014).) The scope of PDF/UA is not meant to be a techniques (how-to) specification, but rather a set of guidelines for creating more accessible PDF. The specification describes the required and prohibited components and the conditions governing their inclusion in or exclusion from a PDF file in order for the file to be available to the widest possible audience, including those with disabilities. The mechanisms for including the components in the PDF stream are left to the discretion of the individual developer, PDF generator, or PDF viewing agent. PDF/UA also specifies the rules governing the behavior for a conforming reader.
PDF includes several features in support of accessibility of documents to users with disabilities. The core of this support lies in the ability to determine the logical order of content in a PDF document, independently of the content's appearance or layout, through logical structure and Tagged PDF. Applications can extract the content of a document for presentation to users with disabilities by traversing the structure hierarchy and presenting the contents of each node. For this reason, producers of PDF files must ensure that all information in a document is reachable by means of the structure hierarchy.
PDF's logical structure features (introduced in PDF 1.3) provide a mechanism for incorporating structural information about a document's content into a PDF file. Such information might include, for example, the organization of the document into chapters, headings, paragraphs and sections or the identification of special elements such as figures, tables, and footnotes. The logical structure features are extensible, allowing applications that produce PDF files to choose what structural information to include and how to represent it, while enabling PDF consumers to navigate a file without knowing the producer's structural conventions.
PDF logical structure shares basic features with standard document markup languages such as HTML, SGML, and XML. A document's logical structure is expressed as a hierarchy of structure elements, each represented by a dictionary object. Like their counterparts in other markup languages, PDF structure elements can have content and attributes. In PDF, rendered document content takes over the role occupied by text in HTML, SGML, and XML.
A PDF document's logical structure is stored separately from its visible content, with pointers from each to the other. This separation allows the ordering and nesting of logical elements to be entirely independent of the order and location of graphics objects on the document's pages.
The logical structure of a document is described by a hierarchy of objects called the structure hierarchy or structure tree. At the root of the hierarchy is a dictionary object called the structure tree root, located by means of the StructTreeRoot entry in the document catalog. See Section 14.7.2, ("Structure Hierarchy") in PDF 1.7 (ISO 32000-1): Table 322 shows the entries in the structure tree root dictionary. The K entry specifies the immediate children of the structure tree root, which are structure elements.
Tagged PDF (PDF 1.4) is a stylized use of PDF that builds on PDF's logical structure framework. It defines a set of standard structure types and attributes that allow page content (text, graphics, and images) to be extracted and reused for other purposes. It is intended for use by tools that perform the following types of operations:
Simple extraction of text and graphics for pasting into other applications.
Automatic reflow of text and associated graphics to fit a page of a different size than was assumed for the original layout.
Processing text for such purposes as searching, indexing, and spell-checking.
Conversion to other common file formats (such as HTML, XML, and RTF) with document structure and basic styling information preserved.
Making content accessible to people who rely on assistive technology.
PDF files may be produced either directly by application programs or indirectly by conversion from other file formats or imaging models. In addition, tools exist for inspecting, checking, and repairing PDF files for accessibility. The following sections provide representative lists of applications and tools typically used for these functions.
These notes do not, and cannot, provide an exhaustive list, nor do they endorse particular applications and tools. Rather they provide a snapshot of tools in fairly wide use at the time the WCAG Working Group undertook to review and publish techniques for producing PDF documents. As with any software, application support for PDF accessibility will vary with different versions, with the formatting requirements of specific PDF documents, and with actual usage of the application. That is, the tools can be used properly to produce appropriate tags, etc..
In general, newer tools will provide greater support than earlier ones. The tools' vendors are the source of authoritative information about their support for PDF accessibility.
Many applications can generate PDF files directly, and some can import them as well. This direct approach is preferable, since it gives the application access to the full capabilities of PDF, including the imaging model and the interactive and document interchange features. Alternatively, applications that do not generate PDF directly can produce PDF output indirectly. There are two principal indirect methods:
The application describes its printable output by making calls to an application programming interface (API) such as GDI in Microsoft® Windows® or QuickDraw in the Apple Mac OS. A software component called a printer driver intercepts these calls and interprets them to generate output in PDF form.
The application produces printable output directly in some other file format, such as PostScript, PCL, HPGL, or DVI, which is converted to PDF by a separate translation program.
Although these indirect strategies are often the easiest way to obtain PDF output from an existing application, the resulting PDF files may not make the best use of the high-level PDF imaging model relied upon to expose the semantics of the document. This is because the information embodied in the application's API calls or in the intermediate output file often describes the desired results at too low a level. Any higher-level information maintained by the original application has been lost and is not available to the printer driver or translator.
For example, since the printer driver or translator targets correct visual output, information about the semantics of the document may not be sent at all or may be ignored when creating the PDF output. As a result, headings may not be tagged as such, or link text may not be associated with its link object. Check with the vendor of any PDF authoring tool in order to understand how to use the tool in a way that produces the best tagged output.
Adobe Acrobat's PDFMaker - PDFMaker is part of Adobe Acrobat which adds macros to many business applications such as Microsoft Office, AutoCAD and Lotus Notes that support the conversion of content from the original format to tagged PDF.
Adobe FrameMaker - Desktop publishing application from Adobe Systems that directly exports tagged PDF and provides support for alternative text descriptions.
Adobe InDesign - Page layout and desktop publishing application from Adobe Systems that directly exports tagged PDF and provides support for alternative text descriptions.
Adobe LiveCycle Designer - Windows-based forms design application from Adobe Systems that directly exports tagged PDF interactive forms and provides support for alternative text descriptions; can be invoked standalone or from within Acrobat Pro.
LibreOffice - Open-source word processing software from The Document Foundation that can export tagged PDF.
Lotus Symphony Documents - Word-processing software from IBM that can export tagged PDF.
Microsoft® Word - Word processing application from Microsoft Corporation that can export tagged PDF using the save as XPS or PDF utility.
OpenOffice.org Writer - Open source word-processing software from Sun Microsystems Inc. that can export tagged PDF using the Export as PDF utility.
CommonLook Office for Microsoft Office from Netcentric Technologies is an add-in to Microsoft® Word and PowerPoint that makes it possible to create tagged PDF documents. CommonLook Office provides tools to allow content authors to run accessibility tests in the Microsoft Word and PowerPoint environments and to remediate accessibility issues prior to conversion to PDF.
Xenos Axess™ for Accessible Statements - PDF software integrates with an organization's existing enterprise content management (ECM) infrastructure to capture high-volume print streams and automatically transform them into tagged PDFs.
WordPerfect® Office - Word-processing software from Corel that can be used to create, mark up, and share tagged PDF documents.
Microsoft Office 10 - a suite of desktop office applications that creates tagged PDF.
Note: Care should be taken when choosing PDF creation tools from the many available, as some may not support creation of tagged PDF files.
Adobe Acrobat Pro. Adobe Acrobat Pro is an application that creates and edits PDF files. It has a number of tools for evaluating and repairing the accessibility of PDF files, including access to the structure root through the tags panel, the ability to directly manipulate the reading order through the order panel, a built-in accessibility checker, and the Touch Up Reading Order tool which provides a graphical mechanism for assessing and repairing the accessibility of a PDF document.
Commonlook™ PDF. Commonlook PDF. Commonlook PDF is a plug-in for Adobe Acrobat Pro from Netcentric Technologies. CommonLook PDF helps identify, report and correct the most common accessibility problems, including the proper tagging of images, tables, forms and other non-textual objects.
aDesigner - a disability simulator from the Eclipse Foundation that helps designers ensure that content is accessible and usable by visually impaired users.
inspect32 - part of the Microsoft Windows Software Development Kit (SDK) that allows developers and testers to examine the accessible properties of UI components.
PDDOMView - part of Acrobat_Accessibility_9.1.zip which contains files that can be used by Windows clients of the accessibility interfaces described in the Accessibility API Reference document.
UISpy - part of the Microsoft Windows Software Development Kit (SDK) that allows developers and testers to view and interact with the user interface (UI) elements of an application.
PDF User Agents with accessibility support include:
Adobe Acrobat Pro - PDF Authoring Tool, Editor, and Viewer from Adobe Systems which is compatible with MSAA devices on the Windows platform. Has a number of built in accessibility features including text to speech (Read Out Loud), high contrast display, reflow for large print display, auto scroll, accessibility full check, accessibility quick check, touch up reading order tool, and an accessibility setup assistant.
Adobe Reader – Freely distributed PDF Viewer from Adobe Systems which is compatible with MSAA devices on the Windows platform. Has a number of built in accessibility features including text to speech (Read Out Loud), high contrast display, reflow for large print display, auto scroll, accessibility quick check, and an accessibility setup assistant.
Kurzweil 3000™ - a comprehensive reading, writing and learning software solution from Kurzweil Educational Systems® which reads PDF files using text to speech facilities.
Adobe provides methods to make the content of a PDF file available to assistive technology such as screen readers:
On the Microsoft® Windows® operating system, Acrobat and Adobe Reader export PDF content as Component Object Model (COM) objects. Accessibility applications such as screen readers can interface with Acrobat or Adobe Reader in two ways:
Through the Microsoft Active Accessibility (MSAA) interface, using MSAA objects that Acrobat or Adobe Reader exports
Directly through exported COM objects that allow access to the PDF document's internal structure, called the Document Object Model (DOM).
On UNIX® platforms, Adobe Reader supports the Gnome accessibility architecture. C-based Accessibility Toolkit (ATK) interfaces are available.
The DOM and MSAA models are related, and developers can use either or both. Acrobat issues notifications to accessibility clients about interesting events occurring in the PDF file window and responds to requests from such clients. Recent versions of Acrobat and Reader have enhanced the support for accessibility interfaces:
MSAA interfaces are supported in Acrobat/Reader 5.0 and later.
In Acrobat/Reader 6.0 and later, information about the underlying PDF structure is made available through direct COM objects that represent the PDF DOM. The DOM accessibility interfaces provide somewhat more extensive access.
In Acrobat/Reader 7.0 and later, ATK and expanded DOM support is available.
The Linux®, Solaris™, AIX®, and HP-UX versions of Adobe Reader implement C-based ATK interfaces, allowing screen readers, screen magnifiers, and on-screen keyboards to query an Accessibility Technology - Service Providers Interface (AT-SPI) registry for applications that are accessible.
The DOM has been expanded to provide enhanced caret, selection, and focus support, as well as the new interfaces IPDDomDocument, ISelectText, and IPDDomNodeExt.
JAWS 12 for Windows - screen reader from Freedom Scientific. Support for PDF started with JAWS version 4.
MAGic 11 - screen magnifier from Freedom Scientific
NVDA 2011.1 - NonVisual Desktop Access, open source screen reader distributed by NV Access. Providing feedback via synthetic speech and Braille, NVDA allows blind and vision-impaired people to access and interact with the Windows operating system and many third party applications.
Supernova Access Suite 12.02 – full screen reader offering magnification, speech, and Braille support from Dolphin. Support for PDF started with HAL version 5.
System Access To Go - screen reader from Serotek Corporation
VoiceOver - screen reader for Mac OS X v10.6 Snow Leopard
Window-Eyes 7.2 - screen reader from GW Micro. Window-Eyes was the first screen reader to provide support for PDF files, in Window-Eyes 4.2.
ZoomText 9.1 - screen magnifier and screen reader from Ai Squared, with support for Adobe Acrobat and Reader:
PDF documents can be read using both AppReader and DocReader (without special settings)
PDF documents can be read in all Windows operating systems (without special settings)
AppReader and DocReader start instantly in Adobe Reader
PDF documents can be read with greater accuracy and without paging delays
PDF documents can be read in Internet Explorer (with the Adobe Reader plug-in)
Special Adobe Reader settings are no longer needed to obtain optimal reading
Create accessible PDFs using Microsoft Office 10
Tagged PDF documents with images
This technique relates to:
See User Agent Support Notes for PDF1. Also see PDF Technology Notes.
The objective of this technique is to provide text alternatives for images via an /Alt entry in the property list for a Tag. This is normally accomplished using a tool for authoring PDF.
PDF documents may be enhanced by providing alternative descriptions for images, formulas, and other items that do not translate naturally into text. In fact, such text alternatives are required for accessibility: alternate descriptions are human-readable text that can be vocalized by text-to-speech technology for the benefit of users with vision disabilities.
When an image contains words that are important to understanding the content, the text alternative should include those words. This will allow the alternative to accurately represent the image. Note that it does not necessarily describe the visual characteristics of the image itself but must convey the same meaning as the image.
This example is shown with Adobe Acrobat Pro. There are other software tools that perform similar functions. See the list of other software tools in PDF Authoring Tools that Provide Accessibility Support.
Choose Tools > Advanced Editing > TouchUp Object Tool
Access the context menu for the image and choose Properties.
On the TouchUp Properties dialog, select the Tag tab.
On the Tag panel, type the text alternative in the Alternate Text text box.
This example is shown in operation in the working example of Adding an /Alt entry to an image.
This example is shown with Adobe Acrobat Pro. There are other software tools that perform similar functions. See the list of other software tools in PDF Authoring Tools that Provide Accessibility Support.
Choose Tools > Advanced Editing > TouchUp Reading Order Tool

The TouchUp Reading Order dialog will be displayed.
Right-click on the image and choose Edit Alternate Text.
The Alternate Text dialog will be displayed.
Type the text alternative in the Alternate Text text box.
This example is shown with Microsoft Word. There are other software tools that perform similar functions. See the list of other software tools in PDF Authoring Tools that Provide Accessibility Support.
Right-click on the image and choose Format Picture
Select the Web tab
Type the alternative text into the text box provided and then click OK.
Right-click on the image and choose Size
Select the Alt Text tab
Type the alternative text into the text box provided and then click OK.
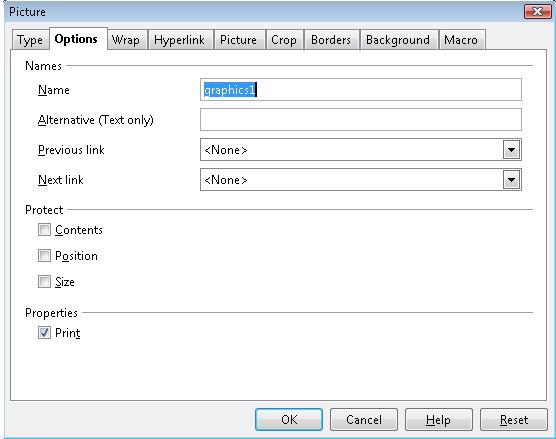
This example is shown with Open Office.org Writer. There are other software tools that perform similar functions. See the list of other software tools in PDF Authoring Tools that Provide Accessibility Support.
Access the context menu for the image and choose Picture...
Select the Options tab
Type the alternative text into Alternate (Text Only) text box and click OK.
The /Alt property used on an image of mountains with a moon and trees typically would be used like this (typically accomplished by an authoring tool):
/Figure <</Alt (Sketch of Mountains with moon rising over trees) >>The image might also be represented by a tag with a different name. A different name might be used because the tag name is written in a language other than English or because a specific tool uses a different name for some other reason. In this situation, it is also necessary that the RoleMap contained within the StructTreeRoot for the PDF document contain an entry which explicitly maps the name of the tag used for the image with the standard structure type used in PDF documents (in this case, Figure). If the RoleMap contains only an entry mapping Shape tags to Figure tags, the rolemap information would appear as follows:
/RoleMap << /Shape /Figure >>In this case, the usage of the /Alt entry as follows would also be correct:
/Shape <</Alt (Crater Lake in the summer, with the blue sky, clouds and crater walls perfectly reflected in the lake) >>
Note that the /Alt entry in property lists can be combined with other entries.
Resources are for information purposes only, no endorsement implied.
Section 14.9.4 (Replacement Text) in PDF 1.7 (ISO 32000-1)
Verify the images which need equivalents have /Alt entries on an enclosing tag by one of the following:
Read the PDF document with a screen reader, listening to hear that the equivalent text is read when tabbing to the non-text object (if it is tabbable) or hearing the alternative text read when reading the content line-by-line.
Using a PDF editor, check that a text alternative is displayed for each image.
Use a tool which is capable of showing the /Alt entry value, such as aDesigner, to open the PDF document and view the GUI summary to read the text alternatives for images.
Use a tool that exposes the document through the accessibility API and verify that images have required text equivalents.
Check 1 is true for each image in the document which needs a text equivalent.
If this is a sufficient technique for a success criterion, failing this test procedure does not necessarily mean that the success criterion has not been satisfied in some other way, only that this technique has not been successfully implemented and can not be used to claim conformance.
Tagged PDF documents
This technique relates to:
See User Agent Support Notes for PDF2. Also see PDF Technology Notes.
The intent of this technique is to make it possible for users to locate content using bookmarks (outline entries in an Outline dictionary) in long documents.
A person with cognitive disabilities may prefer a hierarchical outline that provides an overview of the document rather than reading and traversing through many pages. This is also a conventional means of navigating a document that benefits all users.
This example is shown with Microsoft Word and Adobe Acrobat Pro. There are other software tools that perform similar functions. See the list of other software tools in PDF Authoring Tools that Provide Accessibility Support.
Create a table of contents at the beginning of the Word document.
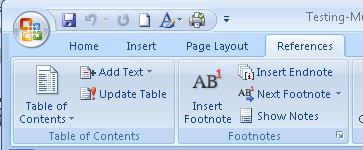
Use Save as... > Adobe PDF to convert the Word document to PDF, specifying both of the following:
Enable Accessibility and Reflow with Tagged Adobe PDF
Convert Word Headings into Bookmarks
The table-of-contents entries in the converted document will be linked to the headings in the document.
In addition, the headings will appear as PDF Bookmarks in the left-hand Navigation pane.
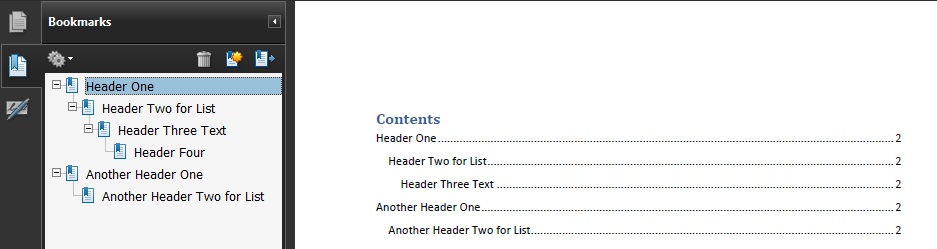
If the document provides a glossary and/or index, these sections should have headings that appear in the table of contents (and thus as bookmarks in the Navigation pane). The table of contents also should be marked up with a heading so it is bookmarked as well.
If this markup has not been done in the authoring tool, Adobe Acrobat Pro can be used to provide the tags. See PDF9: Providing headings by marking content with heading tags in PDF documents if you need to modify converted headings or add new ones.
This example is shown in operation in the working example of creating bookmarks with Word 2007.
This example is shown with OpenOffice.org Writer and Adobe Acrobat Pro and Reader. There are other software tools that perform similar functions. See the list of other software tools in PDF Authoring Tools that Provide Accessibility Support.
Create a table of contents at the beginning of the OpenOffice.org Writer document:
Insert > Indexes and Tables... > Indexes and Tables > Insert Index/Table
Use File > Export as PDF... to convert the document to PDF, specifying Tagged PDF in the Options dialog.
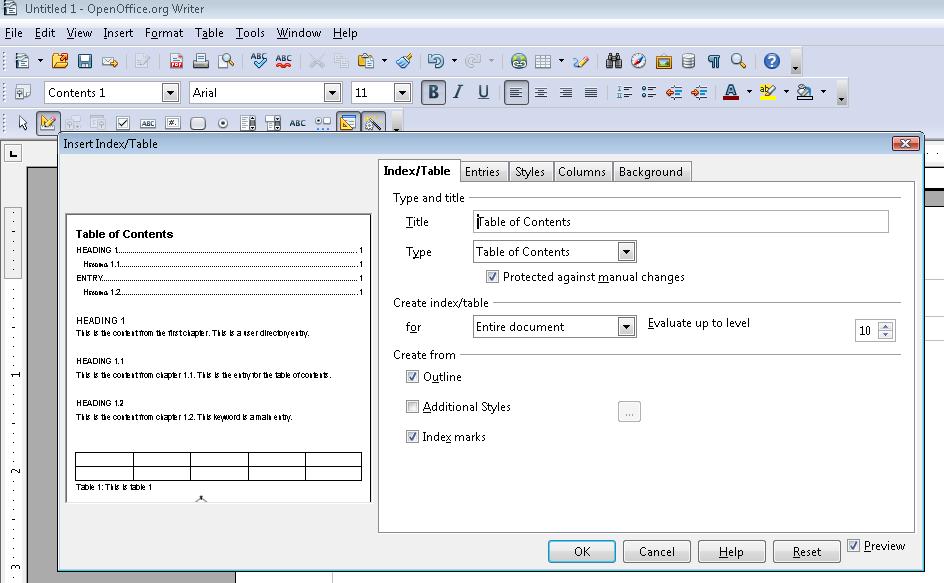
The table-of-contents entries in the converted document will be linked to the headings in the document, and will appear as PDF Bookmarks in the left-hand Navigation pane. The OpenOffice.org Table of Contents and Bookmarks look the same as they appeared in Example 1.
This example is shown in operation in the working example of creating bookmarks with OpenOffice Writer.
This example is shown with Adobe Acrobat Pro. There are other software tools that perform similar functions. See the list of other software tools in PDF Authoring Tools that Provide Accessibility Support.
After conversion to tagged PDF, you may decide to add bookmarks that were not automatically generated. Like the converted bookmarks, tagged bookmarks use the underlying structural information in the document.
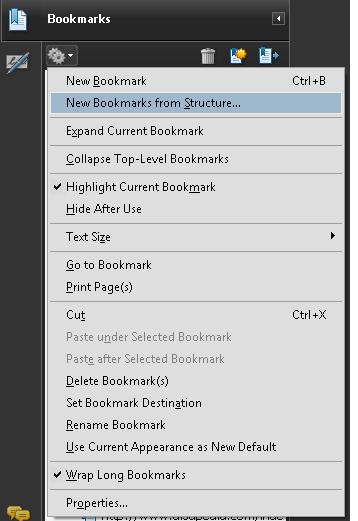
In the Bookmarks panel, choose the options menu, then choose New Bookmarks From Structure...
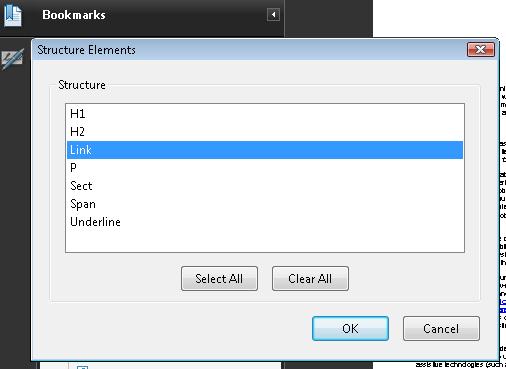
From the Structure Elements dialog, select the elements you want specified as tagged bookmarks.
The image below shows the Bookmarks options menu.
The next image shows the selection of links in the document for bookmarking.
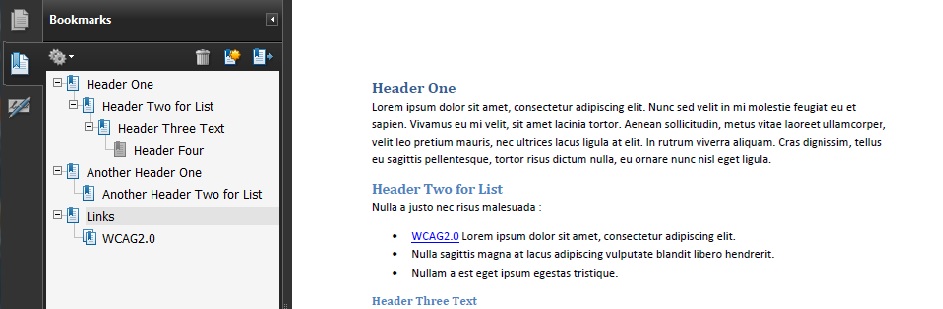
The tagged bookmarks are nested under a new, untitled bookmark. Access the context menu for the new bookmark and select the Rename option to rename the new bookmark, as shown in the following image.
This example is shown in operation in the working example of creating bookmarks with Acrobat Pro.
The following code fragment illustrates part of an outline hierarchy used to create bookmarks This is typically accomplished by an authoring tool.
121 0 obj
 << /Type /Outlines
    /First 22 0 R
    /Last 29 0 R
    /Count 6
 >>
endobj
22 0 obj
 << /Title (Applying Guerrilla Tactics to Usability Testing by People with Disabilities)
    /Parent 21 0 R
    /Next 29 0 R
    /First 25 0 R
    /Last 28 0 R
    /Count 4
    /Dest [3 0 R /XYZ 0 792 0]
 >>
endobj
25 0 obj
 << /Title (Getting started)
    /Parent 22 0 R
    /Next 26 0 R
    /Dest [3 0 R /XYZ null 701 null]
 >>
endobj
Resources are for information purposes only, no endorsement implied.
Section 12.3.3 (Document Outline) in PDF 1.7 (ISO 32000-1)
Check that the Bookmarks panel displays bookmarks.
Check that the bookmarks link to the correct sections in the document.
Check #1 and Check #2 are true.
If this is a sufficient technique for a success criterion, failing this test procedure does not necessarily mean that the success criterion has not been satisfied in some other way, only that this technique has not been successfully implemented and can not be used to claim conformance.
Tagged PDF documents
This technique relates to:
See User Agent Support Notes for PDF3. Also see PDF Technology Notes.
The intent of this technique is to ensure that users can navigate through content in a logical order that is consistent with the meaning of the content. Correct tab and reading order is typically accomplished using a tool for authoring PDF.
For sighted users, the logical order of PDF content is also the visual order on the screen. For keyboard and assistive technology users, the tab order through content, including interactive elements (form fields and links), determines the order in which these users can navigate the content. The tab order must reflect the logical order of the document.
Logical structure is created when a document is saved as tagged PDF. The reading order of a PDF document is determined primarily by the tag order of document elements, including interactive elements, but the order of content within individual tags is determined by the PDF document’s content tree structure.
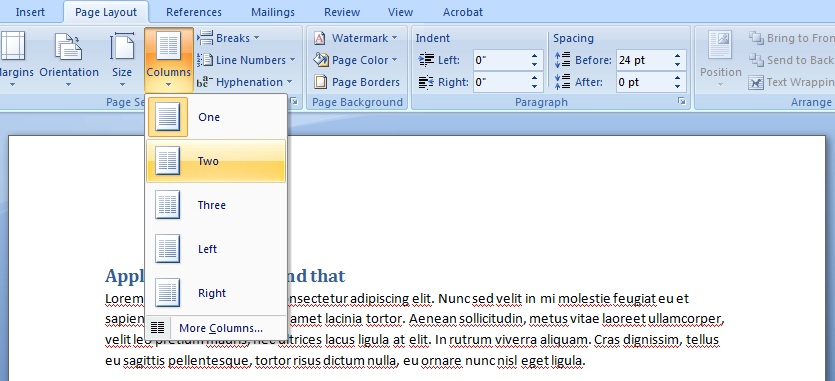
If the reading order is not correct, keyboard and assistive technology users may not be able to understand the content. For example, some documents use multiple columns, and the reading order is clear visually to sighted users as flowing from the top to the bottom of the first column, then to the top of the next column. But if the document is not properly tagged, a screen reader may read the document from top to bottom, across both columns, interpreting them as one column.
The simplest way to ensure correct reading order is to structure the document correctly in the authoring tool used to create the document, before conversion to tagged PDF. Note, however, that pages with complex layouts with graphics, tables, footnotes, side-bars, form fields, and other elements may not convert to tagged PDF in the correct reading order. These inconsistencies must then be corrected with repair tools such as Acrobat Pro.
When a PDF document containing form fields has a correct reading order, all form fields are contained in the tab order in the appropriate order, and in the correct order relative to other content in the PDF. Common tab-order errors include:
Form fields missing from the tagged content.
Form fields in the wrong location in the PDF content; e.g., at the end of non-interactive content.
This example is shown with Microsoft Word. There are other software tools that perform similar functions. See the list of other software tools in PDF Authoring Tools that Provide Accessibility Support.
Multi-column documents created using Word's Page Layout > Columns... tool typically are in the correct reading order when converted to tagged PDF. The image below shows Word's Columns tool.
This example is shown in operation in the working example of 2-column document using Word 2007 (Word file) and working example of 2-column document using Word 2007 (PDF file).
This example is shown with OpenOffice.org Writer. There are other software tools that perform similar functions. See the list of other software tools in PDF Authoring Tools that Provide Accessibility Support.
Multi-column documents created using OpenOffice.org Writer's Format > Columns... tool typically are in the correct reading order when converted to tagged PDF. The image below shows Writer's Columns tool.

This example is shown in operation in the working example of 2-column document using OpenOffice Writer (OpenOffice file) and working example of 2-column document using OpenOffice Writer (PDF file).
This example is shown with Adobe Acrobat Pro. There are other software tools that perform similar functions. See the list of other software tools in PDF Authoring Tools that Provide Accessibility Support.
In a tagged PDF document:
Open the Pages panel by either:
Clicking the Pages icon ![]()
Or selecting View > Navigation Panels > Pages
Select one or more page thumbnails.
Access the context menu for the selected thumbnail(s) and select Page Properties...
Select the Tab Order tab in the Page Properties dialog.
If needed, select a tab order option:
| Option | Description |
|---|---|
| Use Row Order | Tabs from the upper left field, moving first left to right and then down, one table row at a time. |
| Use Column Order | Tabs from the upper left field, moving first from top to bottom and then across from left to right, one table column at a time. |
| Use Document Structure | For tagged documents, moves in the tag order specified by
the authoring application.
Note: This is usually the correct reading order and will be selected by default for tagged documents. |
| Unspecified | If the document was created using an earlier version of Acrobat Pro, the tab order is Unspecified by default. With this setting, form fields are tabbed through first, followed by links and then comments ordered by row. This may not be correct reading order. |

This example is shown in operation in the working example of setting the tab order (Word file) and working example of setting the tab order (PDF file).
This example is shown with Adobe Acrobat Pro. There are other software tools that perform similar functions. See the list of other software tools in PDF Authoring Tools that Provide Accessibility Support (http://trace.wisc.edu/wcag_wiki/index.php?title=PDF_Technology_Notes).
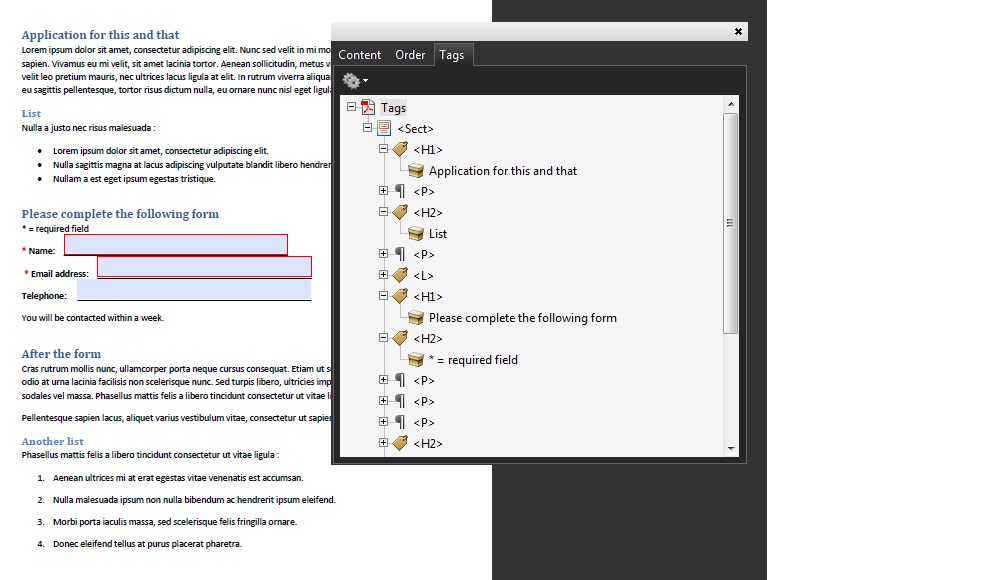
To correct the reading order in Example 5, use the Tags panel, and either
Drag-and-drop the H1 tag to precede the required-field text
(tagged H2), or
Cut-and-paste the H2 tag to follow the H1 tag.
In the following image, the reading order is correct for the text and
header. That is, the content elements H1 and H2 have been switched
into the correct reading order.
Resources are for information purposes only, no endorsement implied.
Section 14.8 (Tagged PDF) in PDF 1.7 (ISO 32000-1)
Verify that the content is in the correct reading order by one of the following:
Read the PDF document with a screen reader or a tool that reads aloud, listening to hear that each element is read in the correct order.
Use a tool that exposes the document through the accessibility API, and verify that the reading order is correct.
Verify that the tab order is correct for focusable content by one of the following:
Use the tab key to traverse the focus order in the document.
Use a tool that is capable of showing the page object entry that specifies the tab order setting to open the PDF document and view the setting.
#1 and Check #2 are true.
If this is a sufficient technique for a success criterion, failing this test procedure does not necessarily mean that the success criterion has not been satisfied in some other way, only that this technique has not been successfully implemented and can not be used to claim conformance.
Tagged PDF documents
This technique relates to:
See User Agent Support Notes for PDF4. Also see PDF Technology Notes.
The purpose of this technique is to show how purely decorative images in PDF documents can be marked so that they can be ignored by Assistive Technology by using the /Artifact tag. This is typically accomplished by using a tool for authoring PDF.
In PDF, artifacts are generally graphics objects or other markings that are not part of the authored content. Examples of artifacts include page header or footer information, lines or other graphics separating sections of the page, or decorative images.
This example is shown with Adobe Acrobat Pro. There are other software tools that perform similar functions. See the list of other software tools in PDF Authoring Tools that Provide Accessibility Support.
The TouchUp Reading Order Tool can be used to mark an image as "Background," which removes it from the document tag structure.
Open the TouchUp Reading Order Tool in Acrobat Pro: Advanced > Accessibility > TouchUp Reading Order
Select the decorative image in the document
In the TouchUp Reading Order Tool, click the Background button to remove the selected image from the tag structure
The screenshot below illustrates this example.

This example is shown in operation in the working example of creating a decorative image (Word file) and working example of marking a background image as an artifact (PDF file).
The PDF specification allows images to be marked as "artifacts" as defined in Section 14.8.2.2 (Real Content and Artifacts) in PDF 1.7 (ISO 32000-1). An artifact is explicitly distinguished from real content by enclosing it in a marked-content sequence with the /Artifact tag.
/Artifact
BMC ... EMC or
/Artifact propertyList
BDC ... EMC The first is used to identify a generic artifact; the second is used for artifacts that have an associated property list. Note, to aid in text reflow, artifacts should be defined with property lists whenever possible. Artifacts lacking a specified bounding box are likely to be discarded during reflow.
Property list entries for artifacts include Type, BBox, Attached, and Subtype.
Resources are for information purposes only, no endorsement implied.
Section 14.8.2.2 (Real Content and Artifacts) in PDF 1.7 (ISO 32000-1)
For an image that is purely decorative, use one of the following to verify that it is marked as an artifact:
Read the PDF document with a screen reader, listening to hear that the decorative image is not announced when reading the content line-by-line.
Using a PDF editor, make sure the decorative image is marked as an artifact.
Reflow the document and make sure the decorative image does not appear on the page.
Use a tool that is capable of showing the /Artifact entry or property list, such as aDesigner, to open the PDF document and verify that decorative images are marked as artifacts.
Use a tool that exposes the document through the accessibility API and verify that the decorative image is not exposed through the API.
#1 is true.
If this is a sufficient technique for a success criterion, failing this test procedure does not necessarily mean that the success criterion has not been satisfied in some other way, only that this technique has not been successfully implemented and can not be used to claim conformance.
Tagged PDF documents with forms
This technique relates to:
Note: This technique must be combined with other techniques to meet SC 3.3.2. See Understanding SC 3.3.2 for details.
See User Agent Support Notes for PDF5. Also see PDF Technology Notes.
The objective of this technique is to notify the user when a field that must be completed has not been completed in a PDF form. Required fields are implemented using the /Ff entry in the form field's dictionary (see Table 220 in Section 12.7 (Interactive Forms) of PDF 1.7 (ISO 32000-1). This is normally accomplished using a tool for authoring PDF.
If errors are found, an alert dialog describes the nature of the error in text. This may be accomplished through scripting created by the author (see, for example, SCR18: Providing client-side validation and alert). User agents, such as Adobe Acrobat Pro and LiveCycle, can provide automatic alerts (as described in the examples below).
Note: once the user dismisses the alert dialog, it may be helpful if the script positions the keyboard focus on the field where the error occurred, although some users may expect the focus to remain on the last control focused prior to the alert appearing. Authors should exercise care to ensure that any movement of the focus will be expected. For example, if the alert announces a missing required phone number, positioning the focus on the phone number field when the alert is dismissed can be regarded as helpful and expected. In some cases, however, this may not be possible. If multiple input errors occur on the page, another approach must be taken to error reporting. (See, for example, the Adobe scripting resources.)
Ensuring that users are aware an error has occurred, can determine what is wrong, and can correct it are keys to software usability and accessibility. Meeting this objective helps ensure that all users can complete transactions with ease and confidence.
It is also important that users are aware that an error may occur. You can incorporate this information in labels; for example, "Date (required)" or the use of a red asterisk to indicate required fields. (Make sure that a legend appears on each form with required fields, e.g., "* = required field".) See PDF10: Providing labels for interactive form controls in PDF documents.
This example is shown with Adobe Acrobat Pro. There are other software tools that perform similar functions. See the list of other software tools in PDF Authoring Tools that Provide Accessibility Support.
Access the context menu of the field and select the Properties dialog.
If the field is required, check the Required box. This checkbox forces the user to fill in the selected form field. If the user attempts to submit the form while a required field is blank, an error message appears and the empty required form field is highlighted.
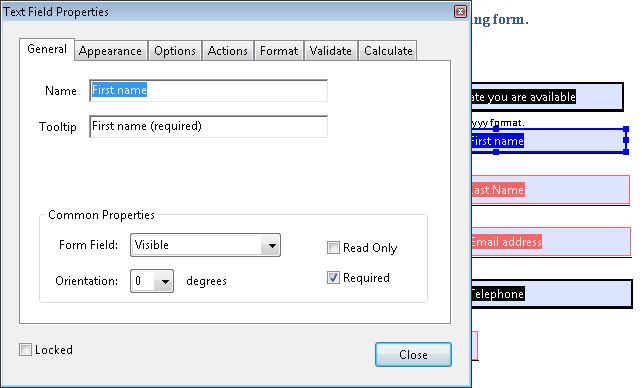
This example is shown in operation in the working example of creating a required field in Acrobat.
This example is shown with Adobe LiveCycle Designer. There are other software tools that perform similar functions. See the list of other software tools in PDF Authoring Tools that Provide Accessibility Support.
Access the context menu of the form control, select Palettes, and select Object.
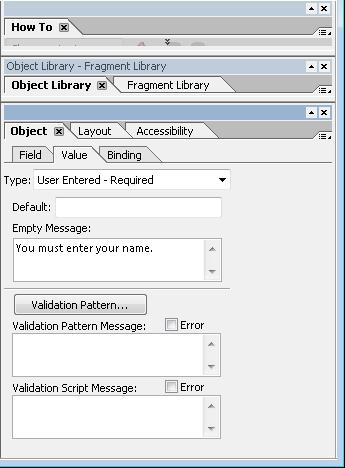
Select "User entered - Required" from the Type pulldown.
Enter an error message in the "Empty Message" field. This message appears when a user tries to submit the form without entering a value in the required field.
If the user attempts to submit the form with a required field left blank, the Empty Message text appears and the empty required field is highlighted.
The image below shows the Adobe LiveCycle Object palette with the required selection.
You can also add explicit text to the form label to indicate required fields (e.g., "(Required)").
This example is shown in operation in the working example of creating a required field in LiveCycle Designer.
The following code fragment illustrates code that is typical for the object definitions for a typical text field. Note that the text field is required, using the Ff flag. This is typically accomplished by an authoring tool.
<< /AP -dict-
   /DA /Helv  0 Tf 0 g
   /DR -dict-
   /F 0x4
   /FT Tx              % FT key set to Tx for Text Field
   /Ff 0x2             % Ff integer 0x2 value indicates required
   /P -dict-
   /Rect -array-
   /StructParent 0x1
   /Subtype Widget
   /T First            % Partial field name First
   /TU First name (required)  % TU tool tip value serves as short description
   /Type Annot
   /V Pat Jones
>>
...
<Start Stream>
 BT
  /P <</MCID 0 >>BDC
  /CS0 cs 0  scn
  /TT0 1 Tf
    -0.001 Tc 0.003 Tw 11.04 0 0 11.04 72 709.56 Tm
    [(P)-6(le)-3(as)10(e)-3( )11(P)-6(rin)2(t)-3( Y)8(o)-7(u)2(r N)4(a)11(m)-6(e)]TJ
  0 Tc 0 Tw 9.533 0 Td
  ( )Tj
  -0.004 Tc 0.004 Tw 0.217 0 Td
  [(\()-5(R)-4(e)5(q)-1(u)-1(i)-3(r)-3(e)-6(d)-1(\))]TJ
 EMC
  /P <</MCID 1 >>BDC
  0 Tc 0 Tw 4.283 0 Td
  [( )-2( )]TJ
   EMC
   /ArtifactSpan <</MCID 2 >>BDC
   0.002 Tc -0.002 Tw 0.456 0 Td
  [(__)11(___)11(___)11(___)11(___)11(_)11(____)11(___)11(___)11(__)]TJ
  0 Tc 0 Tw 13.391 0 Td
  ( )Tj
  EMC
 ET
<End Stream>
Resources are for information purposes only, no endorsement implied.
Section 12.7 (Interactive Forms) in PDF 1.7 (ISO 32000-1)
For each form field that is required, verify that validation information and instructions are provided by applying the following:
Check that the required status is indicated in the form control's label.
Leave the field blank and submit the form. Check that an alert describing the error is provided.
Use a tool that exposes the document through the accessibility API, and verify that the required property is indicated.
#1, #2, and #3 are true.
If this is a sufficient technique for a success criterion, failing this test procedure does not necessarily mean that the success criterion has not been satisfied in some other way, only that this technique has not been successfully implemented and can not be used to claim conformance.
Tagged PDF documents with tables
This technique relates to:
See User Agent Support Notes for PDF6. Also see PDF Technology Notes.
The purpose of this technique is to show how tables in PDF documents can be marked up so that they are recognized by assistive technology. This is typically accomplished by using a tool for authoring PDF.
Tabular information must be presented in a way that preserves relationships within the information even when users cannot see the table or the presentation format is changed. Information is considered tabular when logical relationships among text, numbers, images, or other data exist in two dimensions (vertical and horizontal). These relationships are represented in columns and rows, and the columns and rows must be recognizable in order for the logical relationships to be perceived.
Tagged tables can be created using the Add Tags to Document feature in Adobe Acrobat, using the Object Library in Adobe LiveCycle, or converting tables to PDF from a third-party application, such as Microsoft Word. However, the resulting tables may not be tagged correctly and you should ensure that table tagging issues are resolved.
Within PDF documents, a table uses the following structure types for table elements:
A table element (Table).
One or more table row elements(TR) which define each row of table cells as immediate children of the Table element.
One or more table header elements (TH) or table data elements (TD) as the immediate children of each table row element.
Cells that span two or more rows or columns should use the RowSpan or ColSpan attribute.
For tables that contain blank cells, you may need to add empty TD cells so that each row or column has the same number of cells.
This example is shown with Microsoft Word. There are other software tools that perform similar functions. See the list of other software tools in PDF Authoring Tools that Provide Accessibility Support.
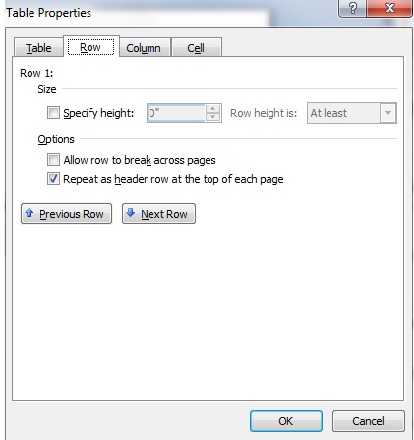
Access the table header row's context menu and select Table Properties...
Select the Row tab.
Check "Repeat as header at the top of each page" as shown in the following image.
This example is shown in operation in the working example of tagged table headings in Word 2007.
Note: Microsoft Word can only mark up cells as column headings, not as row headings. Only the first row can be marked as heading for all table columns. When the table has row headings or a more complex heading structure, this mark-up must be added in a PDF editor such as Acrobat Pro.
This example is shown with OpenOffice.org Writer. There are other software tools that perform similar functions. See the list of other software tools in PDF Authoring Tools that Provide Accessibility Support.
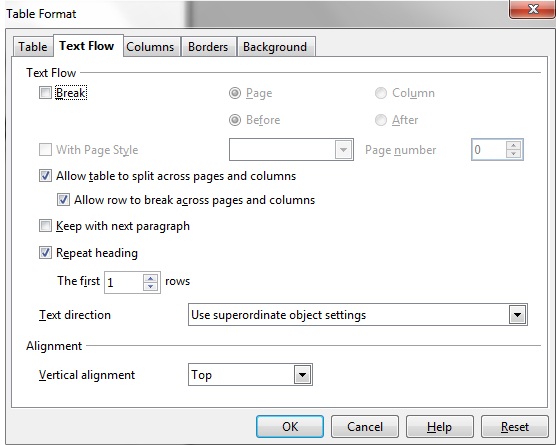
Access the table's context menu and select Table...
Select the Table Format tab.
Check Repeat Heading and select "1" in the First Rows listbox as shown in the following image.
This example is shown in operation in the working example of tagged table headings in OpenOffice Writer.
Note: OpenOffice.org Writer can only mark up cells as column headings, not as row headings. Only the first row can be marked as heading for all table columns. When the table has row headings or a more complex heading structure, this mark-up must be added in a PDF editor such as Acrobat Pro.
This example is shown with Adobe Acrobat Pro. There are other software tools that perform similar functions. See the list of other software tools in PDF Authoring Tools that Provide Accessibility Support.
To check that a converted document with tables has correct table tagging:
In the View menu, select Navigation Panel, then select Tags.
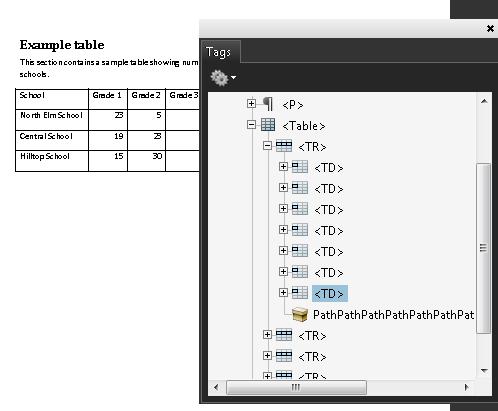
Note that in this case, the table headers were not formatted as illustrated in Examples 1 and 2, and are marked as data cells (TD). To change these to TH tags:
On the Tags tab, open the table row that contains the header cells, as shown on the image above.
Select on the first data cell and select Properties...
On the Tags tab in the Properties dialog, use the Type dropdown to change Table Data Cell to Table Header Cell.
Repeat for all the table header cells in the first table row.

This example is shown in operation in the working example of tagged table headings in Acrobat.
The following code fragment illustrates code that is typical for a simple table (header row and data row) such as shown in Examples 1-3:
95 0 obj                %Structure element for a table
 <<
  /A 39 0 R
  /K[96 0 R 101 0 R 106 0 R 111 0 R]
  /P 93 0 R
  /S/Table              %standard structure type is table
 >>
 endobj
96 0 obj                %Structure element for a table row
 <<
  /K[97 0 R 98 0 R 99 0 R 100 0 R]
  /P 95 0 R
  /S/TR                 %standard structure type is table row
 >>
 endobj
97 0 obj                %Structure element for a table header
 <</A[23 0 R 120 0 R]
   /K 1
   /P 96 0 R
   /S/TH                 %standard structure type is table head
   /Pg 8 0 R
 >>
endobj
104 0 obj                %Structure element for table data (cell contents)
 <<
  /A 29 0 R
  /K 7
  /P 101 0 R
  /S/TD                  %standard structure type is table data
  /Pg 8 0 R
 >>
endobj
Resources are for information purposes only, no endorsement implied.
Section 14.8.4.3.4 (Table Elements) in PDF 1.7 (ISO 32000-1)
For each table, confirm one of the following:
Read the PDF document with a screen reader, listening to hear that the tabular information is presented in a way that preserves logical relationships among the table header and data cells.
Using a PDF editor, verify that the appropriate TR, TH, and TD tags are in the proper reading order and hierarchy in the table tree.
Use a tool which is capable of showing the table elements to open the PDF document, view the table structure, and verify that it contains the appropriate TR, TH, and TD structures.
Use a tool that exposes the document through the accessibility API, and verify that the table structure contains the appropriate TR, TH, and TD structures, and that they are in the proper reading order and hierarchy.
#1 is true.
If this is a sufficient technique for a success criterion, failing this test procedure does not necessarily mean that the success criterion has not been satisfied in some other way, only that this technique has not been successfully implemented and can not be used to claim conformance.
Scanned PDF documents
This technique relates to:
See User Agent Support Notes for PDF7. Also see PDF Technology Notes.
The intent of this technique is to ensure that visually rendered text is presented in such a manner that it can be perceived without its visual presentation interfering with its readability.
A document that consists of scanned images of text is inherently inaccessible because the content of the document is images, not searchable text. Assistive technologies cannot read or extract the words; users cannot select, edit, resize, or reflow text nor can they change text and background colors; and authors cannot manipulate the PDF for accessibility.
For these reasons, authors should use actual text rather than images of text, using an authoring tool such as Microsoft Word or Oracle Open Office to author and convert content to PDF.
If authors do not have access to the source file and authoring tool, scanned images of text can be converted to PDF using optical character recognition (OCR). Adobe Acrobat Pro can then be used to create accessible text.
This example is shown with Adobe Acrobat Pro. There are other software tools that perform similar functions. See the list of other software tools in PDF Authoring Tools that Provide Accessibility Support.
This example uses a simple one-page scanned image of text. To ensure that actual text is stored in the document, perform the following steps:
Scan the document using as high a resolution as possible to improve the OCR performance.
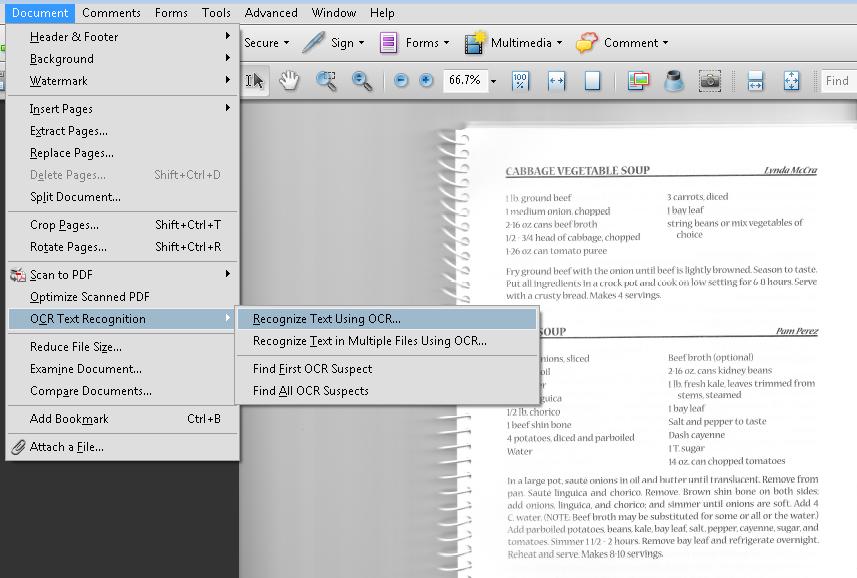
Load the scanned document in Acrobat Acrobat Pro. Select Document > OCR Text Recognition > Recognize Text Using OCR...
In the next dialog, select the All Pages radio button under Pages (or Current Page if you are converting only one page), and then select OK.
Under the Settings list, select Edit. In the next dialog, select Formatted Text and Graphics in the PDF Output Style drop-down list. This is important for ensuring accessibility.
Depending on the resolution and how clear the text was, OCR converts images of words and characters to actual text. Text that Acrobat Pro does not recognize is listed as an "OCR suspect," or text element that Acrobat suspects was not recognized correctly.
To fix the suspects, choose Document > OCR Text Recognition > Find First OCR Suspect. Acrobat Pro presents each suspect one at a time, which can be corrected using Acrobat Pro touchup tools.
Run Advanced > Accessibility > Add Tags to Document
Test for accessibility: Advanced > Accessibility > Full Check...
Note: Alternatively, you can use Document > OCR Text Recognition > Find All OCR Suspects to display all OCR suspects at the same time for faster editing.
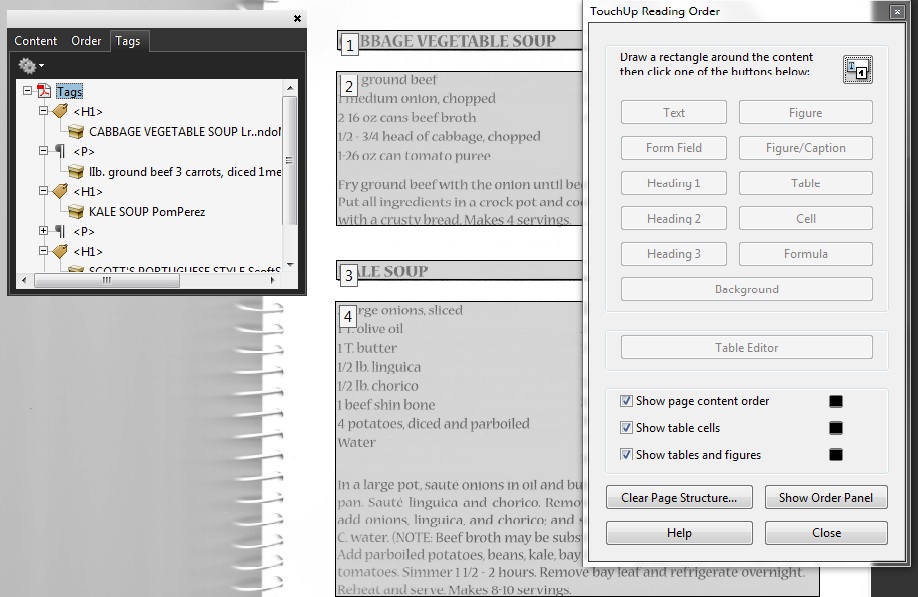
The following image shows a scanned one-page document in Adobe Acrobat Pro.
The next image shows the converted content after adding tags to the document. It will probably be necessary to use the TouchUp Reading Order tool and the Tags panel to tag the content properly for the intended final document. For this example, the image of the spiral book binding was tagged in the conversion. The TouchUp Reading Order tool was used to hide the image as a background (decorative) image (see PDF4: Hiding decorative images with the Artifact tag in PDF documents). The recipe titles were tagged as first level headers.
Note: Acrobat Pro may automatically add tags when the file is run through OCR.
This example is shown in operation in the working example of generating actual text and the result of performing OCR.
Resources are for information purposes only, no endorsement implied.
For each page converted to text using OCR, ensure that the resulting PDF has been converted correctly, using one of the following ways:
Read the PDF document with a screen reader or a tool that reads aloud, listening to hear that all text is read correctly and in the correct reading order.
Save the document as text and check that the converted text is complete and in the correct reading order.
Use a tool that is capable of showing the converted content to open the PDF document and verify that all text was converted and is in the correct reading order.
Use a tool that exposes the document through the accessibility API and verify that all text was converted and is in the correct reading order.
#1 is true.
If this is a sufficient technique for a success criterion, failing this test procedure does not necessarily mean that the success criterion has not been satisfied in some other way, only that this technique has not been successfully implemented and can not be used to claim conformance.
Tagged PDF documents containing abbreviations or acronyms
This technique relates to:
See User Agent Support Notes for PDF8. Also see PDF Technology Notes.
The objective of this technique is to provide an expansion or definition of an abbreviation for the first occurrence of the abbreviation. For example, a reference to an abbreviation, such as "WCAG," should be available as "Web Content Accessibility Guidelines (WCAG)" on its first occurrence in a document.
This is done by setting expansion text using an /E entry for a structure element, and is normally accomplished using a tool for authoring PDF. A Span structure element is typically used to tag the abbreviation, but the /E entry is valid with any structure element.
This technique is applicable for any abbreviation, including acronyms and initialisms. Note that on the first occurrence of the abbreviation, both the abbreviation and the expansion text must be provided. This will aid recognition of later use of the abbreviation.
PDF documents may be enhanced by providing expansions for abbreviations. In fact, such expansions are required for accessibility to ensure understanding by people who have difficulty decoding words; rely on screen magnification (which may obscure context); have limited memory; or who have difficulty using context to aid understanding.
This example is shown with Adobe Acrobat Pro. There are other software tools that perform similar functions. See the list of other software tools in PDF Authoring Tools that Provide Accessibility Support.
In a tagged PDF document:
Select the Tags panel, using Views > Navigation Panes > Tags
Select the first instance of the abbreviated text that needs to be expanded. If the selected text is part of a larger tag, access the Tags panel options menu, select Create Tag from Selection, and create a new Span tag. In this example, the text "WCAG2" (within the LBody tag) has been enclosed in a Span tag.
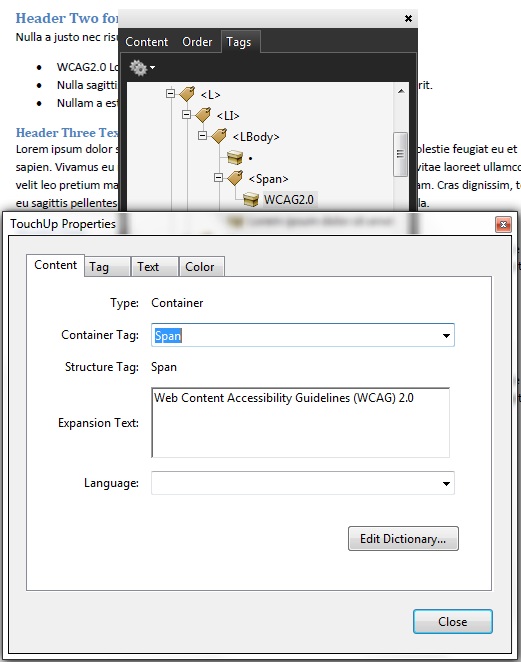
In the Tags panel, access the context menu for the spanned text and select Properties... to open the TouchUp Properties dialog for the Span tag.
On the Content tab of the TouchUp Properties dialog, enter the expansion text, followed by the originally selected text.
The following image illustrates this technique:
This example is shown in operation in the working example of Providing definitions for Abbreviations (Word document), working example of Providing definitions for Abbreviations (OpenOffice document), and working example of Providing definitions for Abbreviations (PDF document).
The following code fragment illustrates code that is typical for using the /Span structure element to define an abbreviation.
This example uses the sentence "Sugar is commonly sold in 5 lb bags." The abbreviation "lb" is tagged as a /Span structure element with an /E entry (typically accomplished by an authoring tool).
 1 0 obj                                  % structure element
   << /Type /StructElemen
            /S /Span                      % element type
            /P ...                        % Parent in structure hierarchy
            /K << /Type /MCR
                        /Page 2 0 R       % Page containing marked-content sequence
                        /MCID 0           % Marked content identifier for "lb"
               >>
            /E  (pound, lb)
    >>
 endobj
As noted in the Description, the /E entry is valid with any structure element.
The following code fragment illustrates code that is typical for using an /E entry to define an abbreviation.
A table that contains columns for each month uses abbreviations as the values of column headers. The expansion for each abbreviation is provided as the /E entry of the /TH structure element (typically accomplished by an authoring tool).
 1 0 obj                                  % structure element
   << /Type /StructElemen
            /S /TH                        % element type
            /P ...                        % Parent in structure hierarchy
            /K << /Type /MCR
                        /Page 2 0 R       % Page containing marked-content sequence
                        /MCID 0           % Marked content identifier for "Dec"
               >>
            /E  (December, Dec)
    >>
 endobj
Resources are for information purposes only, no endorsement implied.
Section 14.9.5 (Expansion of Abbreviations and Acronyms) in PDF 1.7 (ISO 32000-1)
Verify that the first occurrence of abbreviations that require expansion text have /E entries on an enclosing tag by one of the following and that both the abbreviation and the expansion text are provided:
In Windows, use Microsoft's Inspect.exe tool, or some other tool that allows inspection of the MSAA interface, to locate the text of the abbreviation in the document tree and ensure that the value of the abbreviation is in the expansion text.
In a PDF editor, locate the tag for the text that is the abbreviation, and check that an expansion or definition is provided for each abbreviation in the Expansion Text field in the corresponding tag's properties.
Read the PDF document with a screen reader, listening to hear that on the first occurrence, the abbreviation and expansion are read when the screen reader reads the content line-by-line.
Use a tool that is capable of showing the /E entry value, such as aDesigner to open the PDF document and view the GUI summary to read the text expansions for abbreviations.
Use a tool that exposes the document through the accessibility API and verify that the text expansion of the abbreviation is properly implemented.
Check #1 is true.
If this is a sufficient technique for a success criterion, failing this test procedure does not necessarily mean that the success criterion has not been satisfied in some other way, only that this technique has not been successfully implemented and can not be used to claim conformance.
Tagged PDF documents with headings
This technique relates to:
See User Agent Support Notes for PDF9. Also see PDF Technology Notes.
The purpose of this technique is to show how headings in PDF documents can be marked so that they are recognized by assistive technologies. Headings are marked up using the heading elements (H, H1, H2, ... H6) in the structure tree. This is typically accomplished by using a tool for authoring PDF.
Heading markup can be used:
to indicate start of main content
to mark up section headings within the main content area
to demarcate different navigational sections, such as top or main navigation, left or secondary navigation, and footer navigation
to mark up images (containing text) which have the appearance of headings visually.
Because headings indicate the start of important sections of content, it is possible for assistive technology users to access the list of headings and to jump directly to the appropriate heading and begin reading the content. This ability to "skim" the content through the headings and go directly to content of interest significantly speeds interaction for users who would otherwise access the content slowly.
This example is shown with Adobe Acrobat Pro. There are other software tools that perform similar functions. See the list of other software tools in PDF Authoring Tools that Provide Accessibility Support.
One method of adding headings to PDF documents uses the Touchup Reading Order tool:
Open the PDF document in Adobe Acrobat Pro
Select Advanced > Accessibility > TouchUp Reading Order...
Click the Show Order Panel button on the TouchUp Reading Order panel
View the tags in the Show Order panel.
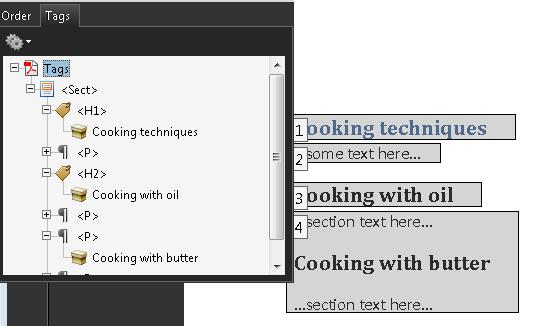
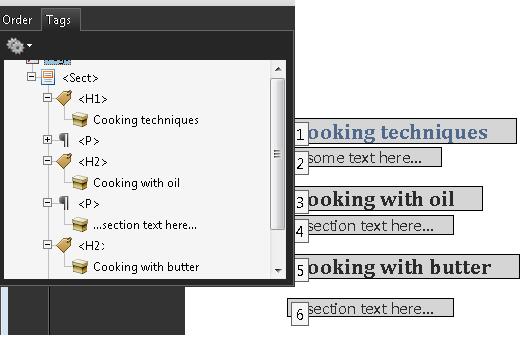
The following image shows a PDF document opened in Adobe Acrobat Pro. The Tags panel is open, showing heading text "Cooking techniques" tagged as H1 and "Cooking with oil" tagged as H2. The text "Cooking with butter" should be tagged as H2 but is not.
To correct the H2 heading, use the TouchUp Reading Order panel as follows:
Left click and drag a selection box over the content you want to tag.
Select the Heading 2 tag from the TouchUp Reading Order panel.
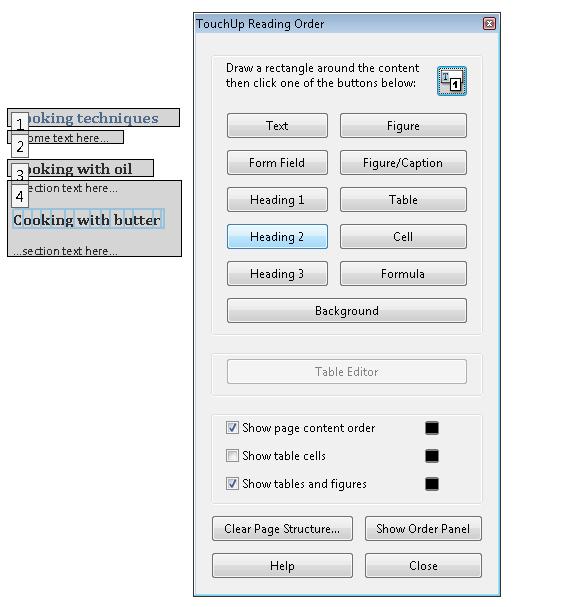
The following image shows the PDF document opened in Adobe Acrobat Pro. The TouchUp Reading Order panel is visible. A selection box appears around the text "Cooking with butter," and Heading 2 on the panel is selected.
Finally, click the Show Order Panel button on the TouchUp Reading Order panel.
The following image shows the PDF document opened in Adobe Acrobat Pro. The Tags panel is visible, showing that the text "Cooking with butter" is now tagged as H2.
You can also add or change headings as follows:
Bring up the Order panel.
Access the context menu for the text to be changed or added as a heading.
Select the correct heading tag for the text.
The following screenshot shows Order panel and the context menu for the text "Cooking with butter." "Tag as heading 2" is selected in the context menu.
You can then check that the correct heading is applied by opening the Tags panel, as shown in the following screenshot.
This example is shown in operation in the working example of adding tagged headings (Word file) and working example of adding tagged headings (PDF file).
This example is shown with Microsoft Word. There are other software tools that perform similar functions. See the list of other software tools in PDF Authoring Tools that Provide Accessibility Support.
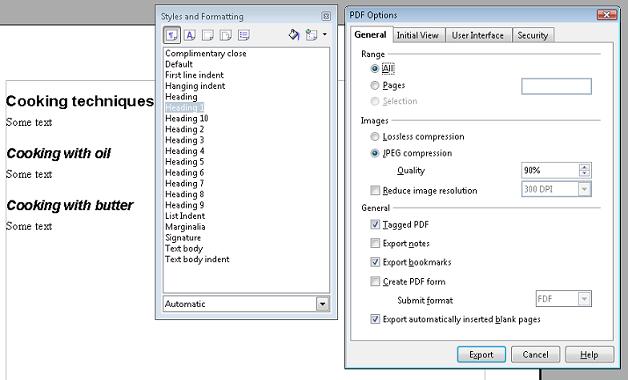
Use Styles to create heading formats: Heading 1, Heading 2, Heading 3, etc. Make styles progress in a logical manner; e.g., a Heading 2 should come after a Heading 1.
Select the "Format > Styles and Formatting" menu item to reveal the styles and formatting task pane.
Use the Heading 1 to Heading 6 styles provided in the "Styles and Formatting" panel.
Select the Home Ribbon in Word 2007/2010 and select the appropriate heading (Heading 1 to Heading 6) from the Styles group.
This example is shown with OpenOffice.org Writer. There are other software tools that perform similar functions. See the list of other software tools in PDF Authoring Tools that Provide Accessibility Support.
Use Styles to create heading formats: Heading 1, Heading 2, Heading 3, etc. Make styles progress in a logical manner; e.g., a Heading 2 should come after a Heading 1.
Export to PDF as follows:
From the File menu, select Export as PDF...
The first time you export as PDF, an Options Dialog appears.
Select Tagged PDF, then select Export.
Headings within PDF documents can be marked up using /Hn elements elements in the structure tree, where n is numeral 1 through 6 (for example /H1, /H2, etc.).
The following code fragment illustrates code that is typical for using the /Hn elements elements to mark content. Note that /H1 has been role-mapped to /Head1 in this example. This is typically accomplished by an authoring tool.
0 obj% Document catalog
  << /Type /Catalog
     /Pages 100 0 R                  % Page tree
     /StructTreeRoot 300 0 R         % Structure tree root
  >>
endobj
 ...
300 0 obj% Structure tree root
  << /Type /StructTreeRoot
     /K [ 301 0 R                    % Two children: a chapter
        304 0 R                      % and a paragraph
        ]
     /RoleMap << /Chap /Sect         % Mapping to standard structure types
                 /Head1 /H
                 /Para /P
              >>
    /ClassMap << /Normal 305 0 R >>  % Class map containing one attribute class
    /ParentTree 400 0 R              % Number tree for parent elements
    /ParentTreeNextKey 2             % Next key to use in parent tree
    /IDTree 403 0 R                  % Name tree for element identifiers
  >>
endobj
301 0 obj                            % Structure element for a chapter
  << /Type /StructElem
     /S /Chap
     /ID (Chap1)                     % Element identifier
     /T (Chapter 1)                  % Human-readable title
     /P 300 0 R                      % Parent is the structure tree root
     /K [ 302 0 R                    % Two children: a section head
          303 0 R                    % and a paragraph
        ]
  >>
endobj
302 0 obj                            % Structure element for a section head
  << /Type /StructElem
     /S /Head1
     /ID (Sec1.1)                    % Element identifier
     /T (Section 1.1)                % Human-readable title
     /P 301 0 R                      % Parent is the chapter
     /Pg 101 1 R                     % Page containing content items
     /A << /O /Layout                % Attribute owned by Layout
           /SpaceAfter 25
           /SpaceBefore 0
           /TextIndent 12.5
        >>
    /K 0                             % Marked-content sequence 0
  >>
endobj
...
Within marked content containers, headings can be marked up using /Headn elements as follows for a first-level heading in a PDF document:
BT		 		% Start of text object
  /Head1 <</MCID 0 >>   	% Start of marked-content sequence
     BDC
        ...
        (This is a first level heading. Hello world: ) Tj
        ...
     EMC			% End of marked-content sequence
     ...
ET				% End of text object
Resources are for information purposes only, no endorsement implied.
Section 14.8.4.3.2 (Paragraphlike Elements) in PDF 1.7 (ISO 32000-1)
For all PDF content that is divided into separate sections, use one of the following to verify that headings are tagged correctly:
Read the PDF document with a screen reader, listening to hear that the list of headings is announced correctly.
Using a PDF editor, make sure the headings are tagged correctly.
Use a tool that is capable of showing the /Headn entries to open the PDF document and verify that headings are tagged correctly.
Use a tool that exposes the document through the accessibility API and verify that the headings are tagged correctly.
#1 is true.
If this is a sufficient technique for a success criterion, failing this test procedure does not necessarily mean that the success criterion has not been satisfied in some other way, only that this technique has not been successfully implemented and can not be used to claim conformance.
Tagged PDF documents with forms.
PDF forms created using Adobe LiveCycle Designer.
This technique relates to:
See User Agent Support Notes for PDF10. Also see PDF Technology Notes.
The objective of this technique is to ensure that users of assistive technology are able to perceive form control labels and understand how form controls are used.
Form controls allow users to interact with a PDF document by filling in information or indicating choices which can then be submitted for processing. Assistive technology users must be able to recognize and understand the form fields, make selections, and provide input to complete the forms, and submit the form, just as sighted users can. Understandable labels that convey the purpose of each form control are essential to form accessibility.
Form inputs generally have labels and instructions to help users understand what information is required and how to fill in the form. Unless these labels are programmatically associated with the relevant fields, assistive technology might not be able to associate them correctly, and thus users might not understand how to complete the form.
Using Adobe Acrobat Pro with documents with interactive forms, you can make sure that the forms are accessible and usable by making sure that programmatically associated labels that convey the purpose of the fields are provided.
The heuristics used by assistive technology will sometimes use the text label if a programmatically associated label cannot be found. The TU entry (which is the tooltip) of the field dictionary is the programmatically associated label (see Example 3 below and Table 220 in PDF 1.7 (ISO 32000-1)). Therefore, add a tooltip to each field to provide a label that assistive technology can interpret.
The table below lists the placement rules governing where Adobe LiveCycle positions labels by default. Note that these rules assume left-to-right text directionality. If your form requires different positioning (e.g., to accommodate PDF documents in languages that use right-to-left text directionality), see Repositioning form labels in Example 2 below. In general, authors should review label positioning to make sure it meets the requirements of their particular form.
| Control Type | LiveCycle Placement Rules |
|---|---|
| Text input (including date/time and password fields) | Default placement for the label is to the left of the control. If this is not possible, LiveCycle will attempt to place it immediately above the control. |
| Checkbox | Default placement for the label is to the right of the check box. |
| Radio button group | Default placement for the label for each individual radio button is to the right of the button. Create a visible caption for the radio button group by creating static text and placing it to the left of or above the group. (See Labeling radio buttons below.) |
| Combo box | Default placement for the label is to the left of the drop-down list. If this is not possible, LiveCycle will attempt to place it immediately above the control.. |
| List box | Default placement for the label is above the list box. |
| Button | LiveCycle automatically places the label on the button; it does not have to be positioned manually. Ensure that the button's purpose is properly described in the label text. |
This example is shown with Adobe Acrobat Pro. There are other software tools that perform similar functions. See the list of other software tools in PDF Authoring Tools that Provide Accessibility Support.
As noted in the Description, text labels added in an authoring tool and then converted to PDF might be visually associated with the fields but are not programmatically associated, and you should provide a tooltip.
In the Forms menu, select Add or Edit Fields...
For the field you want to edit, access the context menu and select the Properties dialog.
In the General tab of the Properties dialog, type a description for the form field in the Tooltip field.
Repeat for all form fields.
The following image shows the Properties dialog with a description in the Tooltip field.
This example is shown in operation in the working example of providing labels using the forms tool.
This example is shown with Adobe LiveCycle Designer. There are other software tools that perform similar functions. See the list of other software tools in PDF Authoring Tools that Provide Accessibility Support.
LiveCycle Designer provides several options for associating descriptive text and labels with form elements.
For sighted or low-vision users, it is important to properly position the label adjacent to the control. For screen reader users, you should also ensure that the label is programmatically associated with the form control and that sufficient information is provided so that screen reader users can readily complete and submit the form.
This example is shown in operation in the working example of providing labels in LiveCycle Designer.
In LiveCycle Designer, create or import a form. Then:
Enable the palette by selecting Window > Accessibility or by pressing shift + F6.
The palette appears in LiveCycle Designer's right-hand panel.
Select an object in your form. The palette shows the object's accessibility properties.
The label that a screen reader uses does not necessarily have to be the same as the visual caption. In some cases, you may want to provide more information about a form element's purpose.
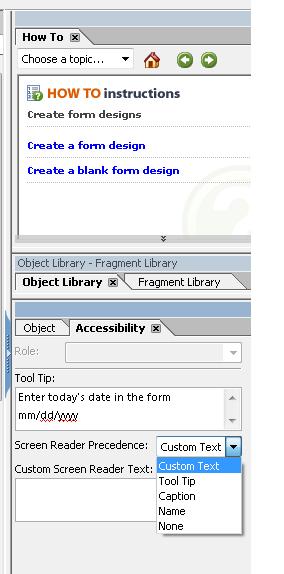
To specify what text should be announced by the screen reader for a particular object, you can use the Accessibility Palette's Screen Reader Precedence drop down list. Text is announced in the order shown in the list: custom text, tool tip, caption, and name.
Depending on the complexity and difficulty of your form, you must decide which option best suits the requirements for your form.
By default, a screen reader searches for an object's text in order shown in the image. Once descriptive text has been found for a control, the search stops.
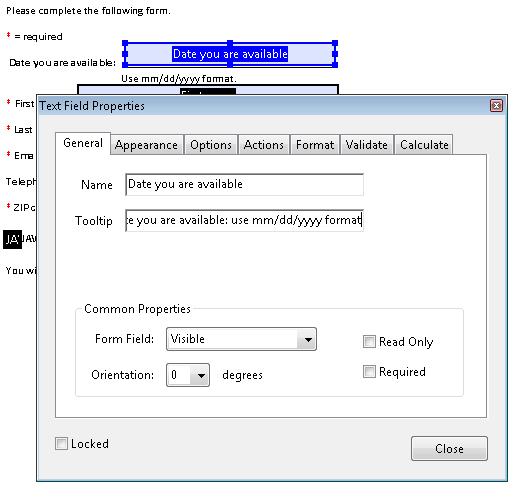
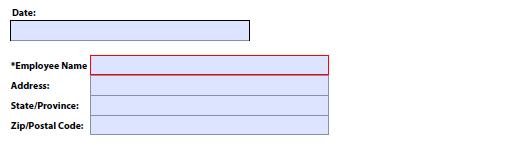
The image below shows an example of a text field with a visual caption that might be unclear for screen reader users. One of the fields has a caption of "Date" but screen reader users may want to know the preferred date format (shown as screen text). So this text is provided in the tooltip. Because a tooltip has a higher precedence than the visual caption, the screen reader uses the tooltip.

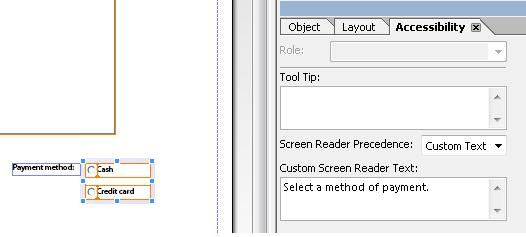
When a screen reader user tabs into a radio button, the screen reader needs to announce two items:
A general description of the purpose of the group of buttons
A meaningful description for the purpose of each radio button
To make radio buttons accessible:
In the Hierarchy palette, select the radio button group.
Select the Accessibility palette and in the Custom Screen Reader Text box, type the speak text for the group. For example, type "Select a method of payment."
In the Hierarchy palette, select the first radio button in the group.
In the Object palette, select the Field tab. In the Item area, select the item and type a meaningful value for the selected radio button. For example, type "Cash."
Repeat steps 3 and 4 for each radio button in the group.
The placement of a caption, or label, is important because users expect them to be found at a particular location adjacent to the control. For screen magnification users this is even more important, as they might not be able to view both the control and the label at the same time.
When you create an object, Adobe LiveCycle Designer automatically positions the label as specified by the control type (see the table in the Description above). For example, for a text field, the label is positioned to the left of the control.
If you need to change the position of the label text (for example, to accommodate right-to-left text directionality):
Select the object by moving the focus to it.
In the Layout palette, under Caption at the bottom of the palette, select the position of your object from the Position drop-down list.
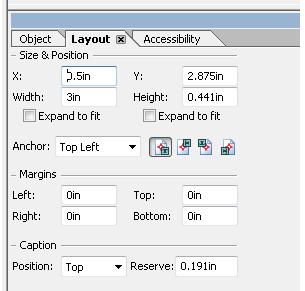
The resulting repositioned label is shown below. The label for the Date text field has been moved from the left of the field to the line above the field.
The following code fragment illustrates the use of the TU entry to provide a tooltip (or programmatically associated text label) for a form field. This is typically accomplished by an authoring tool.
<< /AP -dict-
   /DA /Helv  0 Tf 0 g
   /DR -dict-
   /F 0x4
   /FT Tx              % FT key set to Tx for Text Field
   /P -dict-
   /Rect -array-
   /StructParent 0x1
   /Subtype Widget
   /T Date you are available   % Partial field name Date
   /TU Date you are available: use MM/DD/YYYY format % TU tool tip value serves as short description
   /Type Annot
   /V Pat Jones
>>
...
<Start Stream>
 BT
  /P <</MCID 0 >>BDC
  /CS0 cs 0  scn
  /TT0 1 Tf
    -0.001 Tc 0.003 Tw 11.04 0 0 11.04 72 709.56 Tm
    [(P)-6(le)-3(as)10(e)-3( )11(P)-6(rin)2(t)-3( Y)8(o)-7(u)2(r N)4(a)11(m)-6(e)]TJ
  0 Tc 0 Tw 9.533 0 Td
  ( )Tj
  -0.004 Tc 0.004 Tw 0.217 0 Td
  [(\()-5(R)-4(e)5(q)-1(u)-1(i)-3(r)-3(e)-6(d)-1(\))]TJ
 EMC
  /P <</MCID 1 >>BDC
  0 Tc 0 Tw 4.283 0 Td
  [( )-2( )]TJ
   EMC
   /ArtifactSpan <</MCID 2 >>BDC
   0.002 Tc -0.002 Tw 0.456 0 Td
  [(__)11(___)11(___)11(___)11(___)11(_)11(____)11(___)11(___)11(__)]TJ
  0 Tc 0 Tw 13.391 0 Td
  ( )Tj
  EMC
 ET
<End Stream>
Resources are for information purposes only, no endorsement implied.
For each form control, verify visually that the label is positioned correctly in relation to the control.
For each form control, verify that the name is programmatically associated with the control by one of the following:
Open the PDF document with a tool that is capable of showing the name associated with the control and verify that the name is associated correctly with the control.
Use a tool that exposes the document through the accessibility API, and verify that the name is associated correctly with the control.
#1 and #2 are true.
If this is a sufficient technique for a success criterion, failing this test procedure does not necessarily mean that the success criterion has not been satisfied in some other way, only that this technique has not been successfully implemented and can not be used to claim conformance.
PDF documents that contain links
This technique relates to:
Note: This technique must be combined with other techniques to meet SC 2.4.4. See Understanding SC 2.4.4 for details.
See User Agent Support Notes for PDF11. Also see PDF Technology Notes.
The purpose of this technique is to show how link text in PDF documents can be marked up to be recognizable by keyboard and assistive technology users. That is, the link information is programmatically available to user agents so that links are recognizable when presented in a different format. This is typically accomplished by using a tool for authoring PDF.
Links in PDF documents are represented by a Link tag and objects in its sub-tree, consisting of a link object reference (or Link annotation) and one or more text objects. The text object or objects inside the Link tag are used by assistive technologies to provide a name for the link.
The simplest way to provide links that comply with the WCAG success criteria is to create them when authoring the document, before conversion to PDF.
However, in some cases, it may not be possible to create the links using the original authoring tool. In these cases, Adobe Acrobat Pro can be used to create the link. But, because the tooltip created using the Link dialog in Adobe Acrobat Pro is not accessible to screen readers, be sure that the link text or the link context makes the purpose clear.
In all cases, link purpose should be made clear as described in the general techniques:
This example is shown with Microsoft Word. There are other software tools that perform similar functions. See the list of other software tools in PDF Authoring Tools that Provide Accessibility Support.
To create a hyperlink in Microsoft Word, first locate the item (e.g., web page) to link to. Then:
Either
Select Insert on the ribbon and select Hyperlink in the Links tools
Or, use the CTRL+K keyboard shortcut
On the Insert Hyperlink dialog, add the link destination and link text.
Save the file as tagged PDF. (See the PDF Technology Notes.)
This example is shown with OpenOffice.org Writer. There are other software tools that perform similar functions. See the list of other software tools in PDF Authoring Tools that Provide Accessibility Support.
On the Insert menu, select Hyperlink.
In the Hyperlink dialog, insert the target URI in the Target field under Hyperlink Type.
Insert the link text in the Text field under Further Settings. (You can also select the link text from the document text before bringing up the dialog. The Text field will be filled in with the selected text.)
Save the file as tagged PDF. (See the PDF Technology Notes.)
This example is shown with Adobe Acrobat Pro. There are other software tools that perform similar functions. See the list of other software tools in PDF Authoring Tools that Provide Accessibility Support.
Select the text that will become the link text.
Access the context menu and select Create Link.

3. Follow the instructions in the Create Link dialog to specify the link appearance, as shown below.
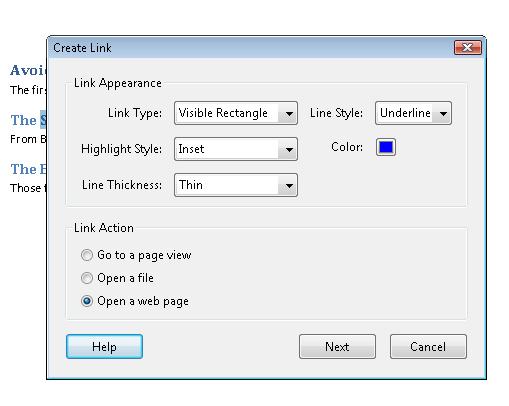
Then select Next and specify the URI. The image below shows the resulting hyperlink and tooltip.
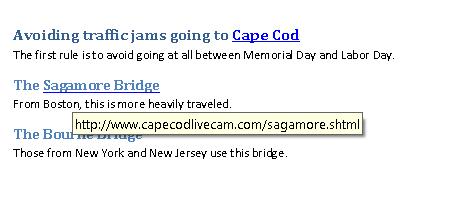
This example is shown in operation in the working example of creating a hyperlink in PDF.
Link annotations in PDF documents are associated with a geometric region of a page rather than a particular object in a content stream. For this reason, link annotations alone are not useful for users with visual impairments, or to applications that must determine which content can be activated to invoke a hypertext link.
Tagged PDF /Link elements use PDF's logical structure to establish the association between content items and link annotations, providing functionality comparable to HTML hypertext links.
In HTML, the following example produces text containing a hypertext link:
Here is some text <a href="http://www.w3.org/WAI/"> with a link </a> inside.
In PDF the page must be painted first and then a link annotation placed over the area where the object action will occur.
The following code fragment shows PDF equivalent to the HTML above; it uses link text displayed in blue and underlined. A second code fragment follows, indicating the associated logical structure hierarchy. This is typically accomplished by an authoring tool.
 /P <</MCID 0>>                                                %Marked Content Sequence 0 (paragraph)
  BDC                                                          %Begin marked content sequence
   BT                                                          %Begin text object
    /F1 11.04 Tf                                               %set text font and size
    1 0 0 1 72.024 709.54 Tm                                   %set text matrix
    0 g                                                        %set non stroking color to black
    0 G                                                        %set stroke color to black
   [(H)3(ere )-4(is s)10(o)5(m)-4(e)9( t)-3(e)9(xt)-3( )] TJ   %Show text preceding the link" Here is some text"
   ET                                                          %end text object
  EMC                                                          %end marked content sequence

 /Span <</MCID 1>>                                             %Marked Content Sequence 1 (underlined link text)
  BDC                                                          %Begin marked content sequence
   BT                                                          %Begin text object
    1 0 0 1 152.42 709.54 Tm                                   %set text matrix
    0 0 1 rg                                                   %set non-stroking color to blue
    0 0 1 RG                                                   %set stroke color to blue
    [(with a )-2(li)3(n)14(k)] TJ                              %Show link text " with a link"
   ET                                                          %end text object
    0 0 1 rg                                                   %set stroke color to blue
    152.42 707.62 45.984 0.72 re                               %rectangle operator - target area for the link
    f*                                                         %fill the path using the even-odd rule
  EMC                                                          %end marked content sequence

 /P <</MCID 2>>                                                %Marked Content Sequence 2 (paragraph)
  BDC                                                          %Begin marked content sequence
   BT                                                          %begin text object
    1 0 0 1 198.41 709.54 Tm                                   %set text matrix
    0 g                                                        %set non stroking color to black
    0 G                                                        %set stroke color to black
    [( )] TJ                                                   %empty text string showing white space
   ET                                                          %end text object
   BT                                                          %begin text object
    1 0 0 1 200.93 709.54 Tm                                   %set text matrix
    [(in)5(sid)5(e.)] TJ                                       %show text following the link "inside."
   ET                                                          %end text
   BT                                                          %begin text object
    1 0 0 1 229.97 709.54 Tm                                   %set text matrix
    [( )] TJ                                                   %empty text string showing white space
   ET                                                          %end text object
  EMC                                                          %end marked content sequence
The following code fragment is an excerpt from the logical structure that establishes the association between the content items and the link annotation:
 11 0 obj                                              %Object ID 11, generation   0, obj keyword
  <</K[1                                               %immediate child of the structure tree root
   <<
    /Obj 26 0 R                                        %reference to Object 26
    /Type/OBJR                                         %this object describes an indirect object reference
   >>]
    /P 12 0 R
    /Pg 17 0 R
    /S/Link
  >>
 endobj

 26 0 obj                                              %object ID 26 which is referenced by the OBJR in Object 11
  <</A 31 0 R
   /BS
   <</S/S
     /Type/Border
     /W 0
   >>
   /Border[0 0 0]                                      %a colorless border
   /H/I
   /Rect[150.128 694.558 200.551 720.0]                %the boundaries defining target area where link annotation is active
   /StructParent 1
   /Type/Annot                                         %Structure element is an annotation
   /Subtype/Link
  >>                                                   %It is a link annotation
 endobj
 31 0 obj                                              %Object 31, gen 0, obj
  <</S/URI                                             %Object type is URI action
    /URI(http://www.w3.org/WAI)                        %The Uniform resource identifier to resolve
  >>
 endobj
Resources are for information purposes only, no endorsement implied.
Section 14.8.4.4.2 (Link Elements) in PDF 1.7 (ISO 32000-1)
For each hyperlink, verify that the link is correctly tagged and the link text is properly exposed:
Read the PDF document with a screen reader, listening to hear that the link is read correctly and that it describes the purpose of the link (i.e., its destination).
Visually scan the tag tree to verify that the link is tagged correctly and the link text is exposed (for screen magnifier users and sighted users with cognitive disabilities).
Use a tool that is capable of showing the /Link entry value to open the PDF document and view the hyperlink and link text.
Use a tool that exposes the document through the accessibility API and verify that the link has the correct link text.
Tab to each link and check that it can be followed to its target by pressing Enter.
#1 or #2 or #3 or #4 is true.
#5 is true.
If this is a sufficient technique for a success criterion, failing this test procedure does not necessarily mean that the success criterion has not been satisfied in some other way, only that this technique has not been successfully implemented and can not be used to claim conformance.
Tagged PDF documents with interactive form fields.
This technique relates to:
See User Agent Support Notes for PDF12. Also see PDF Technology Notes.
The objective of this technique is to ensure that assistive technologies can gather information about and interact with form controls in PDF content.
The types of PDF form controls are: text input field, check box, radio button, combo box, list box, and button.
Providing name, role, state, and value information for all form components enables compatibility with assistive technology, such as screen readers, screen magnifiers, and speech recognition software used by people with disabilities.
The PDF specification defines how name, role, and value are set for form controls in Section 12.7.4 (Field Types) of PDF 1.7 (ISO 32000-1), as shown in the following table. The Comments column explains how Adobe Acrobat Pro displays the corresponding information.
| Interactive Form Dictionary Entries | Used to Define | Comments |
|---|---|---|
| FT | Role | Controls that share field type also use field flags to set the appropriate role. In Adobe Acrobat the role for form controls is set automatically. |
| TU | Name | In Adobe Acrobat the TU entry value is provided via the Tooltip field in the form control's Properties dialog. This should not be confused with the T entry which is defined as the Name in Acrobat's form control properties dialog - the name field in the Properties dialog is not used to provide the name for a control when read by assistive technologies. |
| CA | Name (Pushbuttons only) | In Adobe Acrobat the CA entry value is provided via the label field in the form control's Properties dialog. |
| V | Value | The Value entry is set by the user interacting with the control, where a value is needed. |
| DV | Default Value | In Adobe Acrobat the DV entry value can be set in the form control's Properties dialog. |
The following table describes how the role, name, value, and state are defined for PDF form controls created using Adobe Acrobat Pro. Adobe LiveCycle Designer provides the same controls as well as several additional ones: see Example 2 below.
| PDF form element | Role (FT entry) | Name (TU entry) | Value (V entry) | Configurable States |
|---|---|---|---|---|
| Text field | Text
/Tx
| Tooltip | Default value (DV entry in field dictionary) can be set in the Properties dialog. Value is entered by user. | Read Only, Required, Multiline, Password |
| Check box | Check box
/Btn
| Tooltip | V entry is set to 'Yes' or 'No' depending on Checked state. | Read Only, Required, Checked |
| Radio button | Radio button
/Btn (Field Flag set to 'Radio') | Tooltip | V entry is set to 'Yes' or 'No' depending on Checked state. | Read Only, Required, Checked |
| Combo box | Combo box
/Ch (Field Flag set to 'Combo') | Tooltip | Default value (/DV) can be set in the Properties dialog. Value is determined by user selection. | Read Only, Required |
| List box | Drop-down list
/Ch
| Tooltip | Default value (/DV) can be set in the Properties dialog. Value is determined by user selection. | Read Only, Required |
| Button | Push button
/Btn (Field Flag set to 'Pushbutton') | Label (CA entry instead of TU entry) | Push buttons do not have or require a value. | Read Only, Required |
| Signature field | Text
/Sig
| Tooltip | Default value (DV entry in field dictionary) can be set in the Properties dialog. Value is entered by user. | Read Only, Required |
This example is shown with Adobe Acrobat Pro. There are other software tools that perform similar functions. See the list of other software tools in PDF Authoring Tools that Provide Accessibility Support.
This example uses a check box for illustration; the procedure is the same for other form controls. In Form Editing mode:
Access the context menu for the form field you are creating or modifying.
Select the Properties... dialog for the form field.
Specify the name by adding a value to the tool tip field. This will used by the accessibility API as the Name for the control and should usually be set to match the text used as a visual label for the control.
Select the Options tab.
Specify the default value and the default state, if appropriate.
The image below shows the Check Box Properties dialog, open in the General tab. (The Name field in the dialog is not needed for accessibility.)
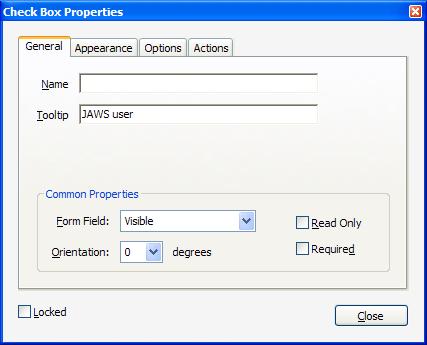
The image below shows the Check Box Properties dialog, open in the Options tab.
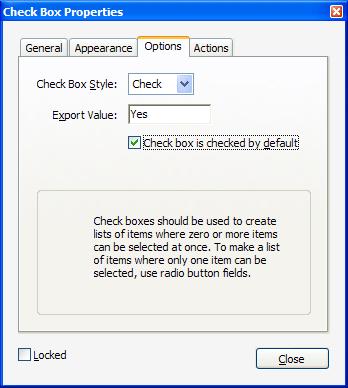
This example is shown in operation in the working example of specifying name, role, value using Acrobat Pro.
This example is shown with Adobe LiveCycle Designer. There are other software tools that perform similar functions. See the list of other software tools in PDF Authoring Tools that Provide Accessibility Support.
In Adobe LiveCycle Designer, you use the Object Library to create form objects and the Object Palette to specify name, role, state or value for the object.
The following image shows the Object Palette.
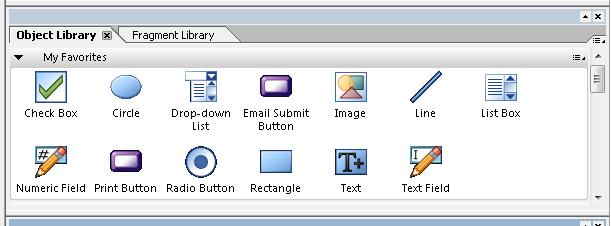
The following three images show the tabs in the Object palette. In the first the Field tab is open for specifying the type (or role) of the field.
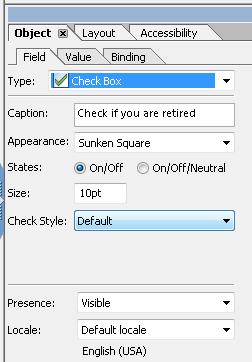
The next image shows the Value tab, with options that can be applied to the field.
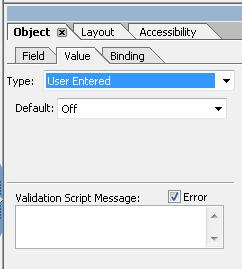
The third images shows the Binding tab, specifying the name of the field.
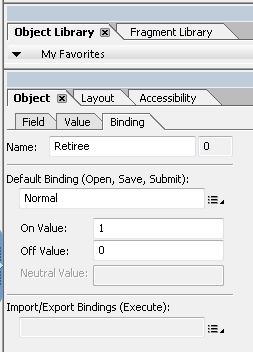
This example is shown in operation in the working example of specifying name, role, value using LiveCycle Designer.
The following code fragment illustrates code that is typical for a simple check box field such as shown in Examples 1 and 2. This is typically accomplished by an authoring tool.
1 0 obj
  << /FT /Btn     % Role
     /TU Retiree  % Name
     /V /Yes      % Value
     /AS /Yes
     /AP << /N << /Yes 2 0 R /Off 3 0 R>>
  >>
endobj
Resources are for information purposes only, no endorsement implied.
Section 12.7.4 (Field Types) of PDF 1.7 (ISO 32000-1)
For the form control, verify that name, role, and value/state are specified by one of the following:
Use a screen reader to navigate to the form control and check that it can be activated or that its value can be changed. Verify that the name (tooltip) and role are announced.
Use a tool capable of showing the form field information to open the PDF document and verify that the form control has the correct name, role, value, and state (if appropriate) information.
Use a tool that exposes the document through the accessibility API, and verify that the form control has the correct name, role, value, and state (if appropriate) information.
#1 is true.
If this is a sufficient technique for a success criterion, failing this test procedure does not necessarily mean that the success criterion has not been satisfied in some other way, only that this technique has not been successfully implemented and can not be used to claim conformance.
Tagged PDF documents that contain links.
This technique relates to:
Note: This technique must be combined with other techniques to meet SC 2.4.4. See Understanding SC 2.4.4 for details.
See User Agent Support Notes for PDF13. Also see PDF Technology Notes.
The objective of this technique is to provide replacement link text via the /Alt entry in the property list for a tag. This is usually not necessary, but in some situations, additional information beyond the visible link text is needed, particularly for screen reader users. Screen readers can read visible link text, but replacing the screen text with meaningful alternate text for links in a PDF document can make links more accessible.
Links in PDF documents are represented by a Link tag and objects in its sub-tree, consisting of a link object reference (or Link annotation) and one or more text objects. The text object or objects inside the Link tag are used by assistive technologies to provide a name for the link.
Authors can replace the default link text by providing an /Alt entry for the Link tag. When the Link tag has an /Alt entry, screen readers ignore the value of any visible text objects in the Link tag and use the /Alt entry value for the link text.
The simplest way to provide context-independent link text that complies with the WCAG 2.0 success criteria is to create them when authoring the document, before conversion to PDF. In some cases, it may not be possible to create the links using the original authoring tool. When editing PDF documents with Adobe Acrobat Pro, the best way to create accessible links is to use the Create Link command.
Authors should make sure that the alternate text makes sense in context of the screen text before and after the link.
This example is shown with Adobe Acrobat Pro. There are other software tools that perform similar functions. See the list of other software tools in PDF Authoring Tools that Provide Accessibility Support.
The image below shows a document converted to PDF from Oracle Open Office. Note that the visible link text is the URL for the link target. A screen reader will read the entire URI as the link text.
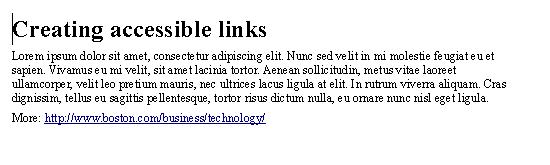
To create more accessible link text for assistive technology:
In the View menu, open the Tag panel by selecting Navigation Panels > Tags.
Locate the Link tag in the tag tree, access the context menu for the link, and select Properties.
In the TouchUp Properties dialog, in the Tags tab, enter replacement text in the Alternate Text field. Screen readers will read this text instead of the entire URI.
The next image shows the Link tag structure in the Tag panel.
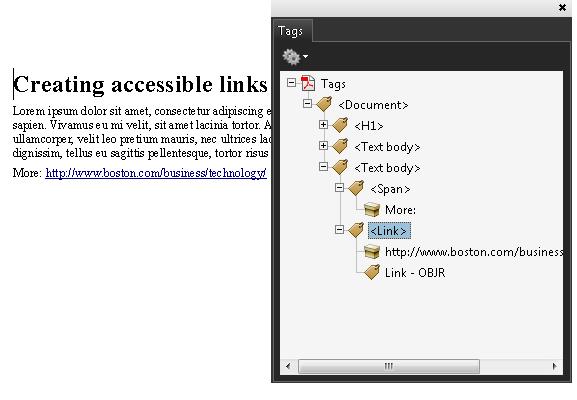
The last image shows the Alternate Text specified in the Link tag's TouchUp Properties dialog. A screen reader will read the Alternate Text as the link text.
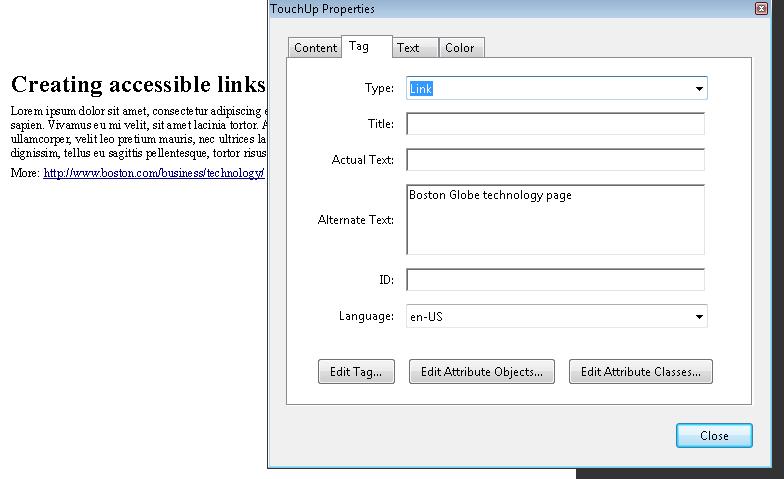
This example is shown in operation in the working example of adding alternate link text (OpenOffice file) and working example of adding alternate link text (PDF file).
The following code fragment illustrates code that is typical for alternative text for a link. This is typically accomplished by an authoring tool.
32 0 obj
<<
  /S/URI                                       %Action type (required), must be URI for a URI action
  /URI(http://www.boston.com/business/technology/)  %Uniform resource identifier(required), the URI to be resolved
>>
endobj
The following illustrates how to specify alternate text for the URL in the above link:
11 0 obj
<<
  /Alt(Boston Globe technology page)    %Alternate text entry
  /K [ 1
       <<
         /Obj 27 0 R
         /Type /OBJR            %Object reference to the link
       >>
       ]
  /P 12 0 R
  /Pg 18 0 R
  /S
  /Link
>>
endobj
Resources are for information purposes only, no endorsement implied.
Section 14.9.4 (Replacement Text) in PDF 1.7 (ISO 32000-1)
For the hyperlink, verify that the alternate link text is properly coded by one of the following:
Read the PDF document with a screen reader, listening to hear that the alternate link text is read correctly.
Use a tool that is capable of showing the /Alt entry to open the PDF document and view the hyperlink and alternate link text.
Use a tool that exposes the document through the accessibility API and verify that the alternate link text is the text for the link.
#1 is true.
If this is a sufficient technique for a success criterion, failing this test procedure does not necessarily mean that the success criterion has not been satisfied in some other way, only that this technique has not been successfully implemented and can not be used to claim conformance.
Tagged PDF documents
This technique relates to:
See User Agent Support Notes for PDF14. Also see PDF Technology Notes.
The objective of this technique is to help users locate themselves in a document by providing running headers and footers via pagination artifacts. This is normally accomplished using a tool for authoring PDF.
Running headers and footers help make content easier to use and understandable by providing repeated information in a consistent and predictable way. The content of headers and footers will vary widely depending on the document scope and content, the audience, and design decisions. Some examples of location information that may be used in headers and footers are listed below. Whether the information appears in a header or a footer is often a design decision; page numbers often appear in footers but they may alternatively appear in headers.
Document title
Current chapter and/or section in the document
Page numbers with location information such as, "Page 3-4" or "Page 9 of 15."
Author and/or date information.
Consistency helps users with cognitive limitations, screen-reader users and low-vision magnifier users, and users with intellectual disabilities understand content more readily.
The easiest way to provide page headers and footers is in the authoring tool for the document. Authoring tools typically provide features for creating header and footer text and information (such as page numbers). However, if after converting your document to PDF, you need to add or modify page headers and footers, authoring or repair tools like Adobe Acrobat Pro's Header & Footer tools can be used. In all cases, the tools generate page headers and footers in consistent and predictable layout, format, and text.
This example is shown with Microsoft Word. There are other software tools that perform similar functions. See the list of other software tools in PDF Authoring Tools that Provide Accessibility Support.
In Microsoft Word, use the Insert ribbon, which allows you to specify header, footer, and page number information and layout, as shown in the following images.
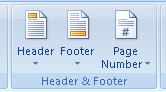
You can use these tools to specify headers and footers as shown in the following images:


When converted to PDF, the page headers and footers appear in the document.
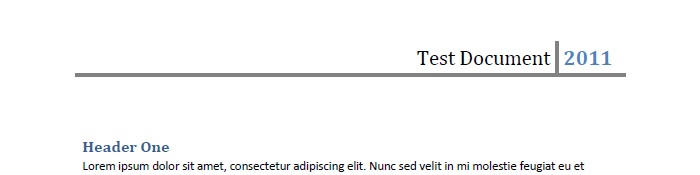

This example is shown in operation in the working example of adding running headers using Word (Word file) and working example of adding running headers using Word (PDF file).
This example is shown with OpenOffice.org Writer. There are other software tools that perform similar functions. See the list of other software tools in PDF Authoring Tools that Provide Accessibility Support.
In OpenOffice.org Writer, use the Insert > Header and Insert > Footer tools, which allow you to specify header and footer information and layout, as shown in the following images.
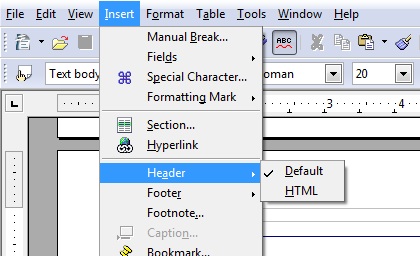
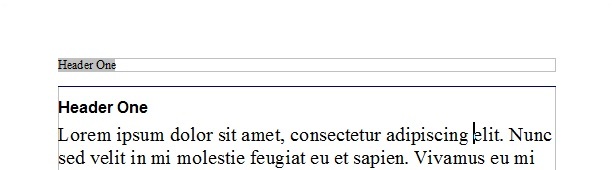

When converted to PDF, the page headers and footers appear in the document as they do in the converted Word document in Example 1.
This example is shown in operation in the working example of adding running headers using OpenOffice Writer (OpenOffice file) and working example of adding running headers using OpenOffice Writer (PDF file).
This example is shown with Adobe Acrobat Pro. There are other software tools that perform similar functions. See the list of other software tools in PDF Authoring Tools that Provide Accessibility Support.
In Adobe Acrobat Pro, you can add or modify headers and footers:
Select Document > Header & Footer > Add...
In the Add Header and Footer tool, specify text and formats for headers and footers in your document.
Use the Previews to make sure the text, fonts, and layout are as you want them for your document.
The image below shows Acrobat Pro's Add Header and Footer tool.
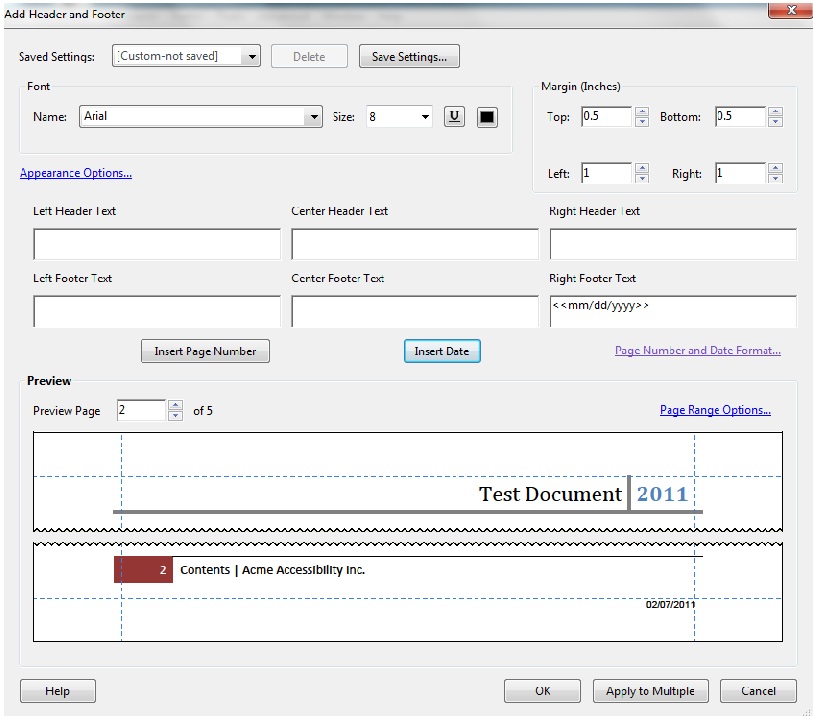
The PDF specification allows running headers and footers to be marked as "pagination artifacts" as defined in section 14.8.2.2 "Real Content and Artifacts," of PDF 1.7 (ISO 32000-1).
An artifact is explicitly distinguished from real content by enclosing it in a marked-content sequence with the /Artifact tag.
/Artifact
BMC
...
EMC
or
/Artifact propertyList
BDC
...
EMC
The first is used to identify a generic artifact; the second is used for artifacts that have an associated property list. Note: to aid in text reflow, artifacts should be defined with property lists whenever possible. Artifacts lacking a specified bounding box are likely to be discarded during reflow.
Property list entries for artifacts include Type, BBox, Attached, and Subtype.
Resources are for information purposes only, no endorsement implied.
Section 14.8.2.2 (Real Content and Artifacts) in PDF 1.7 (ISO 32000-1)
Check that running headers and/or footers are provided and contain information to help users locate themselves within the document (such as page numbers or chapter numbers).
If section headers are used in the running header or footer, check that the section header and the running header or footer are consistent.
#1 and #2 are true.
If this is a sufficient technique for a success criterion, failing this test procedure does not necessarily mean that the success criterion has not been satisfied in some other way, only that this technique has not been successfully implemented and can not be used to claim conformance.
Tagged PDF documents with forms.
This technique relates to:
See User Agent Support Notes for PDF15. Also see PDF Technology Notes.
The objective of this technique is to provide a mechanism that allows users to explicitly request a change of context using the submit-form action in a PDF form. The intended use of a submit button is to generate an HTTP request that submits data entered in a form, so it is an appropriate control to use for causing a change of context. In PDF documents, submit buttons are normally implemented using a tool for authoring PDF.
Examples 1 and 2 demonstrate how to add a submit button using specific authoring tools. There are other PDF tools that perform similar functions. Check the functionality provided by PDF Authoring Tools that Provide Accessibility Support.
This example is shown with Adobe Acrobat Pro. There are other software tools that perform similar functions. See the list of other software tools in PDF Authoring Tools that Provide Accessibility Support.
From the toolbar, select Forms > Form Tools > Button and create a button on the form.
Access the context menu for the button and select Properties... to open the Button Properties dialog.
In the General tab, provide a tooltip for the button.
In the Options tab, choose an option in the Layout menu for the button label, icon image, or both. Then, type text in the Label box to identify the button as a submit button and/or click Choose Icon and locate the image file you want to use.
In the Actions tab:
For Select Trigger, choose Mouse Up. (The Mouse Up event is keyboard accessible and, in addition, ensures that the button will not change context unexpectedly, as it might with, e.g., a Mouse Enter event.)
For Select Action, choose Submit A Form.
Click Add.
In the Add dialog, enter a URL to collect data on a server or collect form data as e-mail attachments.
The following image shows the Options tab on the Button Properties dialog.
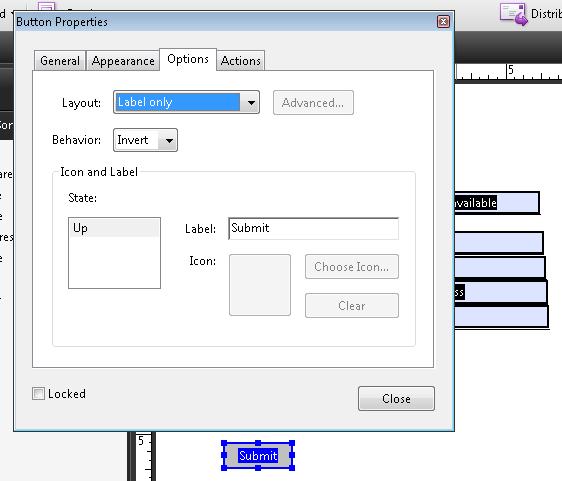
The following image shows the Actions tab on the Button Properties dialog.
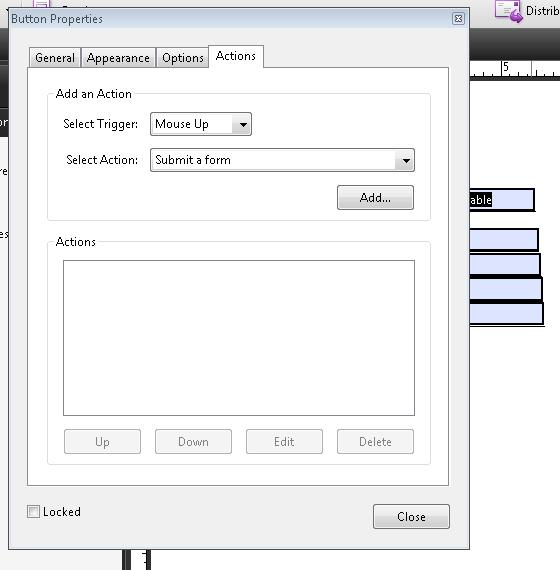
This example is shown with Adobe LiveCycle Designer. There are other software tools that perform similar functions. See the list of other software tools in PDF Authoring Tools that Provide Accessibility Support.
On the Insert > Standard menu, select the HTTP Submit Button item.
On the Object panel for the HTTP Submit Button, insert the URL for form-submission processing.
The following image shows the Standard menu with the list of form controls.

The following image shows the Object panel with the URL and other fields for button appearance.
The following JavaScript code illustrates the use of a script to specify the submit-form action. To add this script to the form field:
Open the Button Properties dialog, as shown in Example 1, and select the Actions tab
Select Run a JavaScript from the drop-down list, and select the Add button
Enter JavaScript code in the JavaScript Editor dialog, for example:
var aSubmitFields = new Array( "name", "id", "juser" );
this.submitForm({
  cURL: "http://www.example.com/cgi-bin/myscript.cgi#FDF",
  aFields: aSubmitFields,
  cSubmitAs: "FDF" // the default, not needed here
});
The following images illustrate this process:
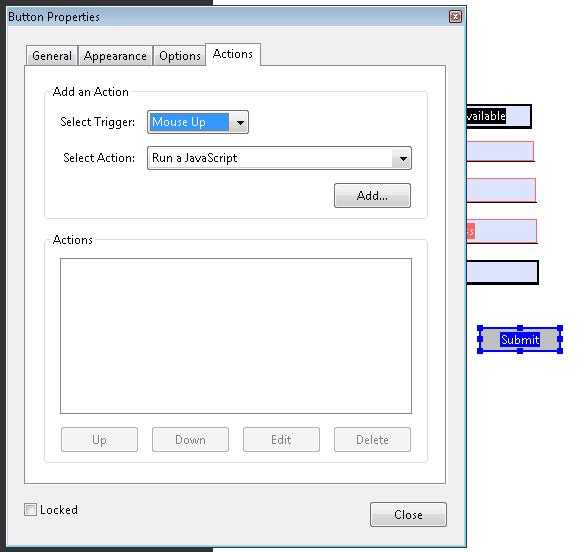
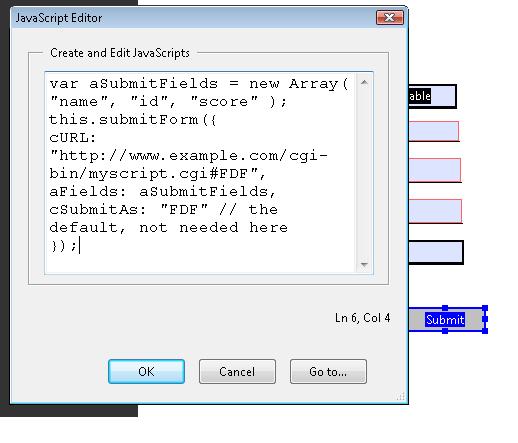
This example is shown in operation in the working example of adding a script action to a submit button.
Resources are for information purposes only, no endorsement implied.
Section 12.7.5.2 (Submit-Form Action) in PDF 1.7 (ISO 32000-1)
For each page that submits a form, visually verify that the form contains a submit button and check one of the following:
Tab to the button and check that it submits the form in response to user action to select the button.
Open the PDF document with a tool that is capable of showing the submit-form action and check that the button action is to submit the form.
#1 is true for each page that contains a form.
If this is a sufficient technique for a success criterion, failing this test procedure does not necessarily mean that the success criterion has not been satisfied in some other way, only that this technique has not been successfully implemented and can not be used to claim conformance.
Tagged PDF documents
This technique relates to:
See User Agent Support Notes for PDF16. Also see PDF Technology Notes.
The objective of this technique is to specify a document's default language by setting the /Lang entry in the document catalog. This is normally accomplished using a tool for authoring PDF.
Both assistive technologies and conventional user agents can render text more accurately when the language of the document is identified. Screen readers can load the correct pronunciation rules. Visual browsers can display characters and scripts correctly. Media players can show captions correctly. As a result, users with disabilities are better able to understand the content.
This example is shown with Adobe Acrobat Pro. There are other software tools that perform similar functions. See the list of other software tools in PDF Authoring Tools that Provide Accessibility Support.
Open the document in Adobe Acrobat Pro
From the File menu, select "Properties..."
In the "Properties" dialog, select the "Advanced" tab
In the "Reading Options" field, select the default language from the "Language" combo box
Note: Acrobat includes 16 preset language selections. If you need to specify a language that is not on the list, such as Russian, you must type the ISO 639 code for the language, not its name.
This example is shown in operation in the working example of adding a /Lang entry using Acrobat Pro.
This example is shown with Microsoft Word. There are other software tools that perform similar functions. See the list of other software tools in PDF Authoring Tools that Provide Accessibility Support.
Documents authored in Microsoft Word: "In some instances, even if the document language has been specified in the source file, the information about document language is not conveyed to the PDFMaker. Setting the language for an entire document in the Document Properties dialog box [see Example 1] corrects all errors related to this option."(Adobe® Acrobat® 9 Pro Accessibility Guide: Creating Accessible PDF from Microsoft® Word)
The natural language used for text in a document is determined in a hierarchical fashion, based on whether an optional /Lang entry is present in any of several possible locations. At the highest level, the document's default language may be specified by a /Lang entry in the document catalog.
The following code fragment illustrates code that is typical for using the /Lang entry in the document catalog for a document's default language (in this case, US English). (This is typically accomplished by an authoring tool.)
 1 0 obj
   << /Type /Catalog
      ...
      /Lang (en-US)
      ...
   >>
 endobj
Resources are for information purposes only, no endorsement implied.
Section 14.9.2 (Natural Language Specification) in PDF 1.7 (ISO 32000-1)
PDF Reference 1.6, 10.8.1 Natural Language Specification (PDF 8.7 Mb)
Adobe® Acrobat® 9 Pro Accessibility Guide: Creating Accessible PDF from Microsoft® Word
Verify that the default language for the document is correctly specified by applying one of the following:
Read the PDF document with a screen reader, listening to hear that the text is read in the correct natural language.
Using a PDF editor, check that the language is set to the default document language.
Use a tool which is capable of showing the /Lang entry value in the document catalog to open the PDF document and view the language settings.
Use a tool that exposes the document through the accessibility API and verify that the language is set to the default language.
#1 is true.
If this is a sufficient technique for a success criterion, failing this test procedure does not necessarily mean that the success criterion has not been satisfied in some other way, only that this technique has not been successfully implemented and can not be used to claim conformance.
Tagged PDF documents
This technique relates to:
See User Agent Support Notes for PDF17. Also see PDF Technology Notes.
The objective of this technique is to help users locate themselves in a document by ensuring that the page numbering displayed in the PDF viewer page controls has the same page numbering as the document. For example, Adobe Acrobat Pro and Reader display page numbers in the Page Navigation toolbar. The page number format is specified by the /PageLabels entry in the Document Catalog.
Many documents use specific page number formats within a document. Commonly, front matter is numbered with lowercase Roman numerals. The main content, starting on the page numbered 1, may actually be the fifth or sixth page in the document. Similarly, appendices may begin with page number 1 plus a prefix of the appendix letter (e.g., "A-1").
Authors should make sure that the page numbering of their converted documents is reflected in any page number displays in their user agent. Consistency in presenting the document's page numbers will help make navigating the document more predictable and understandable.
As an example, if /PageLabels has not been provided to describe the page number formatting, the page numbering scheme will not be reflected in the Page Navigation toolbar in Adobe Acrobat Pro or Reader. This toolbar displays the page number in a text box, which users can change to move to another page. In addition, users can select the arrows to move one page up or down in the document. The toolbar also displays the relative page number location. In the image below, the default display indicates the user is on page 1 of 4 pages.
![]()
A more direct way of going to a page is to use the shortcut for the View > Page Navigation > Page menu item. On Windows, this shortcut is "Ctrl + Shift + N"; on Mac OS, it is "Cmd + Shift + N". This brings up a dialog box to go to a specific page number.
This example is shown with Adobe Acrobat Pro. There are other software tools that perform similar functions. See the list of other software tools in PDF Authoring Tools that Provide Accessibility Support.
The example document converted from Microsoft Word 2007 has 4 pages, numbered i, ii, iii, 1. The image below shows the Word document with lowercase Roman numeral page numbering specified In Word using:
Insert ribbon > Page number > Page Number Format
In this document, a new section has been created with page numbering beginning with Arabic numeral 1 on the fourth page of the document. The document was then converted to PDF from Word.
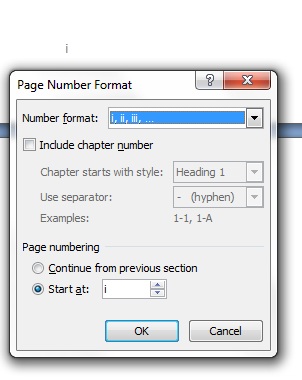
In Adobe Acrobat Pro, Select View > Navigation Panels > Pages. The following image shows the page thumbnails in the Pages panel and the Page Navigation toolbar. Both the thumbnails and the toolbar use Arabic page numbers.
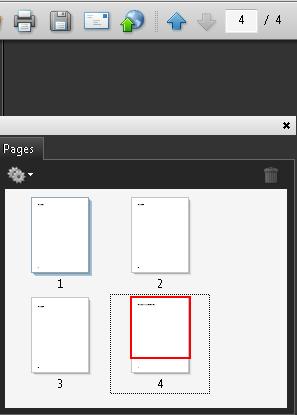
To correct the page numbers:
Select the pages to be renumbered
Access the context menu for the selected pages and select Number Pages
In the Page Numbering dialog, select the lowercase Roman numeral style and the starting page (1 by default, which is correct in this case)
Select OK
The following image shows the Page Numbering dialog and selections.

Follow the same process to change the fourth page number to Arabic numeral 1.
The following image shows the correct page numbers for the 4 pages. Note that page iii is selected in the Pages panel and the Page Navigation toolbar shows iii in the text area. In addition, the relative location in the document is shown at the right of the toolbar: "(3 of 4)."
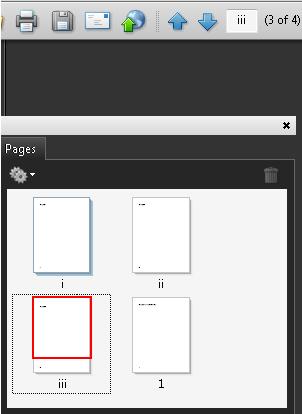
This example is shown in operation in the working example of specifying page numbers in a document converted from Word (Word file) and working example of specifying page numbers in a document converted from Word (PDF file).
The following code fragment illustrates code that is typical for specifying multiple page numbering schemes in a document.
The example below is for a document with pages labeled:
Example: i, ii, iii, iv, 1, 2, 3, A-8, A-9, …
This numbering scheme requires 3 page-label dictionaries (for lowercase Roman, Arabic, and prefixed numbers)
1 0 obj
    << /Type /Catalog
       /PageLabels << /Nums [ 0 << /S /r >>  % lowercase Roman numerals
                              4 << /S /D >>  % Arabic numerals
                              7 << /S /D     % Arabic numerals with ...
                      /P (A-)                % the prefix "A-"...
                      /St 8                  % starting at page 8
                                >>
                            ]
                    >>
       …
   >>
  endobj
Page labels are specified as follows:
/S specifies the numbering style for page numbers:
/D - Arabic numerals (1,2,3...)
/r - lowercase Roman numerals (i, ii, iii,...)
/R - uppercase Roman numerals (I, II, III,...)
/A - uppercase letters (A-Z)
/a - lowercase letters (a-z)
/P (optional) - page number prefix
/St (optional) - the value of the first page number in the range
(default: 1)
Resources are for information purposes only, no endorsement implied.
Section 12.4.2 (Page Labels) PDF 1.7 (ISO 32000-1)
For every section in the document that uses a different pagination format, check that the page navigation feature uses the same format used on the document pages:
Select the pages that begin a new pagination format and visually verify that the same format and page number is shown in the page navigation feature.
Using a screen reader, check that the page number announced in the page navigation feature is the same as the page number announced on the document page.
Using a tool that is capable of showing the /PageLabels entries, open the PDF document and view the entries.
Use a tool that exposes the document through the accessibility API, and verify that the /PageLabels entries are specified correctly.
#1 is true.
If this is a sufficient technique for a success criterion, failing this test procedure does not necessarily mean that the success criterion has not been satisfied in some other way, only that this technique has not been successfully implemented and can not be used to claim conformance.
Tagged PDF documents
This technique relates to:
Note: This technique must be combined with other techniques to meet SC 2.4.2. See Understanding SC 2.4.2 for details.
See User Agent Support Notes for PDF18. Also see PDF Technology Notes.
The intent of this technique is to show how a descriptive title for a PDF document can be specified for assistive technology by using the /Title entry in the document information dictionary and by setting the DisplayDocTitle flag to True in a viewer preferences dictionary. This is typically accomplished by using a tool for authoring PDF.
Document titles identify the current location without requiring users to read or interpret page content. User agents make the title of the page easily available to the user for identifying the page. For instance, a user agent may display the page title in the window title bar or as the name of the tab containing the page.
This example is shown with Adobe Acrobat Pro. There are other software tools that perform similar functions. See the list of other software tools in PDF Authoring Tools that Provide Accessibility Support.
Open the PDF document in Adobe Acrobat Pro:
Select File > Properties
Select the Description tab to view the metadata in the document, including the document information dictionary
Modify the Title field to add or change the document's Title entry
Note that, with Adobe Acrobat installed, you can also enter and read the data properties information from the desktop. Access the file's context menu, choose Properties, and select the PDF tab. Any information you type or edit in this dialog box also appears in the Document Properties Description when you open the file.
To display the document title in the title bar of a user agent:
Select File > Properties
Select the Initial View tab
In the Window Options section, select Document Title in the Show pull-down list.
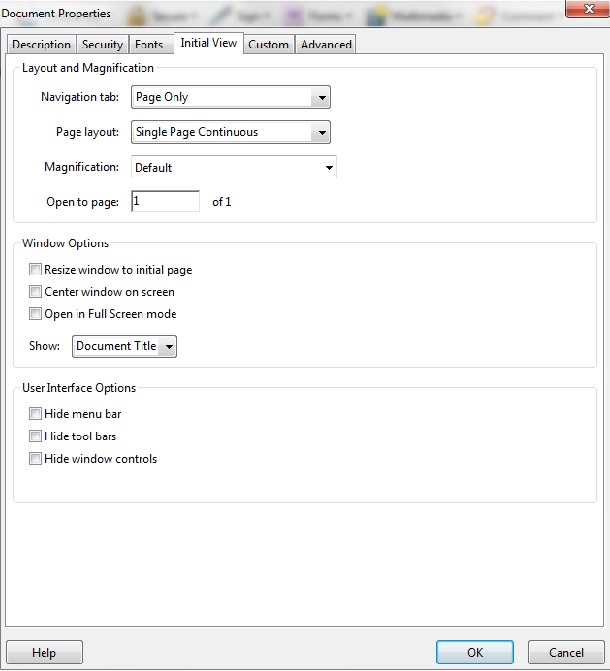
The title is displayed in the title bar, as shown in the image below.
![]()
This example is shown in operation in the working example of displaying document title in the title bar.
The following code fragment illustrates code that is typical for providing a /Title entry in a document information dictionary that contains a document title.
1 0 obj
   << /Title (Applying Guerrilla Tactics to Usability Testing by People with Disabilities)
      /Author (Mary Smith)
      /CreationDate (D:19970915110347-08'00')
   >>
endobj
Resources are for information purposes only, no endorsement implied.
Section 14.3.3 (Document Information Dictionary) in PDF 1.7 (ISO 32000-1)
PDF Reference 1.6, TITLE entry of the document information dictionary
Verify that the title for the document is correctly specified and displayed in the user agent title bar by applying one of the following:
Open the PDF document with a screen reader, listening to hear that the document title is read correctly.
Using a PDF editor, check that the document title is specified. Select the Initial View tab to check that the title will be displayed.
Use a tool which is capable of showing the /Title entry value in the document catalog to open the PDF document and view the /Title entry and /DisplayDocTitle flag settings.
#1 is true.
If this is a sufficient technique for a success criterion, failing this test procedure does not necessarily mean that the success criterion has not been satisfied in some other way, only that this technique has not been successfully implemented and can not be used to claim conformance.
Tagged PDF documents
This technique relates to:
See User Agent Support Notes for PDF19. Also see PDF Technology Notes.
The objective of this technique is to specify the language of a passage, phrase, or word using the /Lang entry to provide information in the PDF document that user agents need to present text and other linguistic content correctly. This is normally accomplished using a tool for authoring PDF.
Both assistive technologies and conventional user agents can render text more accurately when the language is identified. Screen readers can load the correct pronunciation rules. As a result, users with disabilities are better able to understand the content.
Note: This technique can be used to set the default language for the entire document if the entire document is contained in the container or tag. In this case, this technique would apply to Success Criterion 3.1.1.
This example is shown with Adobe Acrobat Pro. There are other software tools that perform similar functions. See the list of other software tools in PDF Authoring Tools that Provide Accessibility Support.
In the Tools menu, select Advanced Editing.
Select the TouchUp Reading Order Tool.
Click the Show Order Panel button in the TouchUp Reading Order Tool
Select the Tags tab in the Show Order Panel and select the paragraph that is in the different language. You can also use the Options menu in the Tags tab: select Find Tag from Selection.
Right-click the selection and select Properties in the context menu.
In the Tags tab in the Properties dialog, select the language from the drop-down list.
Note: Acrobat includes 16 preset language selections. If you need to specify a language that is not on the list, such as Russian, you must type the ISO 639 code for the language, not its name.
This example is shown with Adobe Acrobat Pro. There are other software tools that perform similar functions. See the list of other software tools in PDF Authoring Tools that Provide Accessibility Support.
Select the word or phrase that is in a different language and create a tag for it in the Reading Order Panel (e.g., Text).
Open the Tags tab in the Show Order Panel and select the tagged word or phrase that is in the different language. You can also use the Options menu in the Tags tab: select Create Tag from Selection.
Right-click the selection and select Properties in the context menu.
In the Tags tab in the Properties dialog, select the language from the drop-down list.
When you tag a word or phrase, Acrobat splits the original content into three document content tags: one for the text that precedes your selection, one for the selection, and one for the text that follows the selection. As needed, drag the document content tag for the selected text into position between the other two tags, so that the text reads in the proper order. All three tags must also be at the same level beneath their parent tag. Drag them into place if they are not.
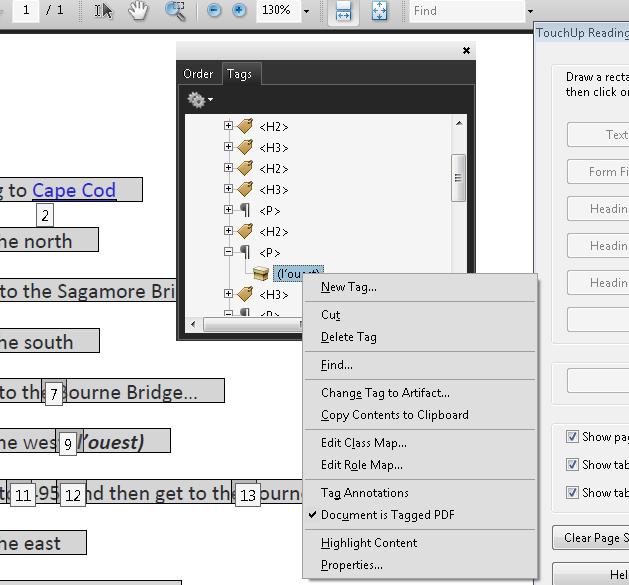
This example is shown in operation in the working example of marking a specific word or phrase in Acrobat Pro.
Below the level of the default document language, the language for a passage may be specified for the following items:
Marked-content sequences that are not in the structure hierarchy, through a /Lang entry in a property list attached to the marked-content sequence with a Span tag.
Structure elements of any type, through a /Lang entry in the structure element dictionary.
The following code fragment illustrates code that is typical for using the /Lang entry to override the default document language by specifying a marked-content sequence within a page's content stream:
   /P % Start of marked-content sequence
   BDC
      (See you later, or in Spanish you would say, ) Tj
      /Span << /Lang (es-MX) >>% Start of nested marked-content sequence
     BDC
      (Hasta la vista.) Tj
     EMC% End of nested marked-content sequence
   EMC% End of marked-content sequence
The following code fragment illustrates code that is typical for using the /Lang entry in the structure element dictionary. In this case, the /Lang entry applies to the marked-content sequence having an MCID (marked-content identifier) value of 0 within the indicated page's content stream.
1 0 obj% Structure element
  << /Type /StructElem
    /S /Span% Structure type
    /P /P% Parent in structure hierarchy
    /K<< /Type /MCR
      /Pg 2 0 R% Page containing marked-content sequence
      /MCID 0% Marked-content identifier
     >>
   /Lang (es-MX)% Language specification for this element
   >>
endobj
2 0 obj% Page object
  << /Type /Page
     /Contents 3 0 R% Content stream
   …
   >>
   endobj
3 0 obj% Page's content stream
  << /Length … >>
    stream
     BT
      /P % Start of marked-content sequence
      BDC
     (See you later, or in Spanish you would say, ) Tj
     /Span << /MCID 0 >>% Start of nested marked-content sequence
    BDC
     (Hasta la vista.) Tj
    EMC% End of nested marked-content sequence
  EMC% End of marked-content sequence
 ET
 endstream
 endobj
Resources are for information purposes only, no endorsement implied.
Section 14.9.2 (Natural Language Specification) in PDF 1.7 (ISO 32000-1)
PDF Reference 1.6, 10.8.1 Natural Language Specification (PDF 8.7 Mb)
Adobe® Acrobat® 9 Pro Accessibility Guide: Creating Accessible PDF from Microsoft® Word
Verify that the language of a passage, phrase, or word that differs from the language of the surrounding text is correctly specified by a /Lang entry on an enclosing tag or container:
Read the PDF document with a screen reader that supports the language of the phrase and the language of the surrounding text, listening to hear that the text is read in the correct natural language.
Using a PDF editor, select the word or phrase that is in the different language and check that the language is set correctly.
Use a tool which is capable of showing the /Lang entry value to open the PDF document and view the language settings.
Use a tool that exposes the document through the accessibility API and verify that the language for the passage or phrase is set correctly.
Verify that if the container or tag contains the entire document, the language setting is the language intended as the default for the document.
#1 and #2 are true.
If this is a sufficient technique for a success criterion, failing this test procedure does not necessarily mean that the success criterion has not been satisfied in some other way, only that this technique has not been successfully implemented and can not be used to claim conformance.
Tagged PDF documents with tables.
This technique relates to:
See User Agent Support Notes for PDF20. Also see PDF Technology Notes.
The purpose of this technique is to show how table cells in PDF documents can be marked up so that the logical relationships among rows and columns are preserved and recognized by assistive technology. This is typically accomplished by using a tool for authoring PDF.
However, tables converted to PDF may have incorrectly merged or split table cells, even if they were marked up correctly in the authoring tool. Authors can ensure that table cells are structured properly by using the Table Editor in Adobe Acrobat Pro's TouchUp Reading Order tool.
This example is shown with Adobe Acrobat Pro. There are other software tools that perform similar functions. See the list of other software tools in PDF Authoring Tools that Provide Accessibility Support.
This example uses a table that was marked up correctly when it was created in Microsoft Word. Some table headers span two rows in the header row; one table header spans two columns.

To check the table in the PDF document:
Advanced > Accessibility > TouchUp Reading Order...
Select the table by clicking the number in the top left hand corner of the table (3 in the reading order in the image below).
Select the Table Editor button on the TouchUp Reading Order panel. The table cells will be outlined in red and labeled with their tags. The red outlines may not exactly match up to the table cells but you should be able to determine if the cells are tagged correctly.
The following image shows the example table in the TouchUp Reading Order tool. Note that the Results header appears to span two sub-headers and the other headers to the left span the two rows in the Results header.
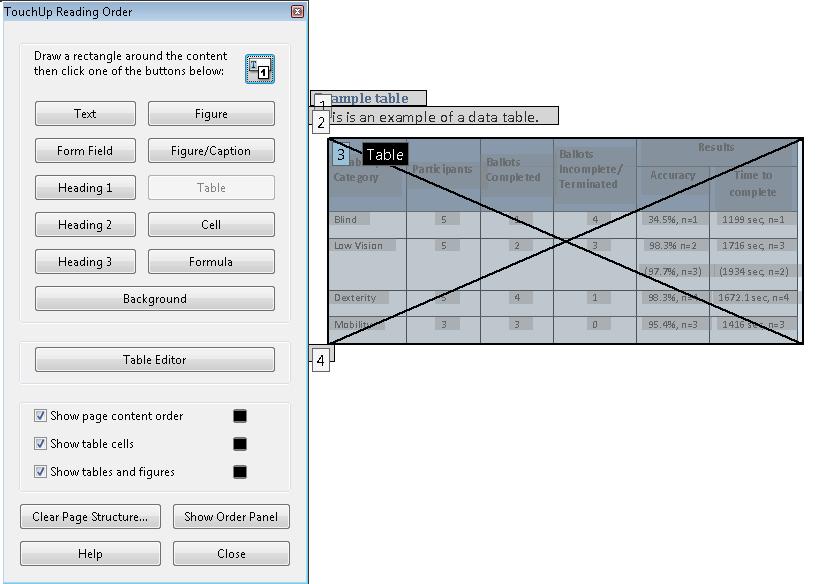
The following images shows the example table in the Table Editor. The cells are outlined in red, and the tab for each cell is displayed. Upon conversion, the Results header was incorrectly split and does not span its two sub-headers. The headers to the right were incorrectly split into 2 cells each and do not span the Results headers. In addition, the incorrectly split cells were merged into one cell.
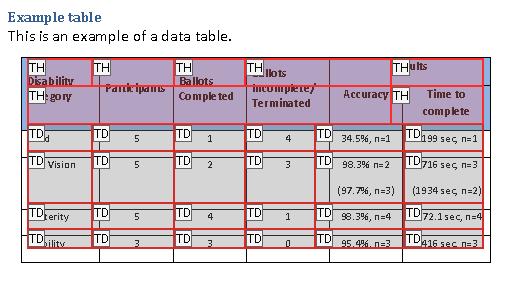
To repair the Results header:
Select the header in the table (it will be outlined in blue when selected)
Access the context menu
Select Table Cell Properties...
In the Table Cell Properties dialog, change the Column Span from 1 to 2
Press OK. You'll get a warning that the change might result in a malformed table structure. In this case, the change is correct. The cell you changed should change color to show the new span, as shown in the following image.
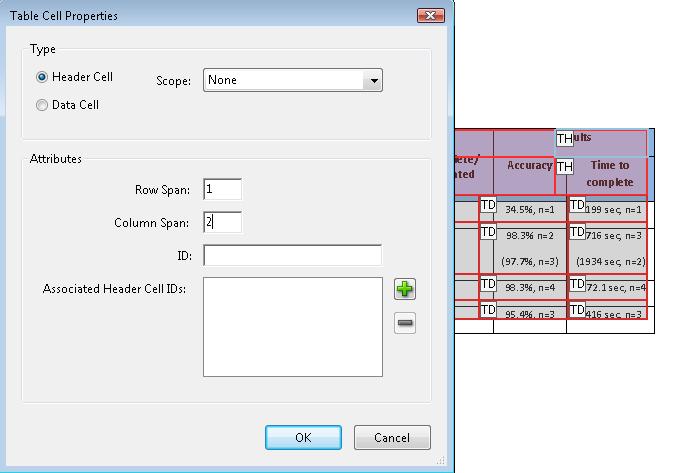
Similarly, to repair the incorrectly split header cells to the left of Results header:
Select the top cell in the column (it will be outlined in blue when selected)
Access the context menu
Select Table Cell Properties...
In the Table Cell Properties dialog, change the Row Span from 1 to 2
Press OK. The following image shows the correction being made to the last header cell, with the corrected header cells to its left.
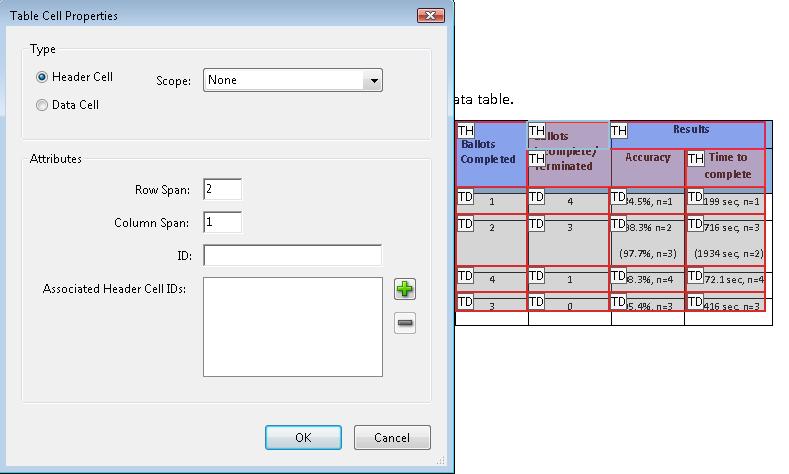
The following image shows the repaired example table.
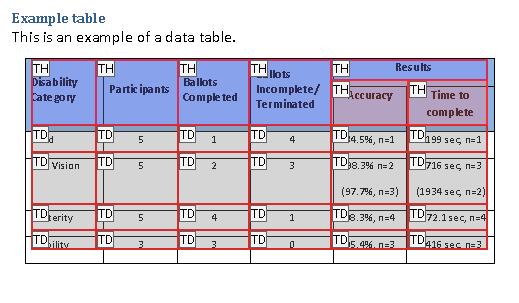
This example is shown in operation in the working example of repairing table structure (Word file) and working example of repairing table structure (PDF file).
The following code fragment illustrates code that is typical for a simple table (header row and data row) such as shown in Examples 1-3:
95 0 obj                %Structure element for a table
 <<
  /A 39 0 R
  /K[96 0 R 101 0 R 106 0 R 111 0 R]
  /P 93 0 R
  /S/Table              %standard structure type is table
 >>
 endobj
96 0 obj                %Structure element for a table row
 <<
  /K[97 0 R 98 0 R 99 0 R 100 0 R]
  /P 95 0 R
  /S/TR                 %standard structure type is table row
 >>
 endobj
97 0 obj                %Structure element for a table header
 <</A[23 0 R 120 0 R]
   /K 1
   /P 96 0 R
   /S/TH                 %standard structure type is table head
   /Pg 8 0 R
 >>
endobj
104 0 obj                %Structure element for table data (cell contents)
 <<
  /A 29 0 R
  /K 7
  /P 101 0 R
  /S/TD                  %standard structure type is table data
  /Pg 8 0 R
 >>
endobj
Resources are for information purposes only, no endorsement implied.
14.8.4.3.4 (Table Elements) in PDF 1.7 (ISO 32000-1)
For a table that has been repaired with the Table Editor, confirm one of the following:
Read the PDF document with a screen reader, listening to hear that the tabular information is presented in a way that preserves logical relationships among the table header and data cells. (Configure the screen reader to not use heuristics to read table header cells.)
Using a PDF editor, verify that the appropriate TR, TH, and TD tags are in the proper reading order and hierarchy in the table tree.
Use a tool which is capable of showing the table elements to open the PDF document, view the table structure, and verify that it contains the appropriate TR, TH, and TD structures.
Use a tool that exposes the document through the accessibility API, and verify that the table structure contains the appropriate TR, TH, and TD structures, and that they are in the proper reading order and hierarchy.
#1 is true.
If this is a sufficient technique for a success criterion, failing this test procedure does not necessarily mean that the success criterion has not been satisfied in some other way, only that this technique has not been successfully implemented and can not be used to claim conformance.
Tagged PDF documents with lists.
This technique relates to:
See User Agent Support Notes for PDF21. Also see PDF Technology Notes.
The intent of this technique is to create lists of related items using list elements appropriate for their purposes. PDF files containing lists are normally created or repaired using a tool for authoring PDF.
When markup is used that visually formats items as a list but does not indicate the list relationship, users may have difficulty navigating the information. An example of such visual formatting is simply using line-breaks to separate list items.
Some assistive technologies allow users to navigate from list to list or item to item. If the lists are not correctly formatted with list tags, these users will have difficulty understanding the list content.
The easiest way to create lists in PDF content is to format them properly using list markup in the authoring tool, for example, Microsoft Word or OpenOffice.org Writer. However, if you do not have access to the source file and authoring tool, you can use Acrobat Pro's TouchUp Reading Order tool and the Tags panel.
The PDF specification defines list structure in section 14.8.4.3.3 (List Elements). The structure types for lists in PDF documents are:
L - the List tag, which contains one or more LI tags.
LI - the List Item tag. List item tags can contain Lbl and LBody tags.
Lbl - the list item label. Contains distinguishing information such as a item number or bullet character.
LBody - the list item body. Contains list item content, or in the case of a nested list, it may contain additional List tag trees.
This example is shown with Microsoft Word. There are other software tools that perform similar functions. See the list of other software tools in PDF Authoring Tools that Provide Accessibility Support.
On the Home ribbon, use the lists tools to create or repair lists in Word documents. This is the easiest way to ensure that lists are formatted correctly when they are converted to PDF.
In the image below, the numbered and bullet lists were created using the list tools. The third list did not use the list tool (see the ribbon) and the list will not be tagged as list elements when converted to PDF.
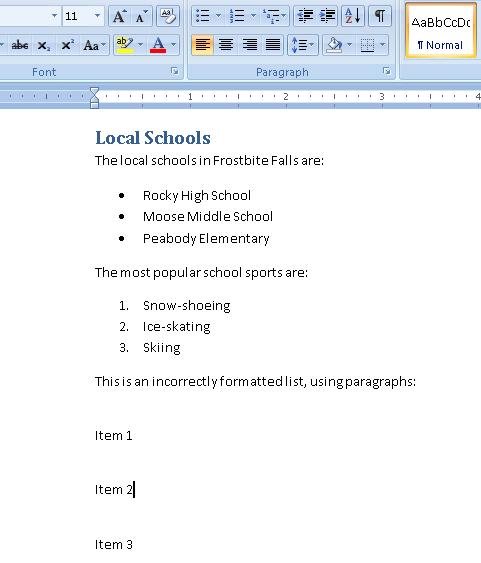
This example is shown with OpenOffice.org Writer. There are other software tools that perform similar functions. See the list of other software tools in PDF Authoring Tools that Provide Accessibility Support.
Use the Bullets and Numbering tool to create or repair lists in OpenOffice.org Writer documents. This is the easiest way to ensure that lists are formatted correctly when they are converted to PDF.
In the image below, the numbered and bullet lists were created using the list tools. The third list did not use the list tool (see the toolbar) and the list will not be tagged as list elements when converted to PDF.
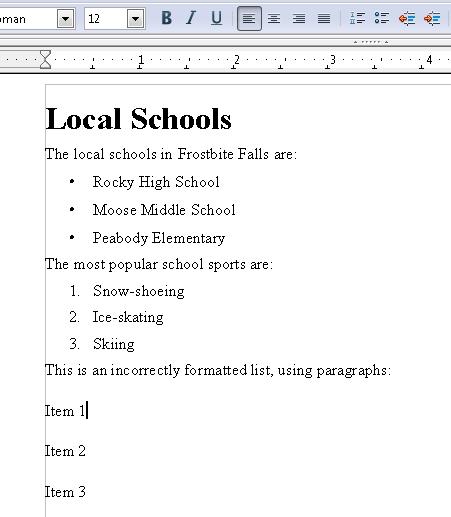
This example is shown in operation in the working example of adding lists to OpenOffice Writer documents.
This example is shown with Adobe Acrobat Pro. There are other software tools that perform similar functions. See the list of other software tools in PDF Authoring Tools that Provide Accessibility Support.
View > Navigation Panels... > Tags
Inspect the lists in the document to determine which, if any, are not formatted properly.
In the following image, the third list is formatted as text. The list items are separated only by line-breaks. Assistive technology may not be able to render the list intelligibly for users.

To repair the list, use the Tags panel to create list tags in the content.
The following image shows the resulting first list item correctly formatted.
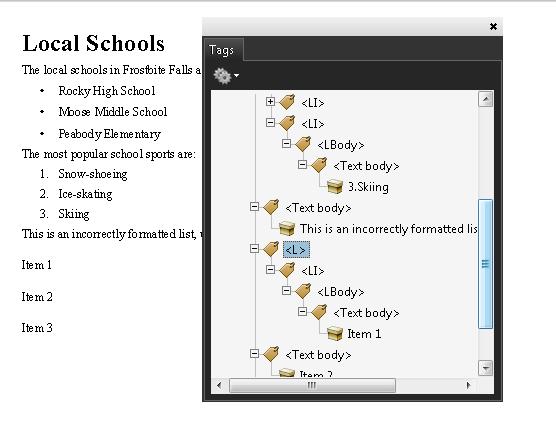
This example is shown in operation in the working example of ensuring lists are properly formatted in Acrobat Pro.
The following code fragment illustrates code that is typical marking up a list hierarchy in PDF documents. It uses the simple numbered list in the previous examples. This is typically accomplished by an authoring tool.
4 0 obj
  <</Type /Page
    /Contents 5 0 R
  >>

endobj
5 0 obj
  << /Length 3 0 R >>
  stream
   /P <</MCID 1>> BDC
      BT T* (The most popular sports are:) Tj ET EMC
   /Lbl <</MCID 11>> BDC
      BT T* (1. ) Tj ET EMC
   /LBody <</MCID 12>> /BDC
      BT (Snow-shoeing ) Tj ET EMC
   /Lbl <</MCID 21>> BDC
      BT T* (2. ) Tj ET EMC
   /LBody <</MCID 22>> /BDC
      BT (Ice-skating ) Tj ET EMC
   /Lbl <</MCID 31>> BDC
      BT T* (3. ) Tj ET EMC
   /LBody <</MCID 32>> /BDC
      BT (Skiing ) Tj ET EMC
endstream
endobj

101 0 obj                 % Structure element for intro paragraph to list ("The most popular sports are:")
  << /Type /StructElem
     /S /P
     /P 201 0 R
     /Pg 4 0 R
     /K 1
  >>
endobj

111 0 obj                  % Structure element for first item, list label (Lbl): "1."
  << /Type /StructElem
     /S /Lbl
     /P 211 0 R
     /Pg 4 0 R
     /K 11
  >>
endobj

112 0 obj
  << /Type /StructElem     % Structure element for first item, list text (LBody): ("Snow-shoeing")
     /S /LBody
     /P 211 0 R
     /Pg 4 0 R
     /K 12
  >>
endobj

... [ objects 121-122 and 131-132, referencing MCIDs 21-22 and 31-32 are omitted in the interest of space. ]

201 0 obj
  << /Type /StructElem
     /S /Caption            % Intro paragraph
     /P 400 0 R
     /K [101 0 R]
  >>
endobj

211 0 obj
  << /Type /StructElem
     /S /LI                 % List item for "1. Snow-shoeing"
     /P 400 0 R
     /K [111 0 R 112 0 R]
  >>
endobj

212 0 obj
  << /Type /StructElem
     /S /LI                 % List item for "2. Ice-skating"
     /P 301 0 R
     /K [121 0 R 122 0 R]
  >>
endobj

213 0 obj
  << /Type /StructElem
     /S /LI                 % List item for "3. Skiing"
     /P 301 0 R
     /K [131 0 R 132 0 R]
  >>
endobj

400 0 obj
  << /Type /StructElem
     /S /L                   % Top-level structure element in the list hierarchy
     /K [201 0 R 211 0 R 212 0 R 213 0 R]
  >>
endobj
Resources are for information purposes only, no endorsement implied.
Section 14.8.4.3.3 (List Elements) in PDF 1.7 (ISO 32000-1)
For a list in a PDF document, verify in one of the following ways:
Read the PDF document with a screen reader, listening to hear that list is read correctly when reading the content line-by-line.
Use a tool that is capable of showing lists to open the PDF document and view the list to check that it is correctly structured.
Inspect the tag tree to verify that the list is structured according to the PDF specification.
Use a tool that exposes the document through the accessibility API and verify that the list is correctly structured.
#1 is true
If this is a sufficient technique for a success criterion, failing this test procedure does not necessarily mean that the success criterion has not been satisfied in some other way, only that this technique has not been successfully implemented and can not be used to claim conformance.
Tagged PDF documents
This technique relates to:
See User Agent Support Notes for PDF22. Also see PDF Technology Notes.
The objective of this technique is to notify the user when user input to a field that requires a specific, required format (e.g., date fields) is not submitted in that format.
If the required format is not used, an alert dialog describes the nature of the error in text. This may be accomplished through scripting created by the author (see, for example, SCR18: Providing client-side validation and alert). User agents, such as Adobe LiveCycle can provide automatic alerts (as described in the examples below).
Note: Once the user dismisses the alert dialog, it may be helpful if the script positions the keyboard focus on the field where the error occurred, although some users may expect the focus to remain on the last control focused prior to the alert appearing. Authors should exercise care to ensure that any movement of the focus will be expected. For example, if the alert announces an error in a phone number format, positioning the focus on the phone number field when the alert is dismissed can be regarded as helpful and expected. In some cases, however, this may not be possible. If multiple input errors occur on the page, an alternative approach to error notification should be implemented.
Ensuring that users are aware an error has occurred, can determine what is wrong, and can correct it are key to software usability and accessibility. Meeting this objective helps ensure that all users can complete for-based transactions with ease and confidence.
It is also important that users are aware that an error may occur. You can incorporate this information in labels; for example, "Date (MM/DD/YYYY)." See PDF10: Providing labels for interactive form controls in PDF documents.
This example is shown with Adobe Acrobat Pro. There are other software tools that perform similar functions. See the list of other software tools in PDF Authoring Tools that Provide Accessibility Support.
Many fields -- telephone number, postal code, date -- must have data entered in a specific format or pattern.
Access the context menu for the form control that requires a specific format.
Select Properties...
In the Format tab, select the Format Category (in this case, Date). The Date Options appear.
Select the format for this form control (in this case, mm/dd/yyyy).
In the General tab, specify "Date (mm/dd/yyyy)" for the Name and Tooltip for the control.
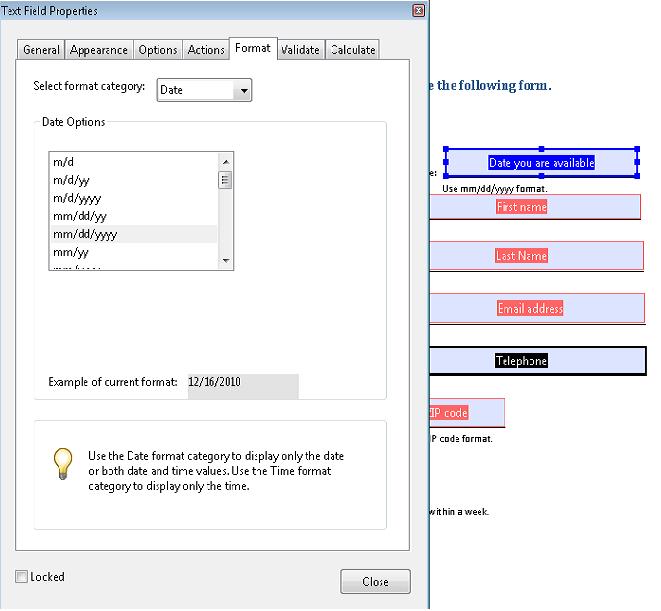
When a user types a recognized date format, it is converted automatically to the specified format. If the date format or value is not recognized, an error alert appears and provides further information, as shown in the image below.
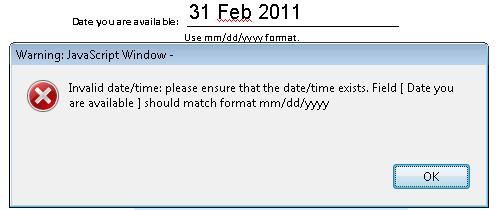
This example is shown in operation in the working example of Required Fields in Acrobat.
This example is shown with Adobe LiveCycle Designer. There are other software tools that perform similar functions. See the list of other software tools in PDF Authoring Tools that Provide Accessibility Support.
Select the form control that has a required format.
In the Object palette, click the Validation Pattern... button.
Because this is a date field the Patterns-Date Field dialog appears. Select the pattern or format you want users to enter. Then click OK.
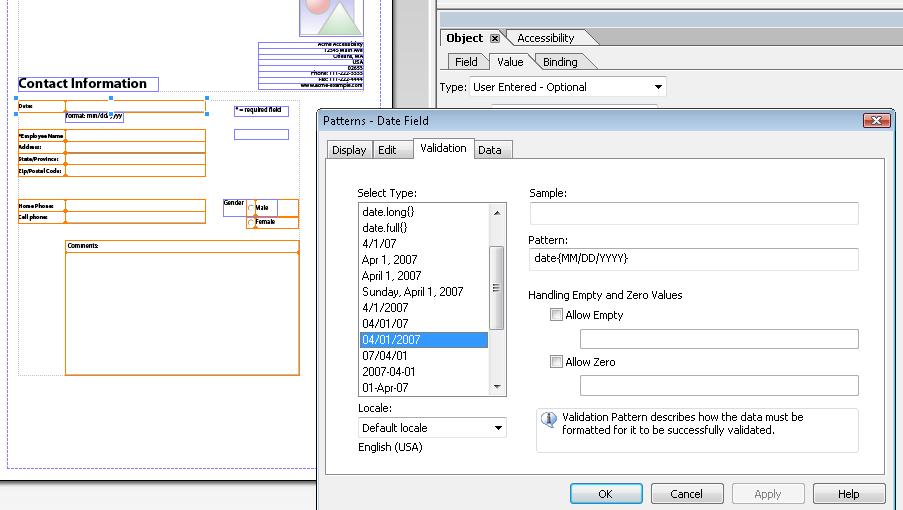
In the Object palette, use the Validation Pattern Message box to type a warning message. Be sure to include the required pattern. This message appears when a user tries to submit the form using an invalid date format.
This example is shown in operation in the working example of Required Fields in LiveCycle Designer.
This example is shown with Adobe Acrobat Pro. There are other software tools that perform similar functions. See the list of other software tools in PDF Authoring Tools that Provide Accessibility Support.
The following JavaScript code illustrates the use of a script to validate form fields, in this case, a date field. To add this script to the form field, open the Text Field Properties dialog, as shown in Example 1, and select Edit in the Validate tab:
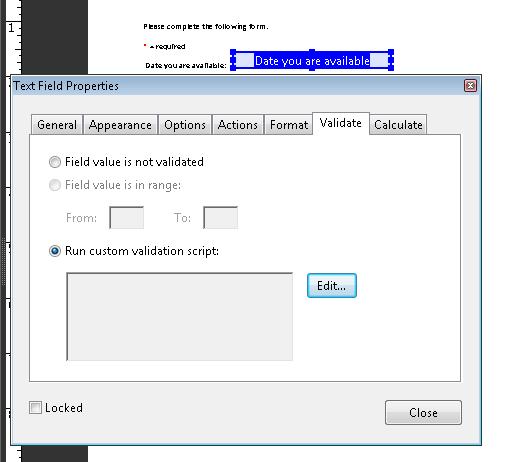
// JavaScript code for date mask format MM/DD/YYYY
var re = /^[mdy0-9]{2}\/[mdy0-9]{2}\/[mdy0-9]{4}$/
//Allow blank space in field
if (event.value !="") {
  if (re.test(event.value) == false) {
    app.alert ({
       cTitle: "Incorrect Format",
       cMsg: "Please enter date using mm/dd/yyyy format"
    });
  }
}
Resources are for information purposes only, no endorsement implied.
For each form field that requires specific input, verify that validation information and instructions are provided by applying the following:
Check that the format or value that is required is indicated in the form control's label.
Use an erroneous format or value and move off the field: make sure that an alert describing the error is provided.
#1 and #2 are true.
If this is a sufficient technique for a success criterion, failing this test procedure does not necessarily mean that the success criterion has not been satisfied in some other way, only that this technique has not been successfully implemented and can not be used to claim conformance.
Tagged PDF documents with forms.
PDF forms created using Adobe LiveCycle Designer.
This technique relates to:
See User Agent Support Notes for PDF23. Also see PDF Technology Notes.
The objective of this technique is to ensure that interactive form controls in PDF documents allow keyboard operation. Interactive PDF forms are generally created using a tool for authoring PDF. Form controls are implemented in PDF documents either as described in Section 12.7 (Interactive Forms) of PDF 1.7 (ISO 32000-1) or as described in the Adobe XML Forms Architecture (XFA).
The types of PDF form controls are: text input field, check box, radio button, combo box, list box, and button.
Form controls allow users to interact with a PDF document by filling in information or indicating choices, which can then be submitted for processing. Users who rely on keyboard access must be able to recognize and understand the form fields, make selections, and provide input to complete the forms, and submit the form, just as sighted users can.
Interactive form controls can be provided for forms created by converting a scanned paper form to tagged PDF or by creating a form in an authoring application such as Microsoft Word or Open Office and converting it to tagged PDF.
However, documents created by authoring applications that provide form design features might not fully retain their fillable form fields on conversion to PDF. Complex forms in particular may not have properly converted form fields and labels when tagged in conversion.
Using Adobe Acrobat Pro with forms in converted documents, you can ensure that form fields are keyboard accessible and usable by:
Opening tagged PDF documents with form fields and creating interactive PDF form elements with the Run Form Fields Recognition tool.
Modifying fillable form fields, or adding form fields, using Adobe Acrobat Pro or Adobe LiveCycle Designer.
Using Adobe LiveCycle Designer, you can create forms from scratch.
This example is shown with Adobe Acrobat Pro. There are other software tools that perform similar functions. See the list of other software tools in PDF Authoring Tools that Provide Accessibility Support.
If you have a form in a tagged PDF document (created by scanning a paper form or using an authoring tool to generate tagged PDF), you can use Adobe Acrobat Pro to make the form elements keyboard accessible in the same page locations as the static form.
Use Advanced > Accessibility > Run Form Field Recognition to automatically detect form fields and make them fillable.
The following image shows the Run Form Field Recognition tool is selected to detect form fields in a document converted to tagged PDF.
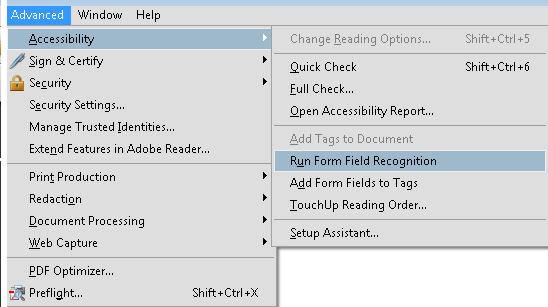
The following image shows the resulting form fields after the Run Form Recognition tool is run.
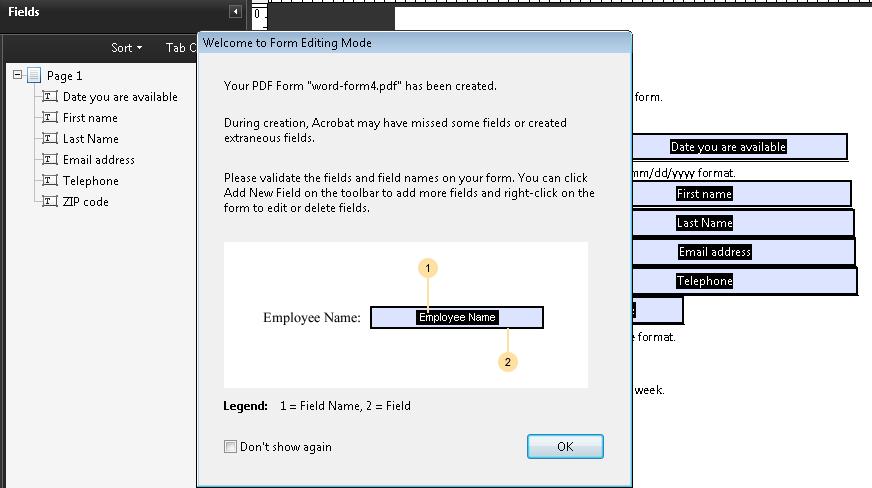
This example is shown in operation in the working example of Interactive Controls in Acrobat.
This example is shown with Adobe Acrobat Pro. There are other software tools that perform similar functions. See the list of other software tools in PDF Authoring Tools that Provide Accessibility Support.
You can add keyboard accessible form controls to your form as follows:
Forms > Add or Edit Fields... This puts the form in Form Editing mode.
Open the Add New Field menu on the upper left, and select a form field to add. The image below shows the menu of fields.
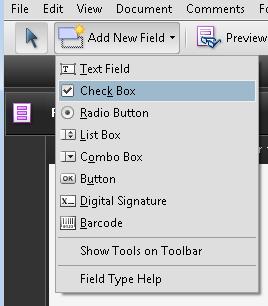
The following image shows a checkbox added to the form in Example 1.
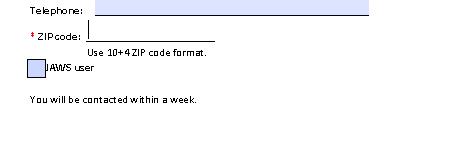
This example is shown in operation in the working example of Interactive Controls in LiveCycle Designer.
This example is shown with Adobe Acrobat Pro. There are other software tools that perform similar functions. See the list of other software tools in PDF Authoring Tools that Provide Accessibility Support.
To edit fields, select the context menu for the field and select Properties... The properties menu for that form field lets you modify it, as shown in the following image.

Note: The tooltip is not keyboard accessible but will be screen-reader accessible: see PDF12: Providing name, role, value information for form fields in PDF documents.
This example is shown with Adobe LiveCycle Designer. There are other software tools that perform similar functions. See the list of other software tools in PDF Authoring Tools that Provide Accessibility Support.
You can use Adobe LiveCycle Designer to create new forms. In addition to invoking this standalone tool from the Windows Start menu, you can invoke it in Adobe Acrobat Pro:
Forms > Start Form Wizard...
Select the No Existing Form radio button, as shown in the following image.
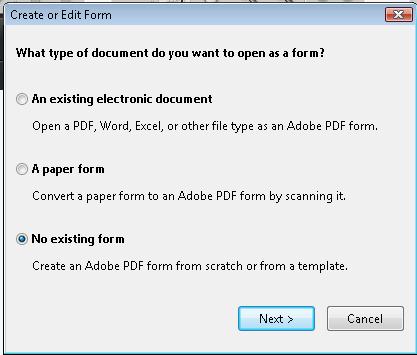
Clicking Next invokes LiveCycle Designer and the first page of the New Form Assistant. as shown in the following image.
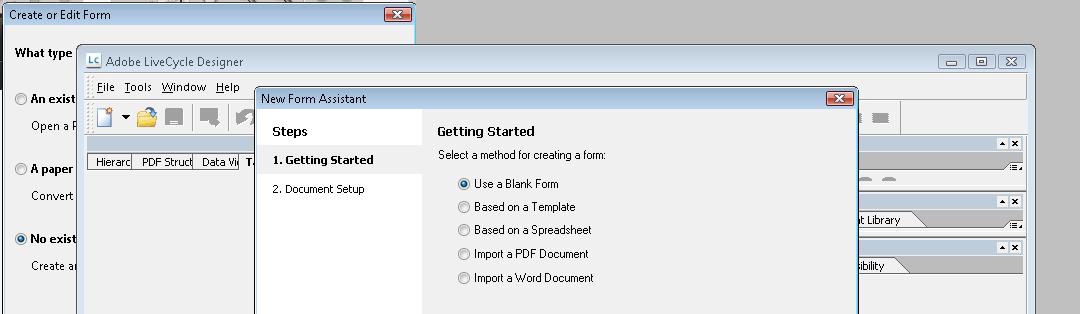
When you invoke LiveCycle Designer from the Windows Start menu, the Form Wizard is available from File > New...
The New Form Assistant creates a blank form. Use the Object Library in the right pane to select form controls.
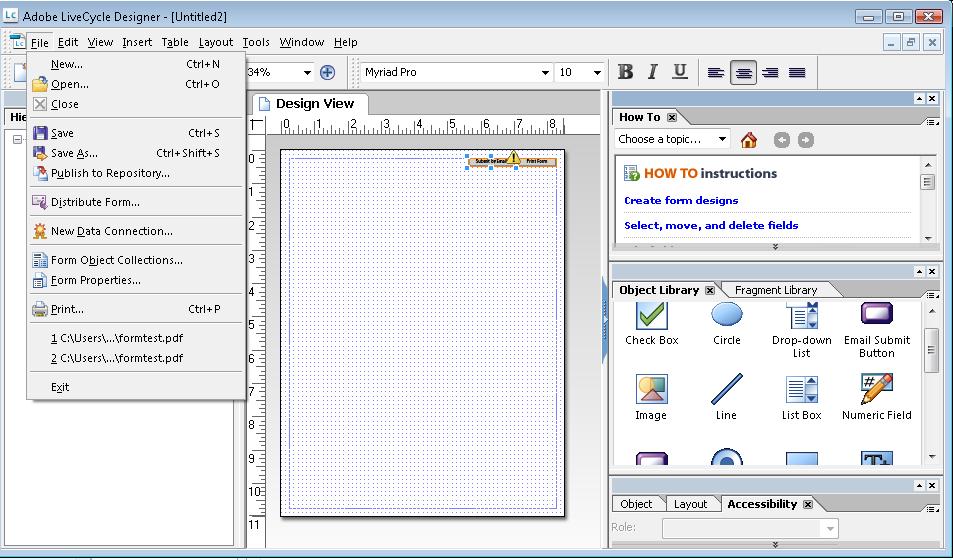
You can also use LiveCycle Designer to create forms based on commonly used forms templates.
Invoke the Template Assistant wizard from the New pulldown: ![]() .
.
Select Forms and then select an appropriate type of form. Then, you can personalize the form by swapping out placeholder text, graphics, form fields, and properties with custom objects that you provide or define.
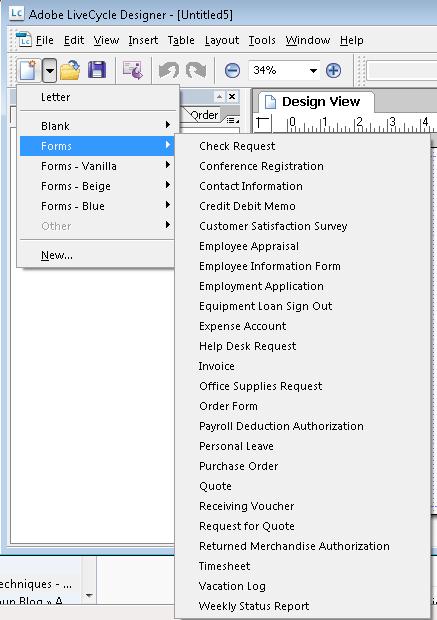
The following code fragment illustrates code that is typical for a simple text field such as shown in Examples 1 and 2. This is typically accomplished by an authoring tool.
<< /AP -dict-
   /DA /Helv  0 Tf 0 g
   /DR -dict-
   /F 0x4
   /FT Tx              % FT key set to Tx for Text Field
   /P -dict-
   /Rect -array-
   /StructParent 0x1
   /Subtype Widget
   /T Date you are available   % Partial field name Date
   /TU Date you are available: use mm/dd/yyyy format % TU tool tip value serves as short description
   /Type Annot
   /V Pat Jones
>>
...
<Start Stream>
 BT
  /P <</MCID 0 >>BDC
  /CS0 cs 0  scn
  /TT0 1 Tf
    -0.001 Tc 0.003 Tw 11.04 0 0 11.04 72 709.56 Tm
    [(P)-6(le)-3(as)10(e)-3( )11(P)-6(rin)2(t)-3( Y)8(o)-7(u)2(r N)4(a)11(m)-6(e)]TJ
  0 Tc 0 Tw 9.533 0 Td
  ( )Tj
  -0.004 Tc 0.004 Tw 0.217 0 Td
  [(\()-5(R)-4(e)5(q)-1(u)-1(i)-3(r)-3(e)-6(d)-1(\))]TJ
 EMC
  /P <</MCID 1 >>BDC
  0 Tc 0 Tw 4.283 0 Td
  [( )-2( )]TJ
   EMC
   /ArtifactSpan <</MCID 2 >>BDC
   0.002 Tc -0.002 Tw 0.456 0 Td
  [(__)11(___)11(___)11(___)11(___)11(_)11(____)11(___)11(___)11(__)]TJ
  0 Tc 0 Tw 13.391 0 Td
  ( )Tj
  EMC
 ET
<End Stream>
Resources are for information purposes only, no endorsement implied.
Section 12.7 (Interactive Forms) in PDF 1.7 (ISO 32000-1)
For each form control, verify that it is properly implemented by tabbing to each form control and checking that it can be activated or that its value can be changed from the keyboard.
#1 is true.
If this is a sufficient technique for a success criterion, failing this test procedure does not necessarily mean that the success criterion has not been satisfied in some other way, only that this technique has not been successfully implemented and can not be used to claim conformance.