JigAdmin is the new way to administer a Jigsaw server. A short description of how to use JigAdmin should be read prior to reading this page.
When you click on one resource, depending on the class of this resource, several "helpers" are called. When available, the "Shortcut Helper" is the first helper shown. The helpers are:
tototo
Click on the "control" resource, you must see in the right part of the window four BIG buttons, with all the allowed actions:
Adding a realm to the edited server is very easy. You only have to click on the "realms" resource. Int the right part of JigAdmin, you will see the realms helper, like this:
Now you simply have to enter a realm name, then press return or click on the "Add Realm" button. If the "realms" node was open, the new realm should be visible now.
Adding an user to a realm is as easy as adding a realm. When you click on the resource, the "users" helper appears in the right part of the window, like this:
Enter the name of the new user, press return or click the "Add User" button and a new user is created, and shown if the realm was expanded.
Select the realm or the user to be destroyed and click on the "Delete resource" button located at the bottom right of your window. In general, this is the way to destroy any resource that can be deleted.
Select the user, the "attributes" helper will appear in the right part of the window. Do all your modification, the click on "Commit" to validate them. If you don't click on commit, your changes will be cancelled if you move to another resource. While editing the attributes of the user, you can reset the attributes to the ones found on the server by click on the "reset" button.
The shortcut helper has been designed to help webmasters to do all the basic commands on Jigsaw with the shortest number of clicks. For Container resource, you will have two entries:
For resources that are not a Container, the only shortcut available is the add of an authorization filter.
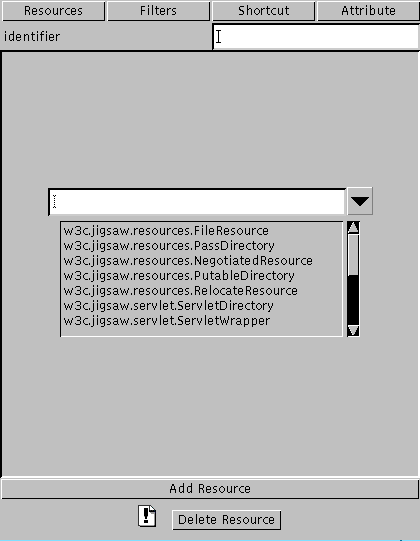
This helper is active only on Container resources, as it allows you to add sons to the container. To add a resource, enter the name of the new resource in the "identifier" field, find the right Resource class in the ComboBox, or type if directly, then click on "Add Resource". If the container node was expanded, the new resource should appear in the Server tree on the left part of the window.
The filters helper is very similar to the resources helper when you want to add a new filter, the only difference is that you don't have to enter an identifier name. The Filters helper will also show you the filters already applied to the resource, both the ones directly attached to the resource and the inherited ones, as you may see in the example below.
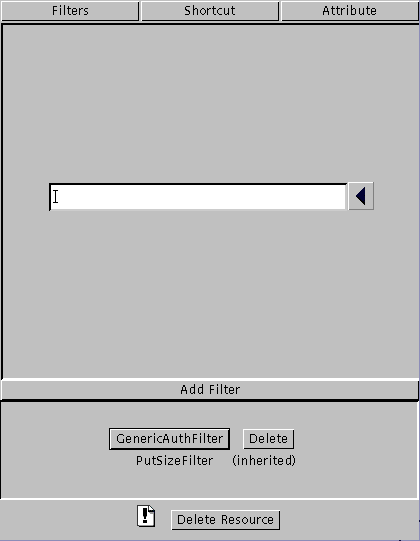
To delete a filter, juste click on the "delete" button. To edit the filter, juste click on the button with the filter's name. An attributes helper will appear in the upper part of the filters helper, which will allow you to edit the attributes of the filter. See the next paragraph to see how to use this helper. To go back to the previous page, to add new filters, click on the "back to add filter menu" button.
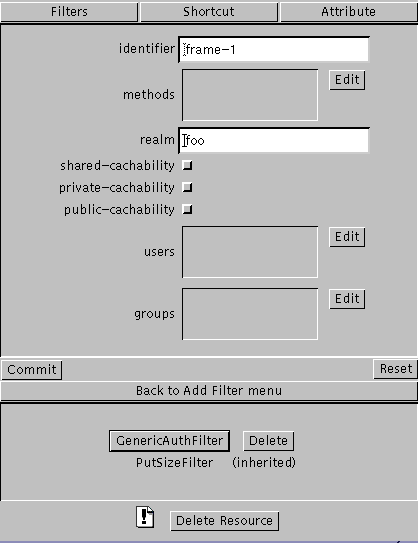
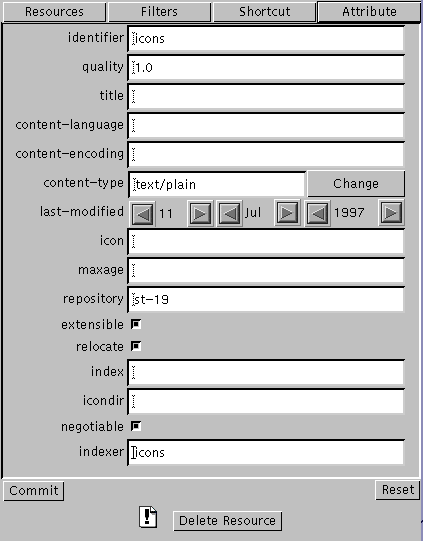
This helper allows you to modify the attributes of a resource. Depending
on the type of attribute you will edit, you will juste type what you want
in the text field, click on checkboxes or click on a button to use a more
sophisticated editor.
If you did some mistakes while editing, you don't need to worry as the changes
are only in the client when you type. To reset to the values to the original
ones, click on the "Reset" button.
To REALLY modify the attributes values, you must click on the "Commit" button
located bottom left of the helper, like in the following example:
If you know how to use the attributes helper, then you know how to edit the properties. The changes are done in the server as soon as you press on the "Commit" button of the attributes helper.
NOTE: some properties are not shown with the complete propery name. In SocketConnectionProp, aliases has been used to give more meaningful information on the properties edited.
Adding a new indexer is like adding a realm to the server's realm catalog or adding a resource in a Container resource. You simply have to provide an identifer.
Yves Lafon
$Id: JigAdm.html,v 1.3 1997/07/28 12:02:21 ylafon Exp $