This CSS Image Values and Replaced Content module has two parts: First,
it defines the syntax for <image> values
in CSS. <image> values can be a single
URI to an image, a list of URIs denoting a series of fallbacks, a
reference to an element in the document, or gradients. Second, it defines
properties used to control the interaction of replaced content and the CSS
layout algorithms. These properties can affect the used image resolution
for bitmaps, the replaced object's orientation, and whether and how to
preserve the object's aspect ratio.
Status of this document
This section describes the status of this document at the time of
its publication. Other documents may supersede this document. A list of
current W3C publications and the latest revision of this technical report
can be found in the W3C technical reports
index at http://www.w3.org/TR/.
Publication as a Working Draft does not imply endorsement by the W3C
Membership. This is a draft document and may be updated, replaced or
obsoleted by other documents at any time. It is inappropriate to cite this
document as other than work in progress.
The (archived) public
mailing list www-style@w3.org (see
instructions) is preferred
for discussion of this specification. When sending e-mail, please put the
text “css3-images” in the subject, preferably like this:
“[css3-images] …summary of
comment…”
In CSS Levels 1 and 2, image values, such as those used in the
‘background-image’ property, could
only be given by a single URI value. This module introduces additional
notations that allow a 2D image to be given as a list of URIs denoting
fallbacks, as a reference to an element in the document, and as a
gradient.
2. Conformance
A document or implementation cannot conform to CSS Image Values &
Replaced Content Level 3 alone, but can claim conformance to CSS Image
Values & Replaced Content Level 3 if it satisfies the conformance
requirements in this specification when implementing CSS or another host
language that normatively references this specification.
Conformance to CSS Image Values & Replaced Content Level 3 is defined
for three classes:
minimal
A device that does not implement CSS Transitions, CSS Animations, nor
CSSOM may ignore the chapters on Serializing and Interpolating values for
the purpose of claiming conformance.
transition-capable
A device that implements CSS Transitions or CSS Animations must
conform to the minimal class, and
additionally must implement the chapter on Interpolation.
CSSOM-capable
A device that implements CSSOM must conform to the minimal class, and additionally must implement
the chapter on Serialization.
The conformance requirements are expressed with a combination of
descriptive assertions and RFC 2119 terminology. The key words "MUST",
"MUST NOT", "REQUIRED", "SHALL", "SHALL NOT", "SHOULD", "SHOULD NOT",
"RECOMMENDED", "MAY", and "OPTIONAL" in the normative parts of this
document are to be interpreted as described in RFC 2119. However, for
readability, these words do not appear in all uppercase letters in this
specification. All of the text of this specification is normative except
sections explicitly marked as non-normative, examples, and notes. [RFC2119]
Examples in this specification are introduced with the words "for
example" or are set apart from the normative text with
class="example", like this:
This is an example of an informative example.
Informative notes begin with the word "Note" and are set apart from the
normative text with class="note", like this:
Note, this is an informative note.
3. Resolution Units: the
<resolution> type
This specification defines the following units as part of the <resolution> value type:
dpi
dots per inch
dpcm
dots per centimeter
dppx
dots per ‘px’ unit
The <resolution> unit represents the size of a single "dot" of an
image. For raster images, a dot is an image pixel. A <resolution>
defines how many of these dots fit in a CSS ‘in’, ‘cm’, or ‘px’ so that images can be sized accordingly.
The default resolution of raster images in CSS is ‘1dppx’, which is equivalent to ‘96dpi’. The concept of "resolution" does not apply
to vector image formats like SVG; generally, this means that any attempt
to change the resolution of a vector image is simply meaningless.
Individual uses of the <resolution> value define precisely what effects
they have on raster and vector images.
Printers tend to have substantially higher resolution than computer
monitors; due to this, an image that looks fine on the screen may look
pixellated when printed out. A <resolution> may be used in the
‘image-resolution’ property to embed a
high-resolution image into the document that maintains an appropriate
size, ensuring attractive display both on screen and on paper:
img.high-res {
	image-resolution: 300dpi;
}
With this set, an image meant to be 5 inches wide that was saved at
300dpi will actually display as 5 inches wide; without this set, the
image would display as approximately 15.6 inches wide since the image is
15000 image pixels across, and by default there are 96 image pixels per
inch.
4. Image Values: the <image> type
The <image> value type denotes a 2D image. It is defined as
...the background of the element will be the portion of the image that
starts at (40px,0px) and is 20px wide and tall, which is just the circle
with a quarter filled in.
* SVG-in-<img> support required. Click the picture to view
the SVG directly.
Note that a legacy UA that doesn't understand the media
fragments notation will ignore the fragment and simply display the
entirety of an image specified with ‘url’. However, since URLs with media fragment
identifiers can also be used in the ‘image()’ notation defined below, authors can take
advantage of CSS's forward-compatible parsing rules to provide a fallback
when using an image fragment URL:
In the example below, the ‘image()’
notation is used together with the media fragment syntax, so that UAs
that don't support media fragments fail to parse the second declaration
and use the first.
background-image: url('swirl.png'); /* old UAs */
background-image: image('sprites.png#xywh=10,30,60,20'); /* new UAs */
4.2. Image Fallbacks and
Annotations: the ‘image()’ notation
The ‘image()’ function allows an
author to specify an image with fallback images to be used if the original
image can't be decoded or is a type that the browser doesn't recognize.
Additionally, the author can specify a color as an ultimate fallback to be
used when none of the images can be.
Along with each URL, the author may specify a directionality, similar to
adding a dir attribute to an element in HTML. The image
represented by the function takes on the directionality of the used URL.
If a directional image is used on or in an element with opposite
directionality, the image must be flipped in the inline direction (as if
it was transformed by, e.g., scaleX(-1), if the inline
direction is the X axis).
So that authors can take advantage of CSS's forwards-compatible parsing
rules to provide a fallback for image slices, implementations that support
the ‘image()’ notation must
support the xywh=#,#,#,# form of media fragment identifiers
for images. [MEDIA-FRAGS]
Multiple arguments can be given separated by commas, in which case the
function represents the first <string> representing an image that the
browser can successfully load and display. The final argument can specify
a <color> to serve as an ultimate fallback; this can be used, e.g. for
‘background-image’, to ensure
adequate contrast if none of the preceding <image-decl>s can be used.
If the final argument is a <color>, it represents a solid-color image
of the given color with no intrinsic
dimensions.
The rule below would tell the UA to load ‘wavy.svg’ if it can; failing that to load
‘wavy.png’; failing that to display
‘wavy.gif’; and finally, if none of
the images can be loaded and displayed, to use the color ‘rgba(0,0,255,0.5)’ to create a dimensionless
background image. For example, the browser might not understand how to
render SVG images, the PNG may be malformed, and the GIF might not exist
on the server and return an HTML 404 error page instead of an image.
The ‘background-size’ property
specifies that dimensionless images by default stretch to cover the
entire background positioning area [CSS3BG], so if none of the
specified images can be displayed the background will be painted
semi-transparent blue. As with any image, this fallback will be painted
over the ‘background-color’ (if
any).
At times, one may need a solid-color image for a property or function
that does not accept the <color> type directly. The ‘image()’ function can be used for this: by
specifying only a color without any URLs, the function
immediately falls back to representing a solid-color image of the chosen
color.
In the above, the background is the image "bg-image.png", overlaid with
partially-transparent blue.
4.3. Using Elements as
Images: the ‘element()’ function
The ‘element()’ function allows an
author to use an element in the document as an image. As the referenced
element changes appearance, the image changes as well. This can be used,
for example, to create live previews of the next/previous slide in a
slideshow, or to reference a canvas element for a fancy generated gradient
or even an animated background. The syntax for ‘element()’ is:
where <id-selector> is an ID selector [SELECT], and <identifier> is an
identifer [CSS3VAL].
If the argument to the ‘element()’
function is an ID selector, the function references the element matched by
the selector. If it's an identifier, the function references the element
whose CSS element reference
identifier is the given identifier. (CSS does not define how an
element acquires a CSS
element reference identifier; that is determined by the host
language.)
The image represented by the ‘element()’ function can vary based on a number of
factors. The function must represent the image described by the first set
of conditions, following, that are true:
The function doesn't reference an element
The function represents a solid-color transparent-black image with no
intrinsic dimensions.
The function represents an image with the dimensions and appearance of
the paint source.
The host language defines the dimensions and appearance of paint sources.
The function references an element that is not rendered
The function references an element that is a descendant of a replaced
element
The function represents a solid-color transparent-black image with no
intrinsic dimensions.
Otherwise
The function represents an image with width and height equal to the
bounding box of the referenced element. The image must be constructed by
rendering the referenced element and its descendants at the same size
that the element would be in its document, over an infinite
transparent-black canvas, positioned so that the edges of the referenced
element's bounding box is flush with the edges of the image. Note: Because images clip anything outside their bounds by
default, this means that decorations that extend outside the bounding
box, like box-shadows or some border-images, may be clipped.
If the referenced element has a transform applied to it or an
ancestor, the transform must be ignored when rendering the element as an
image. If the referenced element is broken across pages, the element
must be displayed as if the page content areas were joined flush in the
pagination direction (elements broken across lines or columns just
render with their bounding box, as normal, which may have unintended
visual effects).
Implementations may either re-use existing bitmap data generated for the
referenced element or regenerate the display of the element to maximize
quality at the image's size (for example, if the implementation detects
that the referenced element is an SVG fragment); in the latter case, the
layout of the referenced element in the image must not be changed by the
regeneration process. That is, the image must look identical to the
referenced element, modulo rasterization quality.
TODO: Create examples of all of the above cases.
Host languages may define that some elements provide a paint source. Paint sources have
an intrinsic width, height, and appearance, separate from the process of
rendering, and so may be used as images even when they're not being
rendered. Examples of elements that provide paint sources are the
<linearGradient>, <radialGradient>, and <pattern> elements in
SVG, or the <img>, <video>, and <canvas> elements in HTML.
Detecting and Resolving
Circular Relationships Introduced by ‘element()’
The ‘element()’ function can produce
nonsensical circular relationships, such as an element using itself as its
own background. These relationships can be easily and reliably detected
and resolved, however, by keeping track of a dependency graph and using
common cycle-detection algorithms.
Populate the dependency graph initially by having every element depend
on each of its children. Then, whenever a property on an element A uses
the ‘element()’ function to refer to an
element B, add an edge to the graph by having A depend on B. If a
dependency cycle is detected, any ‘element()’ functions that produced a dependency in
the cycle must represent a fully transparent image with no intrinsic
dimensions.
Someone else needs to review this and make sure that I'm not
missing any cycles.
5. Gradients
A gradient is an image that smoothly fades from one color to another.
These are commonly used for subtle shading in background images, buttons,
and many other things. The two functions described in this section allow
an author to specify such an image in a terse syntax, so that the UA can
generate the image automatically when rendering the page. The syntax of a
<gradient> is:
Gradients are a type of image, and can be used anywhere an image can,
such as in the ‘background-image’
or ‘list-style-image’ properties.
As with the other <image> types
defined in this specification, gradients can be used in any property that
accepts images. For example:
background: linear-gradient(white, gray);
list-style-image: radial-gradient(circle, #006, #00a 90%,
     #0000af 100%, white 100%)
A gradient is drawn into a box with the dimensions of the concrete object size. Elsewhere in
this section this rectangle is simply called the "box".
A gradient has no intrinsic
dimensions. This means that, for example, if you use a gradient in
the ‘background-image’ property
(with ‘background-size’ at the
default value and ‘background-repeat’ not equal to ‘round’), the box will simply be the size of
the background sizing area. Similarly, for a gradient used as a
list-style-image, the box would be a 1em square.
5.1. Linear Gradients
A linear gradient is created by specifying a gradient-line and then
several colors placed along that line. The image is constructed by
creating an infinite canvas and painting it with lines perpendicular to
the gradient-line, with the color of the painted line being the color of
the gradient-line where the two intersect. This produces a smooth fade
from each color to the next, progressing in the specified direction.
The first argument to the function specifies the gradient-line, which gives the gradient a direction
and determines how color-stops are positioned. It may be omitted; if so,
it defaults to "to bottom".
The gradient-line may be specified
in two different ways. The first is by specifying the angle the gradient-line should assume; for the
purposes of this argument, 0deg points upwards, 90deg points toward the
right, and positive angles go clockwise. The starting-point and
ending-point of the gradient-line are
determined by extending a line in both directions from the center of the
box at the angle specified. In the direction of the angle, the
ending-point is the point on the gradient-line where a line drawn
perpendicular to the gradient-line
would intersect the corner of the box in that direction. The
starting-point is determined identically, except in the opposite direction
of the angle.
Alternately, the direction may be specified with keywords that denote
the direction. If the argument is "to top", "to right", "to bottom", or
"to left", the gradient must be rendered identically to "0deg", "90deg",
"180deg", or "270deg", respectively. If the argument specifies a corner to
angle towards, the gradient must be rendered identically to an angle-based
gradient with an angle chosen such that the endpoint of the gradient is in
the same quadrant as the indicated corner, and a line drawn perpendicular
to the gradient-line through the center of the box intersects the two
neighboring corners.
It is expected that the next level of this module will
provide the ability to define the gradient's direction relative to the
current text direction and writing-mode.
This example illustrates visually how to calculate the gradient-line from the rules above.
This shows the starting and ending-point of the gradient-line, along with the actual
gradient, produced by an element with ‘background:
linear-gradient(45deg, white, black);’.
Notice how, though the starting-point and ending-point are outside of
the box, they're positioned precisely right so that the gradient is pure
white exactly at the corner, and pure black exactly at
the opposite corner. That's intentional, and will always be true for
linear gradients.
The gradient's color stops are typically placed between the
starting-point and ending-point on the gradient-line, but this isn't required -
the gradient-line extends infinitely
in both directions. The starting-point and ending-point are merely
arbitrary distance markers - the starting-point defines where 0%, 0px, etc
are located when specifying color-stops, and the ending-point defines
where 100% is located. Color-stops are allowed to have positions before 0%
or after 100%.
5.1.2.
Linear Gradient Examples
All of the following ‘linear-gradient()’ examples are presumed to be
backgrounds applied to a box that is 200px wide and 100px tall.
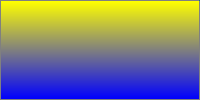
Below are various ways of specifying a basic vertical gradient:
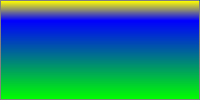
This demonstrates the use of an angle in the gradient. Note that,
though the angle is not exactly the same as the angle between the
corners, the gradient-line is still
sized so as to make the gradient yellow exactly at the upper-left corner,
and blue exactly at the lower-right corner.
This demonstrates a 3-color gradient, and how to specify the location
of a stop explicitly:
linear-gradient(yellow, blue 20%, #0f0);
This demonstrates* a corner-to-corner gradient specified with keywords.
Note how the gradient is red and blue exactly in the bottom-left and
top-right corners, respectively, exactly like the second example.
Additionally, the angle of the gradient is automatically computed so that
the color at 50% (in this case, white) stretches across the top-left and
bottom-right corners.
linear-gradient(to top right, red, white, blue)
* SVG-in-HTML support required to view the image.
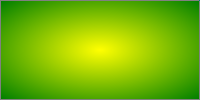
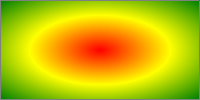
5.2. Radial Gradients
In a radial gradient, rather than colors smoothly fading from one side
of the box to the other as with linear gradients, they instead emerge from
a single point and smoothly spread outward in a circular or elliptical
shape.
A radial gradient is specified by first pinpointing the center of the
gradient, where the 0% ellipse will be, then specifying the size and shape
of the 100% ellipse, ending with a list of color-stops just like a
linear-gradient. Between the center and the ending-ellipse, and past the
ending-ellipse, concentric ellipses are drawn and colored according to the
specified color-stops.
The first argument to the function specifies the center of the ellipse.
The <position> value type is
defined as the positioning syntax of ‘background-position’
and is resolved in the same way, using the center-point as the subject and
the content box as the positioning area. [CSS21][CSS3BG]
If this argument is omitted, it defaults to ‘center’.
The second argument to the function specifies the size and shape of the
ending-ellipse. This can be specified in two ways, with different
characteristics:
Implicitly
The size and shape of the ending-ellipse can be defined
implicitly with a size and shape keyword. The <shape> keyword is defined as:
<shape> = circle | ellipse
‘circle’ indicates that the
ending-ellipse will be a circle with a constant radius. ‘ellipse’ indicates that the gradient-shape will
be an axis-aligned ellipse (that is, its major and minor radiuses will
be horizontal and vertical, not necessarily in that order).
Its values are defined in the list below. For the purpose of these
definitions, consider the box edges as extending infinitely in both
directions, rather than being finite line segments.
closest-side
If the <shape> is ‘circle’, the ending-shape must be a circle
sized so that it exactly meets the closest side of the box.
If the <shape> is ‘ellipse’, the ending-shape must be an ellipse
sized so that it exactly meets the closest horizontal and vertical
sides of the box.
farthest-side
Same as ‘closest-side’, except the ending-shape must
be sized based on the farthest side(s).
closest-corner
If the <shape> is ‘circle’, the ending-shape must be a circle
sized so that it exactly meets the closest corner of the box.
If the <shape> is ‘ellipse’, the ending-shape must be an ellipse
with the same aspect-ratio it would have if ‘closest-side’ were specified, but sized so
that it exactly meets the closest corner of the box.
farthest-corner
Same as ‘closest-corner’, except the ending-shape
must be sized based on the farthest corner. If <shape> is ‘ellipse’, the ending-shape must have the same
aspect ratio it would have if ‘farthest-side’ were specified.
contain
This value is an alias for ‘closest-side’, and has the same meaning.
cover
This value is an alias for ‘farthest-corner’, and has the same meaning.
Explicitly
Alternately, the ending-shape's size and shape can be defined
explicitly, by providing two lengths or percentages. These measure the
length of the horizontal and vertical axises of the ellipse,
respectively. (The axis length is the length from the center of the
ellipse to the edge, similar to the radius of a circle, not the
diameter.)
Percentages used in the first value are relative to the width of the
box, while percentages used in the second value are relative to the
height of the box.
Negative lengths or percentages are a syntax error.
Some combinations of position, size, and shape will produce a degenerate shape - a circle or ellipse with a
radius of 0. This will occur if the center is on a box edge and the second
argument is ‘circle closest-side’,
‘ellipse closest-side’, or ‘ellipse closest-corner’, or if the center is on a
box corner and the shape is ‘closest-corner’, or if the size and shape are
given explicitly and either of the radiuses are ‘0’. In these instances, the gradient must be be
rendered as follows:
If the ending-shape has zero width (regardless of the height):
Render as if the ending-shape was an ellipse whose height was an
arbitrary very large number and whose width was an arbitrary very small
number greater than zero. This will make the gradient
look similar to a horizontal linear gradient that is mirrored across the
center of the ellipse. It also means that all color-stop positions
specified with a percentage resolve to ‘0px’.
Otherwise, if the ending-shape has zero height:
Render as if the ending-shape was an ellipse whose width was an
arbitrary very large number and whose height was an arbitrary very small
number greater than zero. This will make the gradient
look like a solid-color image equal to the color of the last color-stop,
or equal to the average color of the gradient if it's repeating.
If this argument is omitted, it defaults to ‘ellipse cover’.
If only one argument is provided before the color-stops, and it could be
interpreted as either a position or an explicit size (for example, in
‘radial-gradient(10% 10%, red, blue)’),
it must be interpreted as a position.
Color-stops are placed on an imaginary line extending from the center of
the gradient toward the right, with the 0% point at the center of the
gradient, and 100% at the point where the line intersects the
ending-ellipse. The color of each ellipse is equal to the color of the
line where the ellipse intersects it. Distances past 100% can be
specified, and simply indicate a color-stop placed on the line a
corresponding distance from the center. Negative distances are allowed in
a radial gradient and work the same as in linear gradients with respect to
setting the color of the gradient-line, but colors before the
starting-point of the gradient-line
are not displayed. For example, ‘radial-gradient(red
-50px, yellow 100px)’ would produce an elliptical gradient
which starts with a reddish-orange color in the center (the color 1/3
between red and yellow) and transitions to yellow at 100px wide.
Brad suggests that we could drop the position/sizing
arguments and just use background-position and background-size. This would
force all non-background uses of radial gradient to be centered and
box-filling. Is this acceptable or not?
5.2.2.
Radial Gradient Examples
All of the following examples are applied to a box that is 200px wide
and 100px tall.
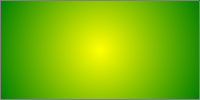
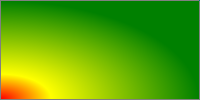
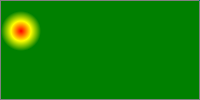
These examples demonstrate the basic syntax for radial gradients:
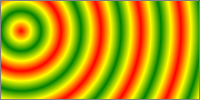
radial-gradient(20px 30px, circle contain, red, yellow, green);
radial-gradient(20px 30px, 20px 20px, red, yellow, green);
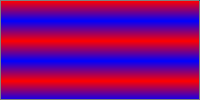
5.3. Repeating
Gradients
In addition to the ‘linear-gradient()’ and ‘radial-gradient()’ functions, this specification
defines ‘repeating-linear-gradient()’
and ‘repeating-radial-gradient()’
functions. These two functions take the same values and are interpreted
the same as their respective non-repeating siblings defined previously:
When rendered, however, the color-stops are repeated infinitely in both
directions, with their positions shifted by multiples of the difference
between the last specified color-stop's position and the first specified
color-stop's position. For example, ‘repeating-linear-gradient(red 10px, blue 50px)’ is
equivalent to ‘linear-gradient(..., red -30px, blue
10px, red 10px, blue 50px, red 50px, blue 90px, ...)’. Note
that the last color-stop and first color-stop will always coincide at the
boundaries of each group, which will produce sharp transitions if the
gradient does not start and end with the same color.
Repeating gradient syntax is basically identical to that of
non-repeating gradients:
repeating-linear-gradient(red, blue 20px, red 40px)
repeating-radial-gradient(red, blue 20px, red 40px)
repeating-radial-gradient(20px 30px, circle contain, red, yellow, green 100%, yellow 150%, red 200%)
If the distance between the first and last color-stops is non-zero, but
is small enough that the implementation knows that the physical resolution
of the output device is insufficient to faithfully render the gradient,
the implementation must find the average color of the
gradient and render the gradient as a solid-color image equal to
the average color.
If the distance between the first and last color-stops is zero (or
rounds to zero due to implementation limitations), the implementation must
find the average color of a gradient
with the same number and color of color-stops, but with the first and last
color-stop an arbitrary non-zero distance apart, and the remaining
color-stops equally spaced between them. Then it must render the gradient
as a solid-color image equal to that average color.
If the height of a repeating radial gradient is zero, or is close enough
to zero that the implementation knows that the physical resolution of the
output device is insufficient to faithfully render the gradient, the
implementation must find the average color of the
gradient and render the gradient as a solid-color image equal to
the average color.
To find the average color of a gradient,
run these steps:
Define list as an initially-empty list of premultiplied
RGBA colors, and total-length as the distance between first
and last color stops.
For each adjacent pair of color-stops, define weight as
half the distance between the two color-stops, divided by
total-length. Add two entries to list, the first
obtained by representing the color of the first color-stop in
premultiplied sRGBA and scaling all of the components by
weight, and the second obtained in the same way with the
second color-stop.
Sum the entries of list component-wise to produce the
average color, and return it.
As usual, implementations may use whatever algorithm they
wish, so long as it produces the same result as the above.
For example, the following gradient is rendered as a solid light-purple
image (equal to rgb(75%,50%,75%)):
repeating-linear-gradient(red 0px, white 0px, blue 0px);
The following gradient would render the same as the previous under
normal circumstances (because desktop monitors can't faithfully render
color-stops 1/10th of a pixel apart), but would render as a normal
repeating gradient if, for example, the author applied "zoom:100;" to the
element on which the gradient appears:
repeating-linear-gradient(red 0px, white .1px, blue .2px);
Color-stops are points placed along the line defined by the gradient-line at the beginning of the
rule. Color-stops must be specified in order. Percentages refer to the
length of the gradient-line, with 0% being at the starting point and 100%
being at the ending point. Lengths are measured from the starting-point in
the direction of the ending-point. Color-stops are usually placed between
the starting-point and ending-point, but that's not required; the
gradient-line extends infinitely in both directions, and a color-stop can
be placed at any position on the line.
At each color-stop, the line is the color of the color-stop. Between two
color-stops, the line's color is linearly interpolated between the colors
of the two color-stops, with the interpolation taking place in
premultiplied RGBA space. Before the first color-stop, the line is the
color of the first color-stop. After the last color-stop, the line is the
color of the last color-stop.
The following steps must be applied in order to process the
list of color-stops. After applying these rules, all color-stops will have
a definite position and they will be in ascending order:
If the first color-stop does not have a position, set its position to
0%. If the last color-stop does not have a position, set its position to
100%.
If a color-stop has a position that is less than the specified
position of any color-stop before it in the list, set its position to be
equal to the largest specified position of any color-stop before it.
If any color-stop still does not have a position, then, for each run
of adjacent color-stops without positions, set their positions so that
they are evenly spaced between the preceding and following color-stops
with positions.
If multiple color-stops have the same position, they produce an
infinitesimal transition from the one specified first in the rule to the
one specified last. In effect, the color suddenly changes at that position
rather than smoothly transitioning.
Below are several pairs of gradients. The latter of each pair is a
manually "fixed-up" version of the former, obtained by applying the above
rules. For each pair, both gradients will render identically.
1. linear-gradient(red, white 20%, blue)
   ==
   linear-gradient(red 0%, white 20%, blue 100%)

2. linear-gradient(red 40%, white, black, blue)
   ==
   linear-gradient(red 40%, white 60%, black 80%, blue 100%)

3. linear-gradient(red -50%, white, blue)
   ===
   linear-gradient(red -50%, white 25%, blue 100%)

4. linear-gradient(red -50px, white, blue)
   ===
   linear-gradient(red -50px, white calc(-25px + 50%), blue 100%)

5. linear-gradient(red 20px, white 0px, blue 40px)
   ==
   linear-gradient(red 20px, white 20px, blue 40px)

6. linear-gradient(red, white -50%, black 150%, blue)
   ==
   linear-gradient(red 0%, white 0%, black 150%, blue 150%)

7. linear-gradient(red 80px, white 0px, black, blue 100px)
   ==
   linear-gradient(red 80px, white 80px, black 90px, blue 100px)
The following example illustrates* the difference between a gradient
transitioning in pre-multiplied sRGBA and one transitioning (incorrectly)
in non-premultiplied. In both of these example, the gradient is drawn
over a white background. Both gradients could be written with the
following value:
linear-gradient(90deg, red, transparent, blue)
In premultiplied space, transitions to or from "transparent" always
look nice:
On the other hand, if a gradient were to incorrectly transition in
non-premultiplied space, the colors near "transparent" would noticeably
darken to a grayish color, because "transparent" is actually a shorthand
for ‘rgba(0,0,0,0)’, or transparent
black:
* SVG-in-HTML support required to view the images.
Note: It is recommended that authors not mix different types
of units, such as px, em, or %, in a single rule, as this can cause a
color-stop to unintentionally try to move before an earlier one. For
example, the rule ‘background-image:
linear-gradient(red, yellow 100px, blue 50%)’ would work as
expected as long as the background area is at least 200px tall. If it was
150px tall, however, the blue color-stop's position would be equivalent to
"75px", which precedes the yellow color-stop, and would be corrected to a
position of 100px.
Note: The definition and implications of "premultiplied"
color spaces are given elsewhere in the technical literature, but a quick
primer is given here to illuminate the process. Given a color expressed as
an rgba() 4-tuple, one can convert this to a premultiplied representation
by multiplying the red, green, and blue components by the alpha component.
For example, a partially-transparent blue may be given as
rgba(0,0,255,.5), which would then be expressed as [0, 0, 127.5, .5] in
its premultiplied representation. Interpolating colors using the
premultiplied representations rather than the plain rgba representations
tends to produce more attractive transitions, particularly when
transitioning from a fully opaque color to fully transparent. Note that
transitions where either the transparency or the color are held constant
(for example, transitioning between rgba(255,0,0,100%) and
rgba(0,0,255,100%) or rgba(255,0,0,100%) and rgba(255,0,0,0%)) have
identical results whether the color interpolation is done in premultiplied
or non-premultiplied color-space. Differences only arise when both the
color and transparency differ between the two endpoints.
6. Sizing Images and Objects in CSS
Images used in CSS may come from a number of sources, from defined image
formats (such as gif, jpeg, etc), dedicated markup formats (such as SVG),
and CSS-specific formats (such as the linear-gradient() value type defined
in this specification). As well, a document may contain many other types
of objects, such as video, plugins, or nested documents. These images and
objects (just objects hereafter) may offer many
types of sizing information to CSS, or none at all. This section defines
generically the size negotiation model between the object and the CSS
layout algorithms.
6.1. Object-Sizing
Terminology
In order to define this handling, we define a few terms, to make it
easier to refer to various concepts:
intrinsic dimensions
An object's intrinsic dimensions are its preferred, natural width,
height, and aspect ratio, if they exist. There can be an intrinsic height and intrinsic width, defining a definite rectangle.
(Most bitmap images fall into this category.) There can be an intrinsic aspect ratio defining the
relation of the width to the height, but no definite size. (SVG images
designed to scale may fall into this category.) There can be just an
intrinsic height or width. Or there can be no intrinsic dimensions at
all, implying that the object has no preferred size or aspect ratio.
(Embedded documents are often assumed to have no intrinsic size, as are
CSS gradients, defined in this specification.)
If an object (such as an icon) has multiple sizes, then the largest
size is used. If it has multiple aspect ratios of that size (or of no
size), then the aspect ratio closest to the aspect ratio of the default object size is used.
specified size
The specified size of an object is given by CSS, such as through the
‘object-fit’ or ‘background-size’ properties. The specified
size can be a definite width and height, a set of constraints, or a
combination thereof.
The only reason these are examples is because the proper
place for the normative definitions of default object sizes is in the
definitions for the relevant properties. These are the correct values,
though.
6.2. CSS⇋Object
Negotiation
Objects in CSS are sized and rendered as follows:
When an image or object is specified in a document, such as through a
url() value in a ‘background-image’ property or a @src
attribute on an <img> element, CSS queries the object for its intrinsic dimensions.
If the specified size has only a
width or height, but not both, then the concrete object size is given
that specified width or height. The other dimension is calculated as
follows:
If the object has an intrinsic
aspect ratio, the missing dimension of the concrete object size is
calculated using the intrinsic aspect-ratio and the present
dimension.
If the specified size has neither
a definite width nor height, and has no additional contraints, the
dimensions of the concrete object
size are calculated as follows:
If the specified size has
additional constraints, the concrete
object size must be sized to satisfy those constraints. For
example, the ‘min-width’,
‘min-height’, ‘max-width’, and ‘max-height’ properties specify slightly more
complex handling for sizing replaced elements, and ‘background-repeat: round’ can further adjust the
size calculated by ‘background-size’ so that the image fits a
whole number of times into the background positioning area.
The ‘object-fit’ property specifies how the
contents of a replaced element should be scaled relative to the box
established by its used height and width. It also enables scaling a
replaced element's contents up to a specified maximum size or down to a
specified minimum size while preserving its aspect ratio. This property
never affects the size of the replaced element; it only affects the size
of the contents of the replaced element.
Not all replaced elements can be scaled, but images typically can.
If the replaced element's content do not have an intrinsic aspect ratio
(which may be derived from an intrinsic width and height), all of the
values for ‘object-fit’ are treated as ‘fill’. Otherwise, the contents are scaled as
follows:
This will make the contents exactly fill the replaced element.
contain
Determine the used ‘height’ and ‘width’ of the element as
usual, except if both ‘height’ and ‘width’ are ‘auto’, and
the used value of at least one of ‘max-width’ and ‘max-height’
is not ‘none’, then compute the element's used width and used height
as though the intrinsic dimensions of the contents were infinitely large
numbers whose ratio is the actual intrinsic ratio of the contents.
Set the content's size to the largest width and height that has the
same aspect ratio as the content's intrinsic aspect ratio, and
additionally has neither width nor height larger than the replaced
element's used width and height, respectively.
cover
Determine the used ‘height’ and ‘width’ of the element as
usual, except if both ‘height’ and ‘width’ are ‘auto’, and
the used value of at least one of ‘min-width’ and ‘min-height’
is not ‘none’, then compute the element's used width and used height
as though the intrinsic dimensions of the contents were infinitely small
numbers whose ratio is the actual intrinsic ratio of the contents.
Set the content's size to the smallest width and height that has the
same aspect ratio as the content's intrinsic aspect ratio, and
additionally has neither width nor height smaller than the replaced
element's used width and height, respectively.
Size the content as if ‘none’
or ‘contain’ were specified, whichever would
result in a smaller size.
Note that both ‘none’ and ‘contain’
respect the content's intrinsic aspect ratio, so the concept of
"smaller" is well-defined.
If the content does not completely fill the replaced element, the
unfilled space shows the replaced element's background. Replaced elements
always clip their contents, similar to the effects of ‘overflow:hidden’ on non-replaced elements, so any
content that would extend beyond the edges of the box are simply not
displayed. See the ‘object-position’ property for positioning
the object with respect to the element's box.
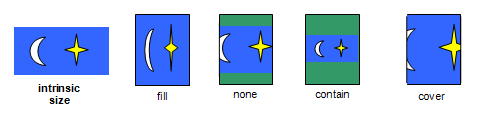
An example showing how four of the values of ‘object-fit’
cause the replaced element (blue figure) to be scaled to fit its
height/width box (shownwith a green background), using the initial value
for ‘object-position’. The fifth value,
‘scale-down, in this case
looks identical to ’contain.
Note: the ‘object-fit’ property has similar semantics
to the fit attribute in [SMIL10].
Note: Per the CSS⇋Object
Negotiation algorithm, the concrete
object size (or, in this case, the size of the content) does not
directly scale the object itself - it is merely passed to the object as
information about the size of the visible canvas. How to then draw into
that size is up to the image format. In particular, raster images always
scale to the given size, while SVG uses the given size as the size of the
"SVG Viewport" (a term defined by SVG) and then uses the values of several
attributes on the root <svg> element to determine how to draw itself.
User agents MAY accept ‘image-fit’ as an alias for ‘object-fit’, as
a previous version of this specification used that name. Authors must not
use ‘image-fit’ in their
stylesheets.
The ‘object-position’ property determines the
alignment of the replaced element inside its box. The <position> value type is defined as
the positioning syntax of ‘background-position’
and is resolved in the same way, using the image as the subject and the
content box as the positioning area. [CSS21][CSS3BG]
Note that areas of the box not covered by the replaced
element will show the element's background.
User agents MAY accept ‘image-position’ as an alias for ‘object-position’, as a previous version of
this specification used that name. Authors must not use ‘image-position’ in their stylesheets.
7. Image Processing
7.1. Overriding Image
Resolutions: the ‘image-resolution’ property
The image resolution is defined as the number of image pixels per
unit length, e.g., pixels per inch. Some image formats can record
information about the resolution of images. This information can be
helpful when determining the actual size of the image in the formatting
process. However, the information can also be wrong, in which case it
should be ignored. By default, CSS assumes a resolution of one image pixel
per CSS ‘px’ unit; however, the
‘image-resolution’ property allows using
some other resolution.
Name:
image-resolution
Value:
[from-image || <resolution>] snap?
Initial:
1dppx
Applies to:
all elements
Inherited:
yes
Media:
visual
Computed value:
specified value
The ‘image-resolution’ property specifies the
resolution of all images used in or on the element: images in content
(e.g. replaced elements and generated content), background images, list
markers, etc. Values have the following meanings:
from-image
The image must be rendered at the image's native resolution. If the
image does not have a native resolution or the UA cannot determine it,
the image must instead be rendered at the specified resolution (see the
following value). If a resolution is not specified, the image must be
rendered at ‘1dppx’ (the default
resolution).
<resolution>
If the "from-image" keyword is not specified, or it is specified and
the native resolution cannot be determined, the image must be rendered at
the specified resolution.
snap
If the "snap" keyword is provided, and the specified resolution is
such that one image pixel would be larger than one device pixel, the
image must be rendered at the specified resolution, rounded to the
nearest value that would map one image pixel to an integer number of
device pixels. Otherwise, the image must be rendered at the specified
resolution, rounded to the nearest value that would map an integer number
of image pixels to one device pixel.
This property must have no effect on vector images, as vector images do
not have a concept of "resolution".
This rule specifies that the UA should use the image resolution found
in the image itself, falling back to 1 image pixel per CSS ‘px’ unit.
img { image-resolution: from-image }
Using this rule, the image resolution is set to 300dpi and the
resolution in the image, if any, is ignored.
img { image-resolution: 300dpi }
This rule, on the other hand, if used when the screen's resolution is
96dpi, would instead render the image at 288dpi (so that 3 image pixels
map to 1 device pixel):
img { image-resolution: 300dpi snap; }
These rules both specify that the UA should use the image resolution
found in the image itself. If the image has no resolution, the resolution
is set to 300dpi.
7.2. Orienting an Image
on the Page: the ‘image-orientation’ property
Images from camera phones, digital cameras or scanners may be encoded
sideways. For example, the first row of image data may represent the
leftmost or rightmost column of image pixels. Furthermore, often such
devices have limited resources, and do not have the capability to rotate
the image into an upright orientation. However, this type of device may
have internal knowledge or can accept input from its user as to the
rotational correction to perform.
The image-orientation property provides a way to specify an
"out-of-band" rotation to be applied to image source data. This facility
is not intended to specify layout transformations such as arbitrary
rotation or flipping the image in the horizontal or vertical direction. It
is not needed to correctly orient an image when printing in landscape
versus portrait orientation, as that rotation is done as part of layout.
It should only be used to correct incorrectly-oriented images.
Name:
image-orientation
Value:
<angle>
Initial:
0deg
Applies to:
images
Inherited:
no
Media:
visual
Computed value:
specified value, rounded and normalized (see text)
‘image-orientation’ specifies an orthogonal
rotation to be applied to an image before it is laid out. CSS layout
processing applies to the image after rotation. This implies, for
example:
The intrinsic height and width are derived from the rotated rather
than the original image dimensions;
The height (width) property applies to the vertical (horizontal)
dimension of the image, after rotation.
Positive values cause the image to be rotated to the right (in a
clockwise direction), while negative values cause a rotation to the left.
The computed value of the property is calculated by rounding the specified
angle to the nearest quarter-turn (90deg, 100grad, .25turn, etc.),
rounding away from 0 (that is, 45deg is rounded to 90deg, while -45deg is
rounded to -90deg), then moduloing the value by 1 turn (360deg, 400grad,
etc.).
The following example rotates the image 90 degrees clockwise:
![[An image showing a box with a
background shading gradually from white in the bottom-left corner to
black in the top-right corner. There is a line, illustrating the
gradient-line, angled at 45 degrees and passing through the center of the
box. The starting-point and ending-point of the gradient-line are
indicated by the intersection of the gradient-line with two additional
lines that pass through the bottom-left and top-right corners of the
box.]](gradient-diagram.png)