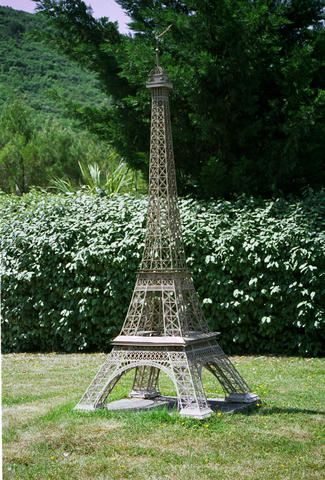
Scale model of the Eiffel tower in Parc Mini-France
HTML5 introduced an element to insert a figure with a caption.
(We'll show a convention to do the same with HTML4 below.)
<figure>
<p><img src="eiffel.jpg"
width="136" height="200"
alt="Eiffel tower">
<figcaption>Scale model of the
Eiffel tower in
Parc Mini-France</figcaption></figure>
For example, to float the figure to the right, in a space equal to
30% of the width of the surrounding paragraphs, these rules will do
the trick:
In fact, only the first two declarations (float and width) are
essential, the rest is just for decoration.
Scaling the image
There is one problem here, and that is that the image may be too
wide. In this case, the image is always 136 px wide and the figure
is 30% of the surrounding text. So if you make the window narrower,
it may be that the image overflows the figure (try it!).
If you know the width of all images in the document, you can add a
minimum width to figure, like this:
figure {
  min-width: 150px;
}
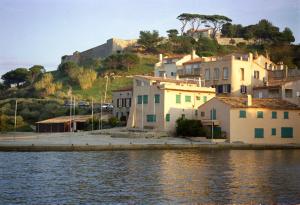
Saint Tropez and its fort in the evening sun
Another way is to scale the image itself. That's what we have done
with the image on the right here. As you can maybe see if you make
the window very wide, JPEG images don't scale very well. But if the
image is a diagram or a graph in SVG
format, scaling in fact works beautifully. Here is the mark-up we
used:
<figure>
  <p><img class=scaled src="st-tropez.jpg"
    alt="St. Tropez">
  <figcaption>Saint Tropez and its
    fort in the evening sun</figcaption>
</figure>
The only addition is the last rule: it makes the image as wide as
the inside of the figure (the area inside the border and the
padding).
Putting the caption on top
The Mediterranean Sea near Cap Ferrat
HTML allows the figcaption element to be either the first or the
last element inside the figure and, without any CSS rules to the
contrary, that will cause the caption to be at the top or the bottom
of the figure, respectively.
But, no matter what the mark-up, you can also specify in CSS
whether the caption should appear above or below the image. You do
that by telling the browser that the figure should be formatted as a
table, with the image as its only cell and the caption as the
table's caption. Just add these rules to the style sheet from the
previous sections:
The style we used on this page includes a gray border around the
figure. Unfortunately, when we use table layout to put the caption
on the top or bottom, we need to specify the border differently,
because the caption is put outside the border of the table. We fix
that by putting a part of the border on the caption itself:
Scale model of the Eiffel tower in Parc Mini-France
HTML4, unlike HTML5, doesn't have an element that inserts a figure
with a caption. It was proposed (see HTML3), but didn't made it
into HTML4. Here is one way to simulate a figure element:
<div class=figure>
  <p><img src="eiffel.jpg"
    width="136" height="200"
    alt="Eiffel tower">
  <p>Scale model of the
    Eiffel tower in
    Parc Mini-France
</div>
Then in the style sheet you use the class "figure" to format the
figure the way you want. For example, to float the figure to the
right, in a space equal to 30% of the width of the surrounding
paragraphs, these rules will do the trick:
As before, only the first two declarations (float and width) are
essential, the rest is just for decoration.
Scaling the image in HTML4
To avoid that wide images overflow the figure, and if you know the
width of all images in the document, you can add a minimum width to
the DIV, e.g., like this:
div.figure {
  min-width: 150px;
}
Saint Tropez and its fort in the evening sun
To scale the image to the width of the figure instead (as we have
done with the image on the right), you can add a CLASS attribute and
a CSS rule, very similar to the HTML5 example above. Here is the
mark-up we used:
<div class=figure>
  <p><img class=scaled src="st-tropez.jpg"
    alt="St. Tropez">
  <p>Saint Tropez and its
    fort in the evening sun
</div>
The only addition is the last rule: it makes the image as wide as
the inside of the DIV (the area inside the border and the padding).
Putting the caption on top in HTML4
The Mediterranean Sea near Cap Ferrat
To put the caption on top, add these rules to the style sheet from
the previous sections:
div.figure {
  display: table;
}
div.figure p + p {
  display: table-caption;
  caption-side: top;
}
The '+' causes the rule to match a P that follows another P. Which
means in this case that it matches the second P of the figure, the
one that contains the caption.
(This technique may expose bugs in some browsers from before 2003,
especially when combined with scaling the image, as I did here.)
As before, the gray border that we chose to put around the figures
on this page will only be around the image itself with this
technique. To put it around the image and the caption, add
these rules: