This tutorial contains the basic steps needed for creating and deleting annotations on documents or on the content of the annotations themselves or replies. It also describes how to create a reply to an annotation.
You can also refer to a more thorough manual of the Amaya user interface to annotations.
Note: The replies and annotations on annotations or replies will be available starting from Amaya version 5.3 and will need an Annotea server that understands replies.
This step needs to be done only once unless you want to change the server settings.
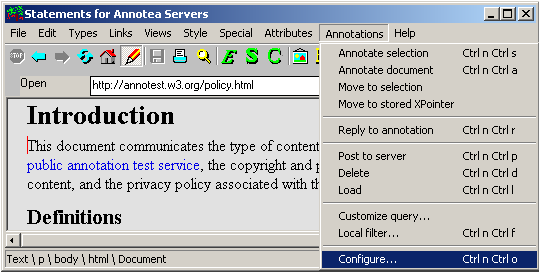
Select the "Configure..." menu command and a dialog box will appear to help you to configure annotation servers.
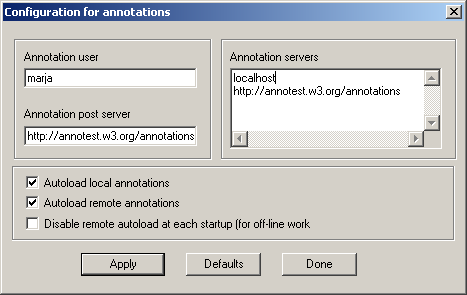
Write the name of the annotation post server in the "Annotation post server" field and click the "Apply" button. This server will be used to store the posted annotations. If your group does not yet have their own annotation server you can try out the W3C test server http://annotest.w3.org/annotations.
Add the post server to the list of annotation servers. These servers are used for loading the annotations when "Autoload annotations" checkbox is selected. Alternatively you can leave the box unselected and use "Load" menu command when you wish to see annotations. If you want to see locally stored annotations, also add "localhost" to the list of servers.
Note: It is a good practice to always post the replies to the same server as where the head annotation of the thread is. That will help prevent user's reading annotations from different annotation servers to see only partial threads. Later the tools should support this too.
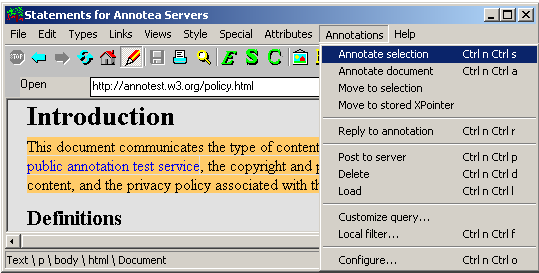
Select the text you want to annotate from the document and then choose the "Annotate selection" command from the Annotations menu. You may annotate also the content of the annotation or a reply.
Alternatively you can also annotate the whole document by choosing the "Annotate document" command. In that case, the annotation is presented at the beginning of the document and no selection is necessary.
The Annotation window appears. It has a framed title area and after that an editable area that you can select by clicking on it. Then add the content of the annotation using normal means.
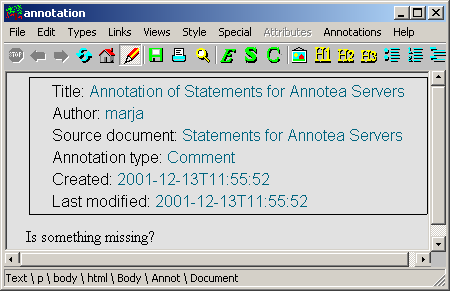
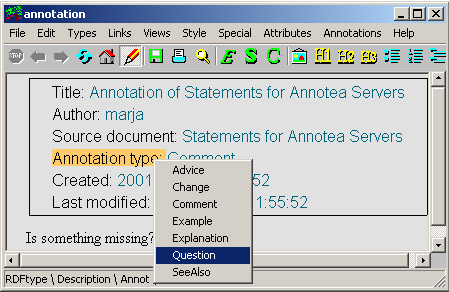
At the title area you can select the annotation type by double clicking the text "Annotation type" and choosing a type from a menu (see the figure below). You can also change the title by editing it. The other parts, e.g. the author and the dates, are created by the system. The source document lets you follow a link to the annotated document if you double click it.
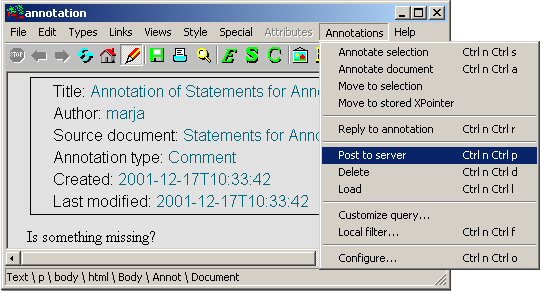
After you have written the content of the annotation, you can post it by choosing the "Post to server" command from the menu. This will store a remote annotation on the annotation post server.
Alternatively, if you prefer to create a local annotation that is saved to your computer, you can use the "Save" command in the "File" menu.
After posting or saving the annotation, the annotation window can be closed at any time.
The annotation will appear on the document window as a pencil icon. The annotation can be selected by single clicking the pencil icon. When the the pencil icon is double clicked the corresponding annotation window will be opened.
It is possible to create a discussion thread by replying to an annotation with the "Reply to annotation" menu command.
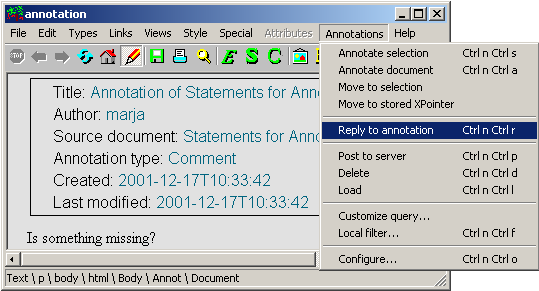
The command opens a reply window which is very similar to an annotation window. After the user has selected a reply type and written other desirable content to the reply, the reply can be posted with "Post to server" command. The whole thread is always stored to the same post server as the first reply in the thread
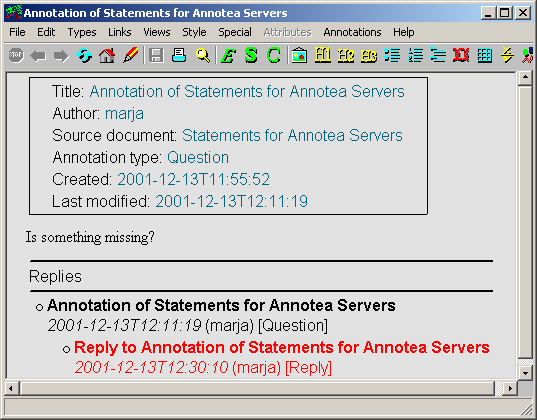
If an annotation has replies, the annotation window will show its reply thread at the bottom of the window. The replies can be opened by double clicking the title, in which case the title is highlighted as shown below.
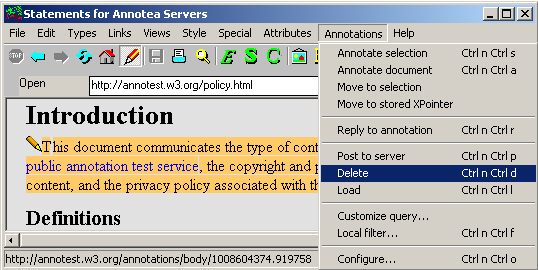
An annotation or a reply can be deleted by selecting it and using the "Delete" menu command. This works for both local and remote annotations and replies, however, if the annotation or a reply already has replies we currently do not allow deletion.