Tabulator — Creating a New Pane — Part 1
Last time, we looked at how to install The Tabulator as a Firefox extension. Although tabulator can also run as a chrome extension or a JavaScript shim, one advantage of the approach outlined is that you can dive in to the code and make changes.
We’re going to look at how to create a new ‘Pane’ and expand slightly on the developer notes. For this tutorial you’ll need a text editor and basic JavaScript knowledge.
What is a Tabulator Pane?
Panes are views for displaying different types of data, and creating apps that are data driven. Although tabulator has many generic data panes, for viewing, querying and editing data, it can be handy to have vertical specific panes, too.
For example for a Person entity you may want a social style pane that allows updates to your timeline, for a publication you may want a special reader, or for your photos you may wish to develop a gallery pane. In this two part tutorial I’ll show how to display a microblog post in a pane.
Step 1: Find an Icon

Each pane will normally require an icon. There are many icon repositories on the web, for this I used, openiconlib which has conveniently sized 22×22 sized icons under LGPG.
The icons are stored in content/icons from the main source tree. In our case we will save the 22×22 PNG under /content/icons/microblog/microblogPost.png
Step 2: Add the Icon to Tabulator
Next we need to add the icon to tabulator and this is done in the file located at /content/js/init/icons.js. Add the following line:
tabulator.Icon.src.icon_mbpost = iconPrefix + 'icons/microblog/microblogpost.png';
Step 3: Add the Pane
To add the pane we need to create a new JavaScript file located at /content/js/panes/microblog/
tabulator.panes.register( {

  icon: tabulator.Icon.src.icon_mbpost,//This icon should be defined in icons.js
  label: function(subject) { //'subject' is the source of the document
    if (true) {
      return "MicroblogPost"; //The icon text
    } else {
      return null;
    }
  },

  render: function(subject, document) {
    var newDiv = document.createElement("h2");
    var newContent = document.createTextNode("Microblog will appear here!");
    newDiv.appendChild(newContent);
    return newDiv;
  }

} , true);
The (true) condition means that this icon will always appear (more on this in part 2). The render function will simply display a generic heading for testing purposes. Later we will show how to query an actual microblog and display the fields.
Step 4 — Load the Pane and Test
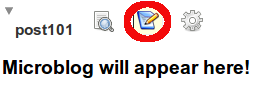
Image: New pane Icon added to Tabulator
We’re now ready for the final step. Add the line below to /content/js/init/init.js and once done you should see the icon on any data that the tabulator imports.
tabulator.loadScript("js/panes/microblogPane/microblogPostPane.js");
If all has gone well you should see the new icon appear in tabulator, after restarting. Try clicking the following test link to see if you have been successful!
What’s Next?
We’ve seen how to add a simple pane to The Tabulator. In the next part we will look at how to get data items from a real microblog post, how display the icon conditionally and how to style the page. The ultimate goal here is to be able to both read and write microblog posts, and share them with your social graph, using web standards.