XForms
Improving the Web Forms Experience
Steven Pemberton
CWI and W3C
Kruislaan 413
1098 SJ Amsterdam
The Netherlands
Steven.Pemberton@cwi.nl
www.cwi.nl/~steven
About the Instructor
Steven Pemberton is a researcher at the CWI, The Centre for Mathematics
and Computer Science, a nationally-funded research centre in Amsterdam, The
Netherlands, the first non-military Internet site in Europe.
Steven's research is in interaction, and how the underlying software
architecture can support the user. At the end of the 80's he built a
style-sheet based hypertext system called Views.
Steven has been involved with the World Wide Web since the beginning. He
organised two workshops at the first World Wide Web Conference in 1994,
chaired the first W3C Style Sheets workshop, and the first W3C
Internationalisation workshop. He was a member of the CSS Working Group from
its start, and is a long-time member (now chair) of the HTML Working Group,
and co-chair of the XForms Working Group. He is co-author of (amongst other
things) HTML 4, CSS, XHTML and XForms.
Steven is also Editor-in-Chief of ACM/interactions.
Objectives
HTML Forms, introduced in 1993, were the basis of the e-commerce
revolution. After 10 years experience, it has become clear how to improve on
them, for the end user, the author, and the owners of the services that the
forms are addressing. XForms is a new technology, announced in October 2003,
intended to replace HTML Forms.
The advantages of XForms include:
- It improves the user experience: XForms has been designed to allow much
to be checked by the browser, such as types of fields being filled in, or
that one date is later than another. This reduces the need for round
trips to the server or for extensive script-based solutions, and improves
the user experience by giving immediate feedback to what is being filled
in.
- It is XML, and it can submit XML.
- It combines existing XML technologies: Rather than reinventing the
wheel, XForms uses a number of existing XML technologies, such as XPath
for addressing and calculating values, and XML Schemas for defining data
types. This has a dual benefit: ease of learning for people who already
know these technologies, and implementors can use off-the-shelf
components to build their systems.
- It is internationalized.
- It is accessible: XForms has been designed so that it will work equally
well with accessible technologies (for instance for blind users) and with
traditional visual browsers.
- It is device independent: The same form can be delivered without change
to a traditional browser, a PDA, a mobile phone, a voice browser, and
even some more exotic emerging clients such as an Instant Messenger. This
greatly eases providing forms to a wide audience, since forms only need
to be authored once.
- It is easier to author complicated forms.
The presenter is one of the authors of the XForms specifications, and is
chair of the Forms Working Group that produced the technology.
This tutorial works from a basis of HTML Forms, and introduces XForms
step-by-step. It covers essentially all of XForms except some technical
details about events, and no more than a passing reference to the use of
Schemas.
Emphasis is on how to improve the user experience, and how XForms improves
accessibility and device independence, and makes the author’s life easy in
producing a better experience.
Plan
Four sections, each with a practical
- Introduction, equivalents to HTML
- Editing XML
- Controlling controls
- Wizards and shopping baskets
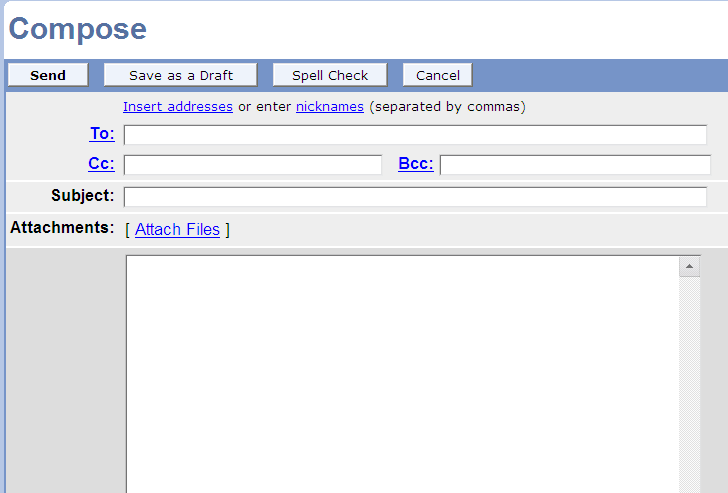
HTML Forms: a great success!
- Forms have been the basis of the e-commerce revolution
- You find them everywhere on the web
Searching
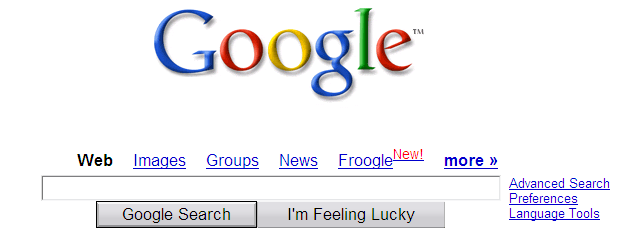
Buying
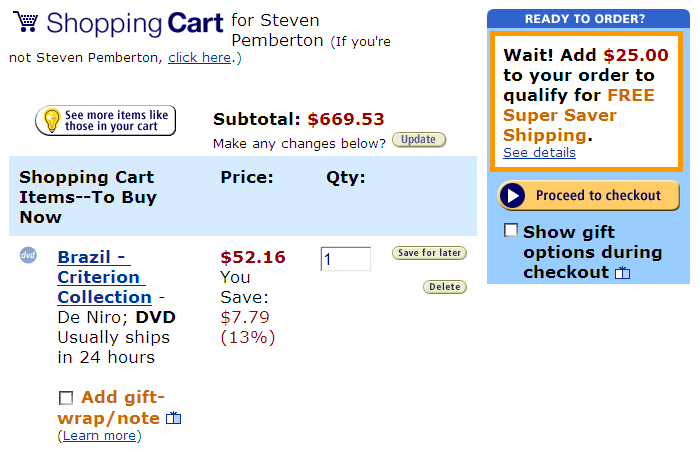
Logging in
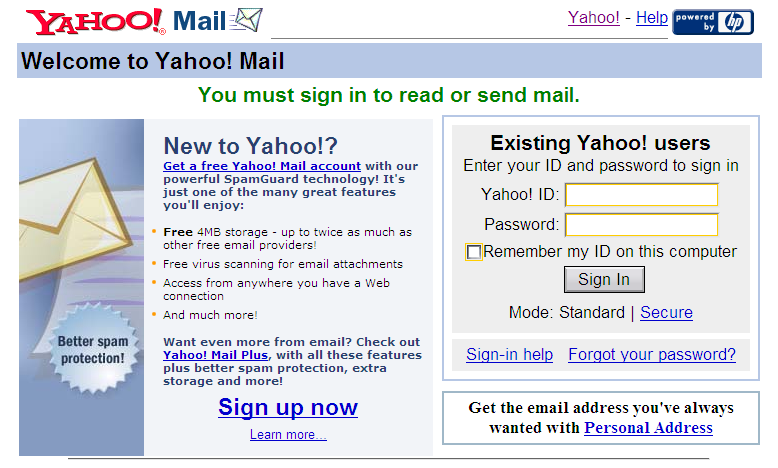
Configuring hardware
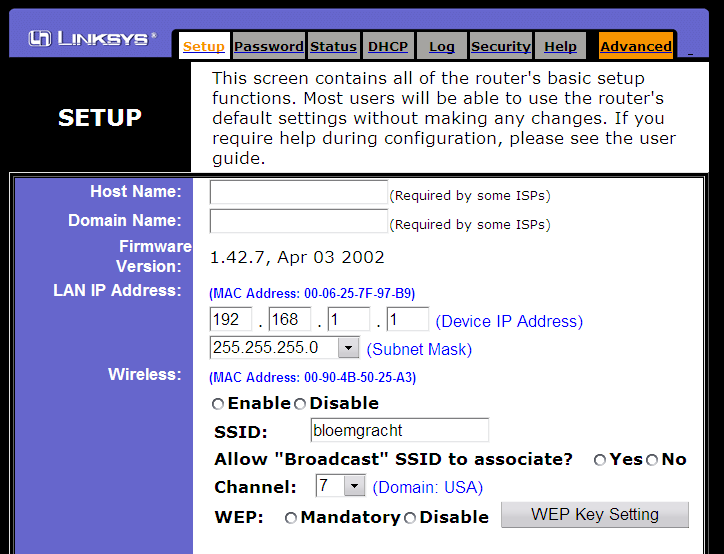
Reading mail
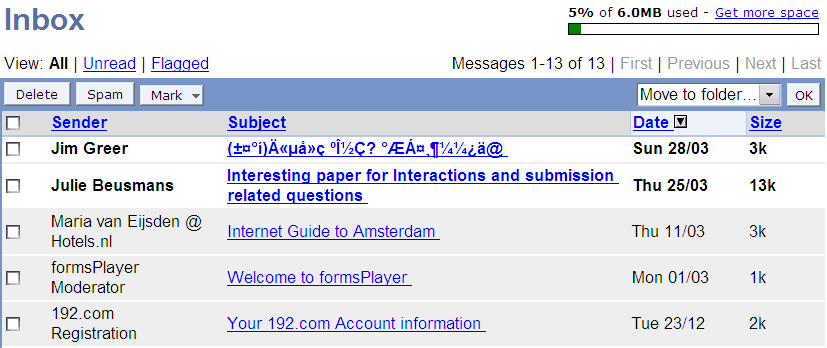
Composing email
Etc etc
- Tracking packages
- calculating currencies
- submitting taxes
- banking
- expenses
- calendars
- blogging
- wiki
- ...
Problems with HTML Forms
- Presentation oriented, mixing data and presentation
- No types, Ping-ponging to the server
- Reliance on scripting
- Problems with non-Western characters
- Accessibility problems
- Hard to make cross-device for single authoring
- Impoverished data-model, no integration with existing streams
- Hard to manage, hard to see what is returned
- No support for wizards and shopping carts etc.
Soundbite: "Javascript accounts for 90% of our headaches in complex
forms, and is extremely brittle and unmaintainable."
XForms
- e-forms are a current hot topic.
- The W3C XForms working group started out as a sub-group of the HTML
working group, but soon spun off as an independent group when it emerged
how much work there was to be done.
- XForms has been designed based on an analysis of HTML Forms, what they
can do, and what they can't.
The Approach
The essence is to separate what is being returned from how the values are
filled in.
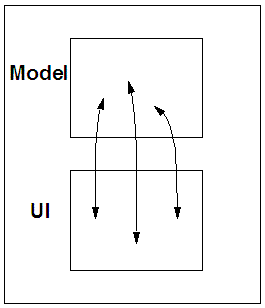 The model specifies the values
being collected (the instance), and their related logic:
The model specifies the values
being collected (the instance), and their related logic:
- Types, restrictions
- Initial values, Relations between values
- The body of the document then binds forms controls to
values in the instance
Controls
An essential difference with HTML is that XForms controls are
intent-based rather than presentation oriented.
Rather than specifying that a control consists of radio buttons, or a
menu, XForms specifies for instance that a control selects one item from a
list of items. CSS or similar can be used to provide the necessary
presentation.
This way the same XForm can be used across different devices without
change.
XForms improves the user experience
XForms has been designed to allow much to be checked by the browser, such
as
- types of fields being filled in
- that a particular field is required
- or that one date is later than another.
This reduces the need for round trips to the server or for extensive
script-based solutions, and improves the user experience by giving immediate
feedback on what is being filled in.
It is easier to author and maintain complicated forms
Because XForms uses declarative markup to declare properties of values,
and to build relationships between values, it is much easier for the author
to create complicated, adaptive forms, and doesn't rely on scripting.
An HTML Form converted to XForms looks pretty much the same, but when you
start to build forms that HTML wasn't designed for, XForms becomes much
simpler.
It is XML, and it can submit XML
XForms is properly integrated into XML: it is in XML, the data it collects
in the form is XML, it can load external XML documents as initial data, and
can submit the results as XML.
By including the user in the XML pipeline, it at last means you can have
end-to-end XML, right up to the user's desktop.
However, it still supports 'legacy' servers.
XForms is also a part of XHTML2.
It combines existing XML technologies
Rather than reinventing the wheel, XForms uses a number of existing XML
technologies, such as
- XPath for addressing and calculating values
- XML Schema for defining data types.
This has a dual benefit:
- ease of learning for people who already know these technologies
- the ability for implementors to use off-the-shelf components to build
their systems.
It integrates into existing data streams
Data can be pre-loaded into a form from external sources.
Existing Schemas can be used.
It integrates with SOAP and XML RPC.
Doesn't require new server infrastructure.
It is device independent
Thanks to the intent-based controls, the same form can be delivered
without change to a traditional browser, a PDA, a mobile phone, a
voice browser, and even some more exotic emerging clients such as an Instant
Messenger.
This greatly eases providing forms to a wide audience, since forms only
need to be authored once.
It is internationalized
Thanks to using XML, there are no problems with loading and submitting
non-Western data.
It is accessible
XForms has been designed so that it will work equally well with accessible
technologies (for instance for blind users) and with traditional visual
browsers.
It is royalty-free and unencumbered
Open standard
Wide industry support
Widely implemented
No vendor lock-in!
(If you think this is a good idea, join W3C!)
It supports new use cases
Regular forms uses
Editing XML
Spreadsheets
Applications
As output transformation
Basic structure of XForms
Take this simple HTML form:
<html>
<head><title>Search</title></head>
<body>
    <form action="http://example.com/search"
          method="get">
         Find <input type="text" name="q">
         <input type="submit" value="Go">
    </form>
</body>
</html>
The main difference in XForms is that details of the values collected and
how to submit them are gathered in the head, in an element called
model; only the form controls are put in the body.
... basic structure
So in this case the minimum you need in the head is (XForms elements and
attributes are in lower case):
<model>
   <submission
       action="http://example.com/search"
       method="get"
       id="s"/>
</model>
The <form> element is now no longer needed; the
controls in the body look like this:
<input ref="q"><label>Find</label></input>
<submit submission="s">
    <label>Go</label>
</submit>
... basic structure
What you can hopefully work out from this is that form controls have a
<label> element as child, the <input>
uses "ref" instead of "name", and there is a
separate submit control that links to the details of the
submission in the head. So the complete example is:
Complete XForms search example
<h:html xmlns:h="http://www.w3.org/1999/xhtml"
        xmlns="http://www.w3.org/2002/xforms">
<h:head>
    <h:title>Search</h:title>
    <model>
        <submission
            action="http://example.com/search"
            method="get" id="s"/>
    </model>
</h:head>
<h:body>
  <h:p>
    <input ref="q"><label>Find</label></input>    <submit submission="s"><label>Go</label>
    </submit>
  </h:p>
</h:body></h:html>
Namespaces
- Another obvious difference is the use of
h: prefixes
- Nothing to do with XForms, but with XML
- Namespace says which language elements belong to
- One language may be the 'default' language
- In the above XForms is the default
- XHTML could have been made the default:
HTML as default namespace
<html xmlns="http://www.w3.org/1999/xhtml"
      xmlns:f="http://www.w3.org/2002/xforms">
<head><title>Search</title>
  <f:model>
    <f:submission method="get" id="s"
        action="http://example.com/search"/>
  </f:model>
</head>
<body>
  <p><f:input ref="q">
       <f:label>Find</f:label>
     </f:input>     <f:submit submission="s">
        <f:label>Go</f:label>
     </f:submit>
  </p>
</body></html>
Choice of prefixes
- You can make nothing the default, and prefix all elements
- You can choose any prefix;
h: or x: or
html: or form:, or ...
Making XForms documents interoperable
- Unfortunately, Microsoft Internet Explorer does not allow you to choose
default language
- HTML must be default
- Some magic words are needed, but your documents will also run on true
XML systems (This is for FormsPlayer; other IE plugins may not require
this)
<html xmlns="http://www.w3.org/1999/xhtml"
      xmlns:f="http://www.w3.org/2002/xforms">
<head>
   <object width="0" height="0" id="FormsPlayer"
     classid="CLSID:4D0ABA11-C5F0-4478-991A-375C4B648F58">
     <strong>FormsPlayer failed to load</strong>
   </object>
   <?import namespace="f"
            implementation="#FormsPlayer"?>
XForms equivalents for simple HTML Forms features
Now to compare one for one HTML forms controls with XForms equivalents
Simple Text Input
To input a single text element
First name: <input type="text" name="fname">
is written
<input ref="fname"><label>First name:</label>
</input>
There is no need to indicate that it is text: in the absence of any other
information, by default it is text (called string in XForms).

We will see later how to give any control an initial value.
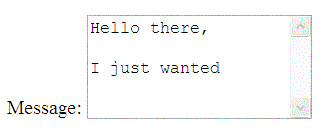
Textarea
To input multiline text
Message:
   <textarea name="message" rows="20" cols="80">
   </textarea>
is written
<textarea ref="message"><label>Message:</label>
</textarea>
Styling controls
Styling is done using a style sheet. For instance:
textarea[ref="message"]
    { font-family: sans-serif;
      height: 20em; width: 80em }
or
textarea[ref="message"]
    { font-family: serif;
      height: 2cm; width: 20% }
If you want all your textareas to have the same dimensions, you can use
textarea { font-family: sans-serif;
           height: 20em; width: 80em }
Adding a stylesheet
The easiest way to include a style sheet in your document is to add this
at the beginning of the document:
<?xml version="1.0"?>
<?xml-stylesheet href="style.css"
                 type="text/css"?>
where 'style.css' is the name of your stylesheet, although in XHTML you
can also say in the <head>:
<link rel="stylesheet" type="text/css"
    href="style.css"/>
(In IE you must do this)
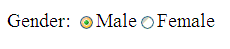
Radio buttons select one value from a set:
Gender:
<input type="radio" name="sex" value="M"> Male
<input type="radio" name="sex" value="F"> Female
becomes
<select1 ref="sex">
   <label>Gender:</label>
   <item>
      <label>Male</label><value>M</value>
   </item>
   <item>
      <label>Female</label><value>F</value>
   </item>
</select1>
Presentation of controls
- Controls principally represent their purpose
select and select1 may be presented as radio
buttons, a (scrollable) select area, or a menu.- Use the hint
appearance="full" to suggest presentation as
radio buttons.
- Use
appearance="compact" to suggest a select area
- Use
appearance="minimal" to suggest a menu
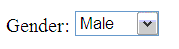
We will see later how to preselect a value.
Checkboxes
HTML Checkboxes select zero or more from a list.
Flavors:
<input type="checkbox" name="flavors" value="v"> Vanilla
<input type="checkbox" name="flavors" value="s"> Strawberry
<input type="checkbox" name="flavors" value="c"> Chocolate
is written
... checkboxes
<select ref="flavors" appearance="full">
   <label>Flavors:</label>
   <item>
      <label>Vanilla</label><value>v</value>
   </item>
   <item>
      <label>Strawberry</label><value>s</value>
   </item>
   <item>
      <label>Chocolate</label><value>c</value>
   </item>
</select>

Depending on the presence of the multiple attribute in HTML,
menus select one, or zero or more from a list of options. You either use
<select1> to select a single choice, or
<select> to select zero or more.
Month:
<select multiple name="spring">
      <option value="Mar">March</option>
      <option value="Apr">April</option>
      <option>May</option>
</select>
would be written:
... menus
<select ref="spring" appearance="compact">
   <label>Month:</label>
   <item>
      <label>March</label><value>Mar</value>
   </item>
   <item>
      <label>April</label><value>Apr</value>
   </item>
   <item>
      <label>May</label><value>May</value>
   </item>
</select>
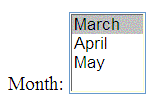
If multiple isn't on the HTML select, use
select1 instead.
Open and closed selections
You can add selection="open" on select and
select1 to allow for open ended selections:
<select1 ref="color" selection="open">
   <item><label>Red</label><value>red</value>
   ...
File Select
To select a file to be uploaded
<form method="post"
      enctype="multipart/form-data" ...>
 ...
File: <input type="file" name="attachment">
is written
<submission method="form-data-post" .../>
...
<upload ref="attachment">
   <label>File:</label>
</upload>
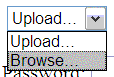
Passwords
Password: <input type="password" name="pw">
is written
<secret ref="pw">
   <label>Password:</label>
</secret>

Reset
- Hardly anyone actually uses reset buttons, yet very many Web forms
include them.
- Often the reset button with the text "Reset" is larger than the
submission button that is often marked "OK" (and there's no undo)
- While it is possible to create a reset button in XForms, it is
deliberately harder to do:
<input type="reset">
is therefore written
<trigger>
   <label>Clear all fields</label>
   <reset ev:event="DOMActivate"/>
</trigger>
Exercise: Log in
Write a form to login somewhere.
Example
If your form doesn't work, check that:
- the namespace URIs are correct
- elements have the correct prefix
- elements are closed properly
- attributes are properly enclosed in quotes
- the <object> element is correctly declared (if necessary)
Buttons have no predefined behavior, but have a behavior attached to them
which is triggered when a relevant event occurs.
The button element
<input type="button" value="Show"
       onclick="show()">
can be written
<trigger><label>Show</label>
   <h:script ev:event="DOMActivate"
             type="text/javascript">show()
   </h:script>
</trigger>
or
... buttons
<trigger ev:event="DOMActivate"
         ev:handler="#show">
    <label>Show</label>
</trigger>
where "#show" locates the element (for instance a
script element) that implements the behavior:
<script id="show" ...>...
XForms has a number of built in actions that can be executed by a button;
see the reset button above for an example.
... buttons
The fact that the event attribute has a prefix, means that
you have to add the following XML Namespace to the head:
xmlns:ev="http://www.w3.org/2001/xml-events"
We will be dealing more with events later.
<input type="image" src="..." ...>
is written by putting an image into the <label> element:
<trigger...>
   <label><h:img src="star.gif" .../></label>
</trigger>
or by specifying it in a stylesheet
<trigger id="activate" ...>
with a stylesheet rule
trigger#activate {
    background-image: url(button.png);
    background-repeat: none}
 (Likewise for
<submit>.)
Optgroup
Drink:
<select name="drink">
   <option selected value="none">None</option>
   <optgroup label="Soft drinks">
      <option value="h2o">Water</option>
      <option value="m">Milk</option>
      <option value="oj">Juice</option>
   </optgroup>
   <optgroup label="Wine and beer">
      <option value="rw">Red Wine</option>
      <option value="ww">White Wine</option>
      <option value="b">Beer</option>
   </optgroup>
</select>
is written
... optgroup
<select1 ref="drink">
   <label>Drink:</label>
   <item><label>None</label><value>none</value></item>
   <choices>
      <label>Soft drinks</label>
      <item><label>Water</label><value>h2o</value></item>
      <item><label>Milk</label><value>m</value></item>
      <item><label>Juice</label><value>oj</value></item>
   </choices>
   <choices>
      <label>Wine and beer</label>
      <item><label>Red wine</label><value>rw</value></item>
      <item><label>White wine</label><value>ww</value></item>
      <item><label>Beer</label><value>b</value></item>
   </choices>
</select1>
Grouping Controls
<fieldset>
   <legend>Personal Information</legend>
   Last Name: <input name="lastname" type="text">
   First Name: <input name="firstname" type="text">
   Address: <input name="address" type="text">
</fieldset>
is written
<group>
   <label>Personal Information</label>
   <input ref="lastname"><label>Last name:</label></input>
   <input ref="firstname"><label>First name:</label></input>
   <input ref="address"><label>Address:</label></input>
</group>
Note the consistent use of <label>.
Hidden Controls
As you will see shortly, there is no need for hidden controls in
XForms.
Output Controls
XForms has two controls that are not in HTML, output and
range.
The output control allows you to include values as text in
the document.
Your current total is: <output ref="sum"/>
or
<output ref="sum"><label>Total</label></output>
This can be used to allow the user to preview values being submitted.
... output
You can also calculate values:
Total volume:
  <output value="height * width * depth"/>
(where height, width and depth are
values collected by other controls.)
And date and time:
The date and time now is <output value="now()" />
Range Controls
This control allows you to specify a constraint on a value.
<range ref="volume"
       start="1" end="10" step="0.5"/>
A user agent may represent this as a slider or similar.
Submitted Values
- The attribute named
ref on each control actually refers to
a child of an instance element in the model, where the
values are gathered before submission.
- If there is no instance element there (as in the search example above),
then one is silently created.
Making the Submitted Values
Explicit
It is good practice to include an explicit instance, like this for the
search example:
<model>
    <instance>
        <data xmlns=""><q/></data>
    </instance>
    <submission
        action="http://example.com/search"
        method="get" id="s"/>
</model>
...
<input ref="q">
   <label>Search</label>
</input>
... explicit values
- You immediately see that the only data value submitted is called
"q".
- The system will now also check that when you say
ref="q"
that there really is a q in the instance.
- It is essential that you put the
xmlns="" on your instance
data, to tell the processor that the elements here are neither XHTML nor
XForms elements.
- We've used the tag
<data> here, but you can choose
any tag you like.
Initial Values
For initialising controls including initialising checked boxes, and
selected menu items etc., you just supply an instance with pre-filled values.
For the search example:
<instance>
    <data xmlns=""><q>Keywords</q></data>
</instance>
would pre-fill the text control with the word Keywords.
... initial values for checkboxes
<select ref="flavors">
   <label>Flavors:</label>
   <item>
      <label>Vanilla</label><value>v</value>
   </item>
   <item>
      <label>Strawberry</label><value>s</value>
   </item>
   <item>
      <label>Chocolate</label><value>c</value>
   </item>
</select>
You can preselect vanilla and strawberry like this:
<instance>
   <data xmlns=""><flavors>v s</flavors></data>
</instance>
... initial values for menus
Similarly for the menus example, which looked like this:
<select ref="spring">
  <label>Month:</label>
  <item><label>March</label><value>Mar</value></item>
  <item><label>April</label><value>Apr</value></item>
  <item><label>May</label><value>May</value></item>
</select>
You can preselect March and April like this:
<instance>
  <data xmlns=""><spring>Mar Apr</spring></data>
</instance>
... initial values for choices
And for the optgroup example:
<select1 ref="drink">
   <label>Drink:</label>
   <item><label>None</label><value>none</value></item>
   <choices>
      <label>Soft drinks</label>
      <item><label>Water</label><value>h2o</value></item>
      <item><label>Milk</label><value>m</value></item>
      <item><label>Juice</label><value>oj</value></item>
   </choices>
   <choices>
      <label>Wine and beer</label>
      <item><label>Red wine</label><value>rw</value></item>
      <item><label>White wine</label><value>ww</value></item>
      <item><label>Beer</label><value>b</value></item>
   </choices>
</select1>
... choices
Preselect the value none like this:
<instance>
    <data xmlns=""><drink>none</drink></data>
</instance>
Hidden Values
- Any values in the instance that haven't been bound to by a control are
by definition not visible to the user.
- Therefore there is no need for hidden controls
- To add a hidden value
results to the search form, we
change the instance to:
<instance>
    <data xmlns="">
        <q/>
        <results>10</results>
    </data>
</instance>
Getting Initial Values From
Elsewhere
Exercise: external instance
Write an XForm that displays how many times the page has been loaded.
What does the data look like?
Is there a <submit>?
Example
'Editing' any XML document
- External instances give you immense power
- The
ref attribute can be any XPath expression
- XPath lets you select any element or attribute in an XML document
- You can bring in any XML document as instance, even an XHTML
document
Editing example
Suppose a shop has very unpredictable opening hours (perhaps it depends on
the weather), and they want to have a Web page that people can go to to see
if it is open. Suppose the page in question has a
single paragraph in the body:
<p>The shop is <strong>closed</strong> today.</p>
Well, rather than teaching the shop staff how to write HTML to update
this, we can make a simple form to edit the page
instead:
Editing XHTML page
<model>
   <instance
      src="http://www.example.com/shop.xhtml"/>
   <submission
      action="http://www.example.com/shop.xhtml"
      method="put" id="change"/>
</model
...
<select1 ref="/h:html/h:body/h:p/h:strong">
<label>The shop is now:</label>
<item><label>Open</label><value>open</value></item>
<item><label>Closed</label><value>closed</value></item>
</select1>
<submit submission="change"><label>OK</label></submit>
- The page must be correct XHTML (not HTML)
- The server must accept the "put" method
XPath
XPath selectors look like filename selectors
- Relative: "q", "person/name/first"
- Absolute: "/data/q"
- Attributes of elements with "@": "h:img/@alt"
- Selection is relative to the context
- At the top level the context is the instance itself, but some bindings
set a new context
- Current: .
- Parent: ..
- Any descendent: "h:body//h:p"
- There are other selectors, but you seldom need them
Exercise: Editing XHTML
Imagine that you travel a lot. Design a page that says where you are, and
until when.
Write an XForm that lets you edit it easily.
Example page
Example form
Submitting
We shall now look at details of submission, like multiple submissions,
submission methods, and what happens after submission.
Multiple Submissions
- HTML only allows you to submit the data to one server, in a single
way.
- XForms allows you to submit the data to different servers, or in
different ways.
- For instance, the search example could allow the user to submit the
search string to different search engines:
<model>
   <instance><data xmlns=""><q/></data></instance>
   <submission id="com"
       action="http://example.com/search"
       method="get"/>
   <submission id="org"
       action="http://example.org/search"
       method="get"/>
</model>
Submission Methods
- Just as with HTML there are a number of ways to submit the data.
- In HTML how to submit is expressed in two attributes,
method and enctype
- In XForms it is expressed in
method only
HTML and XForms Equivalent Submission Methods
| HTML |
XForms |
| method="get" |
method="get" |
method="post"
enctype="application/x-www-form-urlencoded" |
method="urlencoded-post" |
method="post"
enctype="multipart/form-data" |
method="form-data-post" |
Life after Submit
- The default when values have been submitted is for the result returned
by the server to replace the whole document, just as with HTML.
- There are other options, specified with the attribute
replace on the submission element.
replace="instance" replaces only the instancereplace="none" leaves the form document as-is without
replacing it.
... example of different submissions
- For instance, for an address-change form for a bank, you can provide
two buttons, one to prefill the form with name and address based on the
account number, and one to submit the changed results
- The 'find' button replaces the instance with a new instance containing
the details of the person with the account number, which you can then
change;
- the 'submit' button will then send the changed instance back, leaving
the form as-is in the browser to allow further changes or to input a new
account number to prefill.
... example
<model>
    <instance><data xmlns="">
        <accountnumber/><name/><address/>
    </data></instance>
    <submission method="get"
        action="http://example.com/prefill"
        id="prefill" replace="instance"/>
    <submission method="put"
        action="http://example.com/change"
        id="change" replace="none"/>
</model>
...
<input ref="accountnumber"><label>Account Number</label></input>
<submit submission="prefill"><label>Find</label></submit>
<input ref="name"><label>Name</label></input>
<textarea ref="address"><label>Address</label></textarea>
<submit submission="change"><label>Submit</label></submit>
Controlling Controls
- In HTML you can specify that controls are disabled, or
read-only but the only way you can change the property is with
scripting.
- XForms offers easy ways to control these properties, but has other
properties you can specify as well
Properties
The 'model binding' properties that you can control are:
- that a value is only relevant in certain circumstances
(for instance name of spouse only if married)
- that a value is readonly in certain circumstances
- that a value is required (that a value must be
supplied before the form can be submitted)
- that a value has a constraint (for instance that the
year of birth is earlier than the year of death)
- that the value must conform to a type (for instance
that it must be an integer), or
- that it is calculated from other values (for instance
that the total is the sum of some other values).
... properties
Note that in XForms it is the collected value that has the
property, not the control, but the property shows up on all controls bound to
the value.
These properties use a <bind> element that goes in the
<model>. To use bind, you must have an
explicit <instance> element.
Disabled Controls = relevant
To disable controls you use the relevant property. For
instance, to say that the credit card number only needs to be filled in if
the person is paying by credit, you can write:
<model>
   <instance><data xmlns="">
      <amount/><method/><cc/><expires/>
   </data></instance>
   <bind nodeset="cc"
         relevant="../method='credit'"/>
   <bind nodeset="expires"
         relevant="../method='credit'"/>
</model>
... relevant
- This states that the fields
cc and expires
are only relevant when method has the value
credit, and will therefore be disabled for other values of
method.
- You have to say "
../method" rather than just
method, because in a bind you are talking about
the thing referred to in the nodeset (which might be a
structured element itself).
- This is an XPath change of context we talked about earlier. It is as if
you have done a 'change directory' to that element.
- If you said just "
method", it would refer to a child
element of cc or expires.
- You can also use absolute addressing, like
/data/method,
which would have the same effect as ../method in this
case.
... relevant
- A browser is free to decide how disabled controls are presented (and it
may also allow you to specify in a stylesheet how they should look), but
typically they will be grayed out in the normal way.
... writing the controls
The controls could be written like this (but note that there is no
indication that they may get disabled: that is inherited from the value they
refer to):
<select1 ref="method">
   <label>Method of payment:</label>
   <item>
      <label>Cash</label>
      <value>cash</value>
   </item>
   <item>
      <label>Credit card</label>
      <value>credit</value>
   </item>
</select1>
<input ref="cc"><label>Card number:</label></input>
<input ref="expires"><label>Expiry date:</label></input>
... using structured instance values
If we used a structured instance, we could simplify this:
<model>
   <instance><data xmlns="">
      <amount/><method/>
      <cc>
        <number/><expires/>
      </cc>
   </data></instance>
   <bind nodeset="cc"
      relevant="../method='credit'"/>
</model>
and the controls then reference the children of 'cc':
<input ref="cc/number"><label>Card number:</label></input>
<input ref="cc/expires"><label>Expiry date:</label></input>
... using grouping on the controls
Instead of:
<input ref="cc/number"><label>Card number:</label></input>
<input ref="cc/expires"><label>Expiry date:</label></input>
grouping can be used to reset the context of the refs:
<group ref="cc">
   <input ref="number"><label>Card number:</label></input>
   <input ref="expires"><label>Expiry date:</label></input>
</group>
... works on buttons too
Although putting a ref on a trigger has no effect on the instance value
being referred to, the relevance of the value can be used to affect the
trigger:
<trigger ref="nextok">
   <label>Next</label>
   ...
</trigger>
Readonly Controls
Similarly to relevant, you can specify a condition under
which a value is read-only. For instance:
<model>
   <instance><data xmlns="">
      <variant>basic</variant>
      <color>black</color>
   </data></instance>
   <bind nodeset="color"
         readonly="../variant='basic'"/>
</model>
This example says that the default value of color is
black, and can't be changed if variant has the
value basic.
Required Controls
A useful new feature in XForms is the ability to state that a value must
be supplied before the form is submitted.
The simplest case is just to say that a value is always required. For
instance, with the search example:
<model>
   <instance><data xmlns=""><q/></data></instance>
   <bind nodeset="q" required="true()"/>
   <submission .../>
</model>
... required
but like the readonly and relevant attributes,
you can use any XPath expression to make a value conditionally required:
<bind nodeset="state"
      required="../country='USA'"/>
which says that the value for state is required when the
value for country is "USA".
It is up to the browser to decide how to tell you that a value is
required, but it may also allow you to define it in a stylesheet.
Constraint Property
This property allows you to add extra constraints to a value. For
instance:
<bind nodeset="year" constraint=". > 1970"/>
constrains the year to be after 1970.
Note the XPath use of "." to mean "this value".
">" has to be written as > because of XML rules, but you should
be used to that already.
Calculate Property
It is possible to indicate that a value in the instance is calculated from
other values. For instance:
<bind nodeset="volume"
   calculate="../height * ../width * ../depth"/>
When a value is calculated like this, it automatically becomes
readonly.
... calculate functions
There are a number of functions available, including:
... types
There are a number of useful built-in types you can use, including:
- xsd:string, xsd:normalizedString (a string with whitespace characters
replaced by the space character).
- xsd:integer, xsd:nonPositiveInteger, xsd:negativeInteger,
xsd:nonNegativeInteger, xsd:positiveInteger
- xsd:boolean
- xsd:decimal, xsd:double
- xsd:date, xsd:time, xsd:dateTime
- xsd:anyURI (A URI)
- xforms:listItems (A space-separated list of strings for use with
select)
- xforms:listItem (A string without any spaces)
... types
You can apply Schemas to instances:
<model schema="types.xsd">
...
</model>
or include them inline:
<model>
   ...
   <xsd:schema>
      ...
   </xsd:schema>
   ...
</model>
(We won't discuss schemas further here today)
Combining Properties
If you have several binds referring to the same value, you can combine
them:
<bind nodeset="q" type="xsd:integer"
                 required="true()"/>
Exercise: Calculate
Write a form that calculates Celsius from Fahrenheit (C=(F-32)*5/9)
Example
- For more than one form in a document, you can use one model per form,
but then you need to identify which form each control refers to
- You do this with an
id attribute on each model, and a
model attribute on each control:
... more than one form
<model id="search">
   <instance><data xmlns=""><q/></data></instance>
   <submission id="s" .../>
</model>
<model id="login">
   <instance><data xmlns=""><user/><passwd/></data></instance>
   <submission id="l" .../>
</model>
...
<input model="search" ref="q"><label>Find</label></input>
<submit submission="s"><label>Go</label></submit>
...
<input model="login" ref="user"><label>User name</label></input>
<secret model="login" ref="passwd"><label>Password</label></input>
<submit submission="l"><label>Log in</label></submit>
More than one instance in a model
- You can have more than one instance in a model.
- You identify which one you want with an id attribute and the use of the
instance() function.
- If you don't identify which, then the first instance in the model is
used
... more than one instance
<model>
   <instance id="currencies">
      <currencies>
         <currency name="USD">125</currency>
         ...
   </instance>
   <instance id="costs">
      <item>
         <date/><amount/><currency/>
         ...
      </item>
   </instance>
</model>
...
<input ref="instance('costs')/date">
   <label>Date</date>
</input>
... more than one instance
<model>
<instance>
<employee xmlns="">
<name/><number/>
<salary/><taxrate/>
...
</employee>
</instance>
<instance id="tax" src="/finance/taxes"/>
<bind nodeset="taxrate"
calculate="if(../salary >
instance('tax')/limit,
50, 33)"/>
Using more than one instance
Useful for filling itemsets in select and select1:
<select ref="value">
   <label>...</label>
   <itemset nodeset="instance(x)">
    <label ref="names"/>
    <value ref="values"/>
  </itemset>
or creating dynamic labels (think multilingual):
<label ref="instance(labels)/label[msg='age']"/>
<label> can also take src="..."
Getting UI values from an instance
Suppose you want to offer a choice of languages in a
select1:
<select1 ref="lang">
    <label>Language:</label>
    <item><label>English</label><value>en</value></item>
    <item><label>Français</label><value>fr</value></item>
    <item><label>Deutsch</label><value>de</value></item>
</select1>
But later discover you want to add another language to this form and
several others that offer the same choice. Better then to put the choices in
a single file, and then load that into an instance, and refer to that
instead:
... UI values from an instance
<instance id="langs" src="languages.xml"/>
where languages.xml contains something like this:
<languages>
    <language><name>English</name><code>en</code></language>
    <language><name>Français</name><code>fr</code></language>
    <language><name>Deutsch</name><code>de</code></language>
</languages>
Then you can rewrite the select1 to use this instance:
<select1 ref="lang">
    <label>Language:</label>
    <itemset nodeset="instance('langs')/language">
        <label ref="name"/>
        <value ref="code"/>
    </itemset>
</select1>
Then anytime you want to add an new language, you only have to edit the
languages.xml file (with an XForm of course!) and all forms
using it will be updated with the new value.
Bind instead of Ref
- If there is a
bind in the model, you can refer to that
from the control instead of directly to the instance value.
- This allows you to change the details of how the instance is structured
without having to change the controls.
- It also means you don't have to specify which model is involved:
<model>
   <instance><data xmlns=""><q/></data></instance>
   <submission id="s" .../>
   <bind id="query" nodeset="q" required="true()"/>
</model>
...
<input bind="query"><label>Find</label></input>
- Note that the
bind attribute is a reference to an
id on a bind element; it is not an XPath
expression.
<select> with values containing spaces
Since the ref of a standard <select> references a string, and each
value selected is separated from the next with a space, no value may contain
a space.
However, a <select> may refer to other data structures than a
string. For instance:
<visited><city>New York</city><city>New Orleans</city></visited>
You do this in the following way:
<select ref="visited">
  <item>
    <label>New York</label>
    <copy ref="city">New York</copy>
  </item>
  <item>
    <label>Los Angeles</label>
    <copy ref="city">Los Angeles</copy>
  </item>
  <item>
    <label>New Orleans</label>
    <copy ref="city">New Orleans</copy>
  </item>
  ...
</select>
Exercise: UI values from an instance
Events
- XForms uses a specification called XML Events to deal with eventing
- The important thing to know about XML Events is that it uses the same
event mechanism as HTML, only written differently.
- In HTML:
<input type="submit"
   onclick="verify(); return true;">
says that if the <input> element (or any of its
children) gets the click event, then the piece of code in
the onclick attribute is performed.
Problems with HTML Events
- The event name is hard-wired into the language, rather than being a
parameter (so that to be able to deal with a new sort of event you have
to add a new attribute)
- You can only use one scripting language (since you can't have two
attributes called onclick, one for JavaScript and one for VB)
- The Event names are hardware dependent (e.g. click)
- You are forced to intertwine document and scripting
XML Events
XML Events specifies the relationship between the event, observer and
handler in a different way: (HTML example)
<input type="button">
   <script ev:event="DOMActivate"
           type="text/javascript">
      DoSomething();
   </script>
</input>
- The
<script> element is a handler
for the event DOMActivate and in the
absence of any other information, the parent element is the
observer (<input> in this case).
- Note that <script> elements have to be performed differently from
vanilla HTML.
- The ev namespace is xmlns:ev="http://www.w3.org/2001/xml-events"
... an advantage
This approach allows you to specify handlers for different scripting
languages: (HTML example)
<input type="button">
   <script ev:event="DOMActivate"
           type="text/javascript">
      ...
   </script>
   <script ev:event="DOMActivate"
           type="text/vbs">
      ...
   </script>
</input>
... another advantage
This approach allows you to specify handlers for different events:
(HTML example)
<input type="button">
   <script ev:event="event1"
           type="text/javascript">
      ...
   </script>
   <script ev:event="event2"
           type="text/javascript">
      ...
   </script>
</input>
... other actions
- setfocus: set focus on a control
<setfocus control="inputdate"/>
- action: for grouping
<action>
   <setvalue .../>
   <setvalue .../>
</action>
- load: load a resource
<load resource="doc.html" show="new"/>
or
<load ref="homeurl" show="replace"/>
Help, hint and alert
All forms controls have, as well as a <label> element, also
<help>, <hint> and <alert>.
Events
There are very many events you can catch in XForms, including
initialisation events, error notifications, values changing, validity
changing, and submission done.
<submission id="save"
    action="file:results.xml"
    method="put"
    replace="none">
      <message ev:event="xforms-submit-done">
         Saved!
      </message>
</submission>
...
<submit submission="save">
   <label>Save</label>
</submit>
Other ways to specify the event-observer-handler relationship
One way is to move the handler to some other part of the document, and
specify the relationship there (like some variants of HTML use the
for attribute on the <script> element):
 <action ev:observer="#button"
          ev:event="DOMActivate">
     ...
 </action>
...
<trigger id="button"/>
... another way
Another way is to move the handler somewhere, and specify the relationship
in another place with the <listener> element:
<ev:listener observer="button"
             handler="dosomething"
             event="DOMActivate"/>
...
<action id="dosomething">...</action>
...
<trigger id="button"/>
- This allows you to use the same handler for more than one observer
- Note that the ev: prefix goes on the element in this case, not the
attributes.
... another way
And finally, you can specify the relationship on the observer itself:
<action id="dosomething">
      ...
</action>
...
<trigger ev:handler="dosomething"
         ev:event="DOMActivate"/>
Exercise: Events
When the Form has been loaded, an xforms-ready event is sent
to the <model> element.
Write a handler that sets the focus to a particular control.
You will need the action <setfocus
control="...id..."/>
Example
Wizards: toggle and switch
These are used to reveal and hide parts of the interface.
<switch>
   <case id="start">
      <group>
         <label>About you</label>
         <input ref="name"><label>Name:</label></input>
         <input ref="city"><label>City:</label></input>
         <input ref="email"><label>Email:</label></input>
      </group>
      <trigger>
         <label>Next</label>
         <toggle ev:event="DOMActivate" case="preferences"/>
      </trigger>
   </case>
   <case id="preferences">
   ...
... toggle and switch
   ...
   <case id="preferences">
      <group>
         <label>Your preferences</label>
         <input ref="food"><label>Favorite food:</label></input>
         ...
      </group>
      <trigger>
         <label>Next</label>
         <toggle ev:event="DOMActivate" case="history"/>
      </trigger>
   </case>
   <case id="history">
      ...
   </case>
   ...
</switch>
... Adding a back button
   <case id="start">
      ...
   </case>
   <case id="preferences">
      <group>
         <label>Your preferences</label>
         <input ref="food"><label>Favorite food:</label></input>
         <input ref="drink"><label>Favorite drink:</label></input>
         <input ref="music"><label>Preferred music style:</label></input>
      </group>
      <trigger>
         <label>Back</label>
         <toggle ev:event="DOMActivate" case="start"/>
      </trigger>
      <trigger>
         <label>Next</label>
         <toggle ev:event="DOMActivate" case="history"/>
      </trigger>
   </case>
   <case id="history">
      ...
Switch for simple/advanced views
<switch>
   <case id="simple">
      <input ref="to"><label>To: </label></input>
      <input ref="subject"><label>Subject: </label></input>
      <trigger>
         <label>More</label>
         <toggle ev:event="DOMActivate" case="advanced"/>
      </trigger>
   </case>
   <case id="advanced">
      <input ref="to"><label>To: </label></input>
      <input ref="subject"><label>Subject: </label></input>
      <input ref="cc"><label>Cc: </label></input>
      <input ref="bcc"><label>Bcc: </label></input>
      <trigger>
         <label>Less</label>
         <toggle ev:event="DOMActivate" case="simple"/>
      </trigger>
   </case>
Switch for editing
<switch>
   <case id="show">
      <output ref="name"><label>Name:</label></output>
      <output ref="city"><label>City:</label></output>
      <output ref="email"><label>Email:</label></output>
      <trigger>
         <label>Edit</label>
         <toggle ev:event="DOMActivate" case="edit"/>
      </trigger>
   </case>
   <case id="edit">
      <input ref="name"><label>Name:</label></input>
      <input ref="city"><label>City:</label></input>
      <input ref="email"><label>Email:</label></input>
      <trigger>
         <label>Done</label>
         <toggle ev:event="DOMActivate" case="show"/>
      </trigger>
   </case>
</switch>
Exercise: Switch and Toggle
Take the earlier bank example (in the section "Life
after submit") and split the two parts of the interaction up using a
switch.
Hint: you might need <action>, <send>, <setvalue>
Example
Repeat
Repeat allows you to bind to repeating items in an instance
<shoppinglist>
   <buy><item>eggs</item><amount>6</amount></buy>
   <buy><item>milk</item><amount>2 litres</amount</buy>
   ...
</shoppinglist>
<repeat nodeset="buy" id="shoprepeat">
   <input ref="item"><label>Buy</label></input>
   <input ref="amount"><label>Amount</label></input>
</repeat>
Note that a repeat sets the XPath context.
Adding items
There is an action called insertthat adds items to a
collection:
 <trigger>
   <label>New</label>
   <insert ev:event="DOMActivate" nodeset="buy"
           position="before" at="1" />
</trigger>
This adds a new item at the start; you can add a new element at the end
with
<insert ... nodeset="buy" position="after" at="count(buy)"/>
or add a new item after the current position with
<insert ... position="after" at="index(shoprepeat)"/>
Deleting items
To delete an item, you use the delete action:
<trigger>
   <label>Delete</label>
   <delete ev:event="DOMActivate" nodeset="buy"
           at="index(shoprepeat)" />
</trigger>
The best place to include this is in the repeat, so you get one delete
button per item, but you could put it next to the 'new' button, when it would
delete the 'current' item.
Implementations
- At release XForms had more implementations announced than any other W3C
spec had ever had at that stage
- Different types of implementation:
- plugin
- native
- 'zero install'
- proxy
- editors
- office suites
- Many big players doing implementations, e.g.
"The age of the fat client is past" -- an implementor
Users
As you would expect with a new technology, first adopters are within
companies and vertical industries that have control over the software
environment used.
Major companies and industries that are already using XForms include
Bristol-Myers-Squibb, Hewlett-Packard, Remia - a major Dutch food
manufacturer, Frauenhofer (known for MP3), Daiwa - a Japanese Bank, the
entire British Life Insurance industry, the US Navy, German Shipbuilding ...
and several more that are on the point of being announced.
As more industries adopt XForms, the expectation is that it will then
spread out into horizontal use.
The Future
Experience with XForms 1.0 has revealed a number of things:
- Some ambiguities
- Some missing functionality
- Some 'low hanging fruit': additional features implemented on several
implementations, but in different ways
A future iteration of XForms will address these issues.
More Information
The origin: www.w3.org/Markup/Forms, and if your company is a member:
www.w3.org/Markup/Forms/Group
XForms: http://www.w3.org/TR/xforms/
XPath: http://www.w3.org/TR/xpath
XPath quick reference:
http://www.mulberrytech.com/quickref/XSLTquickref.pdf
XML Events: http://www.w3.org/TR/xml-events/
validator: www.xformsinstitute.com
Exercise: To Do list
Design a To Do list manager
What will the data-structure look like?
What actions will you need?
E.g.
- New task
- Delete task
- Change state of task
Example form
Data structure
Exercise: RSS
RSS contains sequences of items like this:
<item rdf:about="http://www.w3.org/News/2004#item163">
  <title>W3C Standards Tour</title>
  <description>The W3C Spanish Office brings its first W3C Standards Tour to ten universities in Spain from 3 to 26 November.
  </description>
  <link>http://www.w3.org/News/2004#item163</link>
  <dc:date>2004-10-27</dc:date>
</item>
write a form to edit such a document. (The root element is
<rdf:RDF>)